
Painting is all about taking an idea and communicating that idea to other people using paint and brush. Most people only talk about the physical process of how to apply paint to the canvas. But it is also important to consider what happens before you pick up your brush – the process of taking that initial idea and turning it into something worth painting.
In this post, I walk you through my process and provide commentary on an idea which I am exploring for my next project. I’ll cover:
- It All Starts With a Spark of Inspiration
- Nurturing the Idea
- Exploring the Idea and Possible Variations
- Committing to the Idea
- Want to Learn More?
- Thanks for Reading!
I’ll walk you through the entire process using one of my recent paintings. You’ll see how I go from idea all the way through to reflecting on the finished painting.

It All Starts With a Spark of Inspiration
You never know when inspiration might strike. But rest assured it will strike as long as you keep busy. As Pablo Picasso once said…
“Inspiration exists, but it has to find us working.”
But inspiration is fleeting. You need to make sure you capture those brief moments so you can nurture them into something more.
I keep a record of all the painting ideas I come up with and any reference photos I want to paint. When it is time for my next project I can go through this record to see what inspires me.
I find if you do not record your ideas they quickly fade from memory, no matter how great they seem.
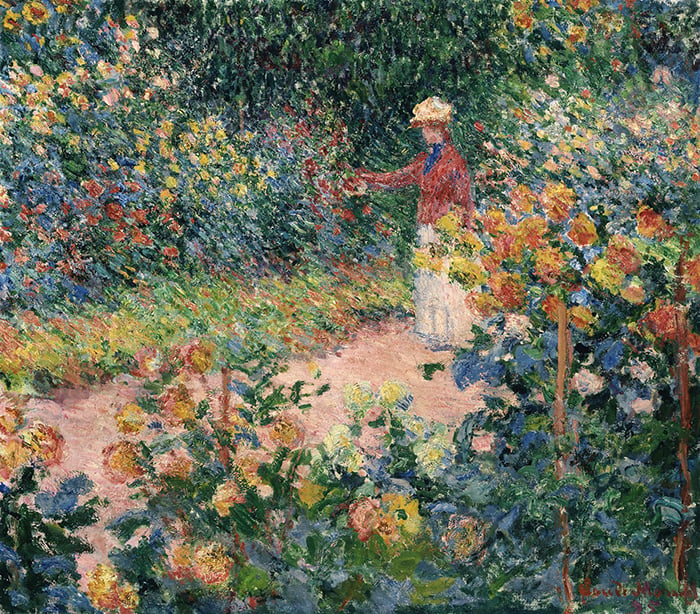
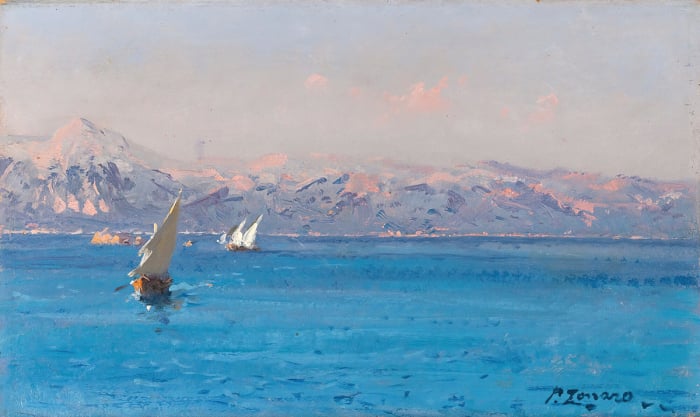
The initial spark of inspiration could be anything – a painting you love, the way light is bouncing off the water, or an interesting composition. For example, I had a spark of inspiration when I first saw the painting by Claude Monet pictured below. I was in awe of that stunning contrast between the dark foreground and the high key background.

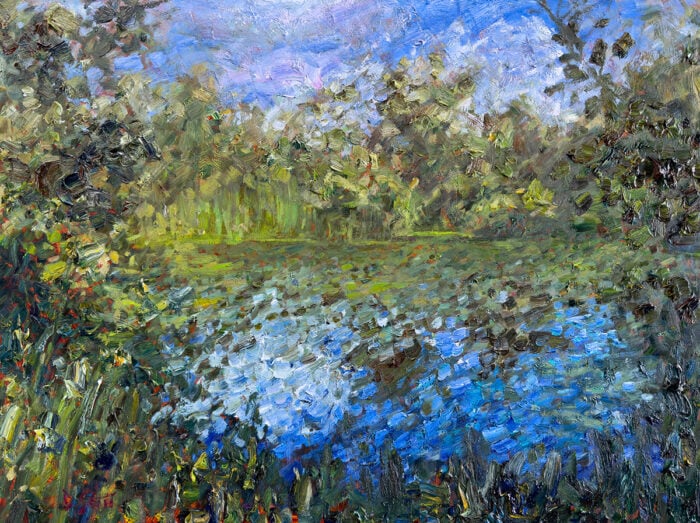
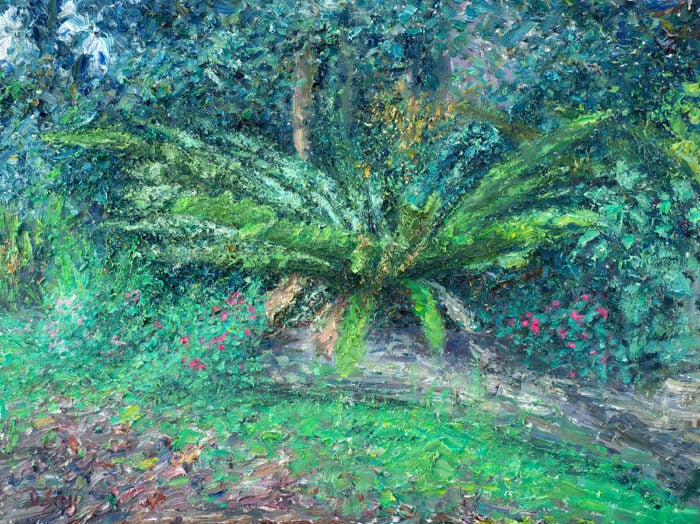
Then I came across the following scene on a trip to Mount Barney in Queensland. It reminded me of Monet’s painting and I made sure to take reference photos to assess later on. I love the way the high key colors are framed by shadowed foreground.
At the time, I was not yet convinced this would turn into a finished painting. But, it looked promising.

Nurturing the Idea
Once you have the idea, unless it is a really good one, I would sit on it for a while. Sometimes an idea may seem great, but it becomes less interesting the more you think about it.
You need to consider how you would go about turning the idea into a finished painting, the problems you may encounter and what the finished painting may look like. This is all about working out if the idea is worth pursuing.
If you cannot see a finished painting at the end of the tunnel, then don’t paint it.
With the photo from Mount Barney, I did not paint it straight away. In fact, I took it over a year ago and it has been on my computer ever since. It was only recently that I looked at the photo and could see myself painting it.
Many people think you must grab your brush and start slinging paint onto the canvas as soon as inspiration strikes. But there is nothing wrong with taking your time.
If you think the idea is worth pursing, then you can take it to the next step – exploring the idea and possible variations.
Exploring the Idea and Possible Variations
By this stage you have a great idea for a new painting and you can see a finished painting at the end of the tunnel. Now is the perfect time to see if you can improve on the idea at all.
There is always a better way to do something. Maybe you could improve on the composition by cutting out some unnecessary areas which are detracting from the focal point? Or maybe you could come up with a better harmony of colors?
Think about if there are any easy wins for improving your idea. You do not need to change the foundation of the idea, just explore variations.
In practice, this could involve doing quick studies to explore and test how the idea translates to the canvas before making a more serious commitment. For example, you could do a few color studies to test different color combinations, or notan studies to test different compositions.
By putting in a bit of work here, you could save yourself the frustration of working on an idea which does not translate as well as you had initially thought.
Below, I will run you through a study I did based on the Mount Barney reference photo and provide some commentary on how I explored and tested my initial idea.
Part 1 – The Sharp Contrast
In the first part of the study I wanted to see if I could replicate the sharp contrast I saw in life. To do this I used a dark mix of viridian green, burnt sienna and ultramarine blue. This was not intended to be the final color. I just wanted a dark value to judge the contrast.
The light grass was a difficult color to mix, especially without the context of all the other areas painted in. I had to trust my instinct and color mixing, as the light yellows and greens shown below appeared lifeless and dull without the other light colors in the background.

Part 2 – High Key Colors In The Mountain And Sky
Here I wanted to experiment with the colors to use for the mountain and sky. I also wanted to get a feel for what shapes and detail to use for the mountain. This is a tricky area to paint – I need to paint with enough detail to give a sense of the mountain’s form, but not so much detail that the mountain seems to come forward in perspective.
I also picked up a problem with the reference photo being that the apex of the mountain aligns with the large tree to the left. In the study, I decided to move the apex of the mountain slightly to fix this composition mishap.

Part 3 – Brushwork For The Clouds
This part was all about using playful brushwork to create the illusion of the clouds in the sky and getting all the high key colors to work together.

Part 3 – Fixing The Color Temperature
Here I needed to fix the color temperature throughout the painting. The foreground was too warm compared to the background.
My assumption is that the direct light from the sun was slightly warm and the ambient light from the blue sky was slightly cool. So I painted with warm lights and cool shadows.
In addition to that, I needed to also paint with a sense of atmospheric perspective. So objects in the distance need to be cooler than the same objects in the foreground.

Part 4 – Highlights In The Foreground
This part is all about testing the kind of brushwork I should use for the highlights hitting the foreground. I want to use thick paint for these highlights to stick within the theme of the rest of the painting – thick paint for highlights and thin paint for darks.

Part 5 – Finishing The Study
Here is the finished study. It is not perfect but it did reveal some important things about my initial idea:
- The background is simple but difficult to paint as it is interwoven with the trees in the foreground.
- The mountain in the reference photo needs to be moved slightly so that the apex does not align with the tree in the foreground.
- It is important to try and keep the integrity of the dark and light areas. In the finished study, I lost some of that integrity as I blended too much.
- I need to use cooler colors for the dark base at the start. In the study I started too warm and I had to adjust this later.
All in all, I think this idea is worth taking to the next step – a larger studio piece.

Note About Studies: I recommend you do not take studies too seriously. You want them to be quick and playful. The main benefit of doing studies is that you can paint without the worry of making mistakes. This benefit gets negated if you take the studies too seriously.
I also recommend that you focus on one or two elements when doing studies. For example, if you are doing a color study, then just focus on color and overlook the other elements. In my study from above, I completely overlooked delicate brushwork and accuracy. I was focused mostly on color and composition to some extent.
Committing to the Idea
By now, you should be ready to fully commit to the idea and turn it into a finished painting. If you followed the previous steps, then there is a good chance your painting will turn out well.
Now you need to focus on executing the idea and translating it to the canvas. I have found that the execution is much easier when you have thoroughly planned the painting and explored the idea.
I have walked you through my process using the Mount Barney reference. I will be committing to that idea and will turn it into a more serious painting. I will let you know how it goes.
Hopefully, this gives you some insight on what goes on before brush hits the canvas. It is worth noting that this is just my process and what works for me, may not work for you. Also, I do not go to these lengths for every painting I create. Sometimes, I prefer to just jump straight into it once inspiration strikes.
Want to Learn More?
You might be interested in my Painting Academy course. I’ll walk you through the time-tested fundamentals of painting. It’s perfect for absolute beginner to intermediate painters.
Thanks for Reading!
I appreciate you taking the time to read this post and I hope you found it helpful. Feel free to share it with friends.
Happy painting!
Dan Scott

Draw Paint Academy
Thanks, Dan, that was truly inspiring. In fact I pulled out a photo I had long wanted to paint but lacked the confidence to attempt. Painting a study was very freeing! I was more willing to just slap some paint down and experiment. In many ways I think the freedom of my study painting is superior to my finished piece but the process as a whole gave me a lot more confidence and I’m very happy with my finished piece.
thanks Dan, great lesson,helpful. i do enjoy your lessons
This was super helpful! I too am guilty of getting an idea or inspiration & thinking I have to dive into it immediately. Also, I’ve been hesitant to change anything. Thank you so much for your valuable suggestions!
Thanks Toni! My pleasure.
You did not mention the preparation of the canvas before the sketch, that of course is a completely different item !
Inspiring! The idea of preliminary studies isn’t new, and thanks to them we have many treasured drawings and prelim paintings from da Vinci, Rembrandt, Michaelangelo, Van Gogh and many more. Thanks for driving home this often overlooked essential point.
Thanks Tom!
Thank you Can for sharing your very helpful ideas.
Thanks Joanne
I enjoyed walking through your process with you. It’s so nice for an amateur like myself to know that professional artists don’t just whip out paintings like magic. Thank you for the very useful tips. I will try to remember to apply them the next time I am inspired by an idea or photo.
Thanks Cheryl. Yes most of the time a lot of work goes on behind the scenes.
Wonderful explanation very helpful I learned many tips which surly help in my painting and not vesting time
Thanks Sati
Dan: a treasure tuition! I grew up in the countryside of a small town in Argentina. I’m keeping photos and so many pictures of the scenery in my memory which are my true inspiration! I want to bring them into my paintings and you’re helping me so much with it. To explore and see possible variations will make me come closer to the ideas I have. Makes me feel positive and enthusiastic! I now understand the idea of fixing a composition mishape! Thank you Dan!
Thanks Ana!
I too take a photo of a scene, picture or painting that I think might give me inspiration later on. In the past I never liked to admit this as I thought serious artist’s would think it was somehow cheating. (I’m very new to painting) I paint in watercolour and my imagination is useless, but with an idea in front of me I can paint. I love collecting idea’s. I’m happy to read other people do the same sort of thing.
Thanks Heidi
That is in no way cheating. It is just a tool to help.
I loved you study under part two. I would’ve stoppe there and called it a day, and would’ve been quite satisfied.
I ie the article, though. Thanks.
Thanks Barb
You are very inspiring, Dan. Thank you for all your tips, help and ideas.
Thanks Carol you are too kind!
.תודה לך על המידע שאתה מחלק איתנו. עצות מועילות. אני לומדת הרבה מהמיילים שלך.
Thanks for the step by step lesson! My time is limited so I tend to just jump in but maybe if I did some studies I’d spend less time correcting on the canvas!
Hi Deb. Yes that is one of the main benefits. 20 minutes planning can save hours of frustration later on.
Excellent practical advice. I especially like the playful, quick approach to the studies which makes the process achievable for beginners.
Thanks Melanie!