
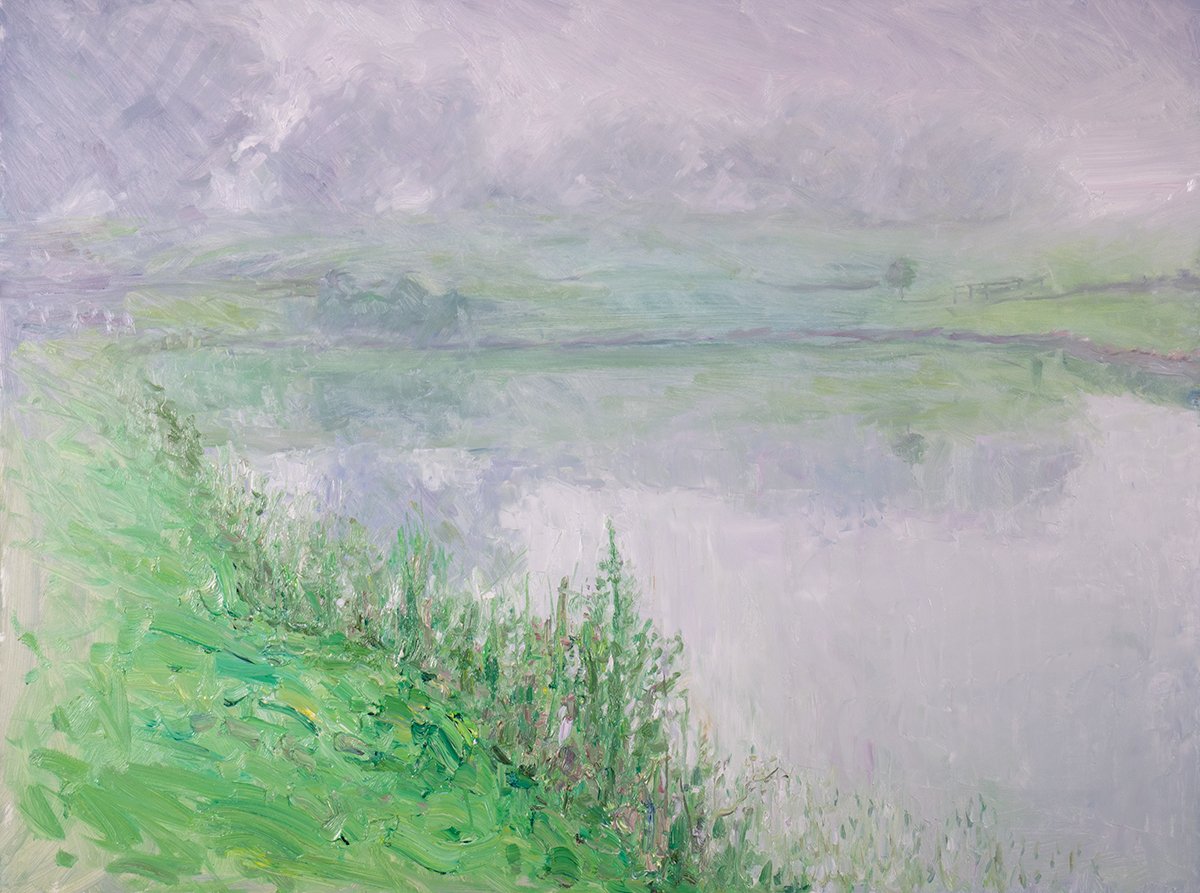
One of the key features of my recent Misty, Green Landscape painting is atmospheric perspective, with the mist gradually enveloping everything in the distance. So I thought this would be a good opportunity to write a detailed guide about how to paint atmospheric perspective and some things you should consider. I’ll cover:
- Recap: What is Atmospheric Perspective and When Does It Apply?
- Levers to Pull
- Practical Tips and Techniques
- Degree of Gradation
- Overlapping Objects in Space
- Exaggerating the Effects
- Key Takeaways
- Thanks for Reading!

I’ll walk you through the entire process using one of my recent paintings. You’ll see how I go from idea all the way through to reflecting on the finished painting.

Recap: What is Atmospheric Perspective and When Does It Apply?
First, let’s recap on the basics.
Atmospheric perspective refers to the way the surrounding atmosphere affects our perception of an object as it recedes into the distance. When mountains in the distance appear to have a blueish tint—that’s atmospheric perspective at play. As is the way the trees get fainter and fainter in my Misty, Green Landscape painting.
From a scientific perspective, it’s caused by how light interacts with the atmosphere. Specifically:
Rayleigh Scattering: Shorter wavelengths of light (blue and violet) scatter more in the atmosphere than longer wavelengths (red and yellow). This makes distant objects take on a bluish tint.
Aerial Haze: Dust, water vapor, and other particles in the air scatter light in all directions.
Reduced Contrast and Value Compression: Because light is scattered and absorbed over distance, the range between light and dark tones flattens.
But we artists don’t need to worry too much about the science behind it all. It helps to understand it, but only to an extent. For most cases, you’ll be fine to follow this rule of thumb:
As objects recede into the distance, they gradually take on the appearance of the surrounding atmosphere.
On a clear, blue-sky day, objects may get closer to a light blue.
On an overcast day, objects may get closer to a cool gray.
During sunrise or sunset, objects may get closer to light orange or yellow.
It’s not perfect, but you’ll find it to be mostly true.
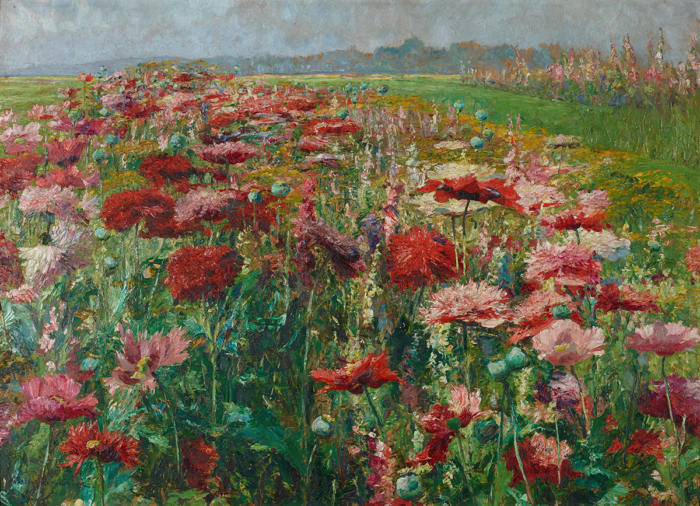
The nature of atmospheric perspective means that it will be more significant when painting subjects with more depth and space. Think vast landscapes with distant mountains and open skies. For subjects with a shallower depth, such as the landscape below, or most still lifes and interior scenes, the effects of atmospheric perspective won’t be as visible or play much of a role in your work.

Levers to Pull
When it comes to painting atmospheric perspective, you have three main levers to pull:
Value: Reduce the value contrast of distant objects. As objects recede into the distance, they will appear flatter and more compressed in terms of value. That is, there won’t be as much contrast between light and dark. However, the value relationships will stay intact (this is important). So in a typical landscape, the foreground will have the most value contrast, then everything will get more and more compressed. My New Zealand, Misty Mountains painting below is a good example.

Color temperature: Make distant objects appear cooler or warmer in temperature (usually cooler due to Rayleigh scattering). In American Mountains and Sierra Nevada, notice how I really pushed the cool blues of the mountains in the background.


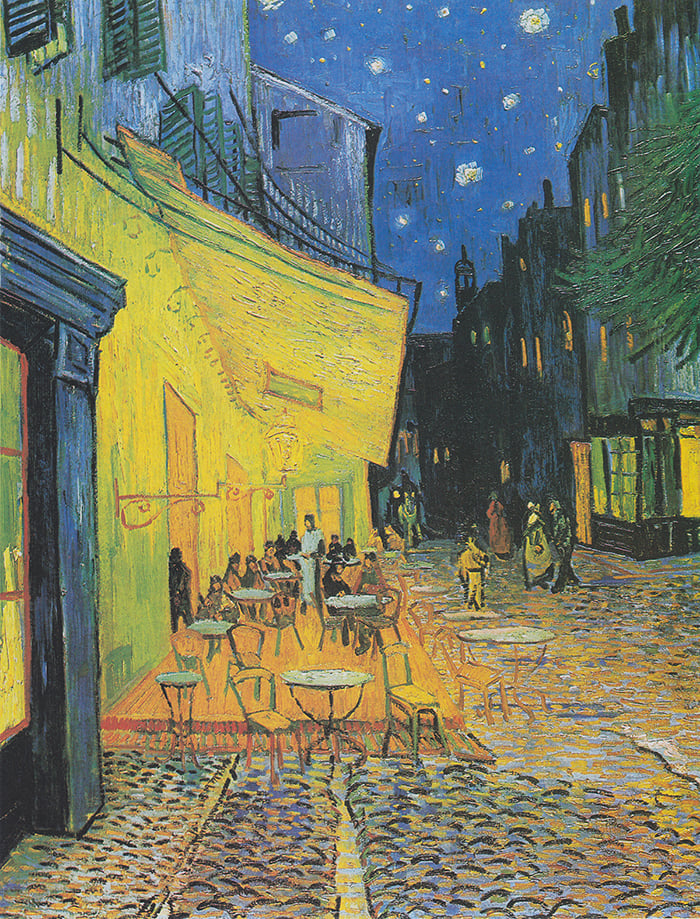
If painting a fiery sunrise or sunset, the colors may get warmer as you approach the sun. See Fraser Island, Sunset below, with the colors going from mostly blue in the foreground, to purples, yellows, and oranges in the distance.

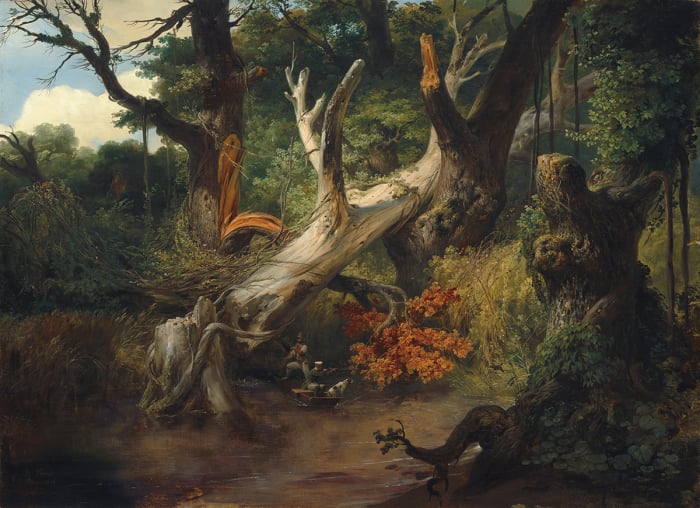
Brushwork: Simplify the detail, soften the edges, and flatten the texture of distant objects. We see distant objects with less clarity and detail, and we can convey this through our brushwork. In Fallen Trees and Striking Contrast, notice how I simplified and flattened my brushwork for the background trees. This pushes them slightly back in perspective.

Practical Tips and Techniques
- Apply a thin, transparent wash of color. This is an efficient way to make a broad change to an area. For example, you could apply a thin wash of light gray to push an area back in perspective.
- Gently scumble color over the top of the dry surface. The outcome tends to be similar to the transparent wash of color in that you can broadly change the appearance of an area (make it appear more or less distant). But the finish is less refined and smooth.
- Use your brush to blend one color into the next, creating a fine gradation. This is ideal for open skies.
- Use broken color or pointillism to create a rough, painterly gradation. I often use this for more dramatic subjects, such as sunrises or sunsets.
- Use larger brushes for distant areas. This will force you to be simpler in your approach.
- Use a clean brush to soften wet brushwork and gently blend the edges of distant areas. You can also use your finger for this. I did frequently with my Misty, Green Landscape painting shown at the top of this post. I would apply color to the surface, then use a clean brush or my finger to soften it all.

Degree of Gradation
The effects of atmospheric perspective will take place gradually over space. There will rarely be a sudden or abrupt change in the atmosphere. So as you paint, you’ll need to vary your colors and brushwork gradually and with a touch of finesse.
The degree or severity of gradation, however, will vary based on the environment and conditions. On a clear, sunny day, you’ll be able to see far into the distance and objects may appear just a touch lighter and cooler. But on an overcast day or in misty or foggy conditions, the gradation will be much more severe and take place over a shorter distance. In some cases, you may only be able to see a few meters in front.

Overlapping Objects in Space
When painting overlapping objects (you almost always will be), you’ll need to convey jumps in space and atmosphere by making a sudden change in your colors and brushwork. For example, in Morning Lookout, notice how it jumps from the foreground to the middle ground to the background. With each jump in space, the effects of atmospheric perspective become much more noticeable (the trees get lighter and warmer). The effects of atmospheric perspective are still occurring gradually over space, but we cannot see all that space due to the overlaps in the land. The bigger the jump in space, the more your colors and brushwork should change.
The sky, however, is mostly open space, apart from a few vague clouds just above the horizon line, hence the smooth color gradation from blue at the top to green to yellow to orange.

Exaggerating the Effects
By exaggerating the effects of atmospheric perspective, you can manipulate the sense of depth, space, and the conditions in your painting. For example, you could make the mountains appear more distant and grand by making them cooler than they appear in life. Or you could make the mist or fog in a landscape feel more enveloping by having more of the subject melt into the background. That’s what I did in Maryvale, Mist.
Or you could go the other way and restrain the effects of atmospheric perspective, giving your painting more clarity and a photographic-like appearance. But I would advise against this as it goes against how we actually see the world around us.
Key Takeaways
Here are some of the key takeaways from this post:
- Atmospheric perspective refers to the effects that the surrounding atmosphere has on our perception of an object as it recedes into the distance.
- A good rule of thumb for artists to follow: As objects recede into the distance, they gradually take on the appearance of the surrounding atmosphere.
- The nature of atmospheric perspective means that it will be more significant when painting subjects with more depth and space. Think vast landscapes with distant mountains and open skies.
- When it comes to painting atmospheric perspective, you have three main levers to pull: value, color temperature, and brushwork.
- The effects of atmospheric perspective will take place gradually as an object recedes into the distance. There will rarely be a sudden or abrupt change in the atmosphere. However, you may need to convey jumps in space and atmosphere due to overlapping objects.
- You can make a landscape appear even more vast and open, or the mist or fog in a landscape appear more enveloping, by exaggerating the effects of atmospheric perspective.

Thanks for Reading!
Hope you found this post helpful. If you want to learn more, you may be interested in Color Masterclass. Enrollment closes in 3 days.
Happy painting!

Dan Scott


Hello Dan,
I so agree with all the above comments. You are the most generous artist on the web for sure, and you always give me inspiration and the desire and joy to continue painting. I took your Color Masterclass and highly recommend it. It’s excellent!
Thank you so very much for sharing your knowledge!
Agnes
P.S. I also totally enjoyed your last plain air painting demos! Great info but also great fun.
If there was a honor bestowed on the most generous artist on the web it would be Dan.
I teach 2 classes of adults and frequently mention Dan’s information.
Thank you , Dan, for your generosity in sharing useful information frequently.
Joanne
Thanks for your kind words Joanne. Appreciate it.
Thanks so very much for taking the time to explain in detail as I struggle with depth perception in my paintings. I’ve had VERY little time to paint this past year but after reading your article I’m looking forward to retouching some previous works and trying to incorporate these tips. Thank you!
Hello Dan – I often read your notes and suggestions – but this one really hit home. I have been stuck in a large painting that I am doing as a gift. It is a mountainous scene of a place that I’ve never been to and have, as a reference, a photo that is much too postcard like for my artisitic tendencies. I was getting caught up in my need tp recreate the scene in a camera like mode. This article I think has provided me with a good direction that I think will satisfy both the receivers’ memory of their special place, as well as a satisfying outlet for my creative goal. Thank you for sharing your guidance.
Dan, this is great information! I added it to my notes from my
Sunrise/Sunsets class of yours. I always enjoy how you use paintings, not only yours but from other artists, as examples to get your ideas across. And then you put in your videos showing us how you do things, so helpful. I encourage all my “art friends” to check out your classes, they are terrific and an amazing value. Cheers!
Thank you!
This was very helpful. I hadn’t thought about the brushwork when creating perspective only lesson in detail.
As always, you explained by example and with clarity. Thank you Dan. Atmosphere in a painting gives it a little mystery and reality at the same time. Good to remember!!
Thank you for this comprehensive look at atmospheric perspective. I especially enjoy learning the scientific basis for the effects. As artists, we could just open our eyes and see what’s happening in the distance, but I do like to know why the values flatten, colors get more muted and cool, etc. When I’m painting, I strive to have an attitude of appreciation, discovery, wonder, almost devotion, for whatever I’m putting on paper. A bit of scientific knowledge just enhances that approach.