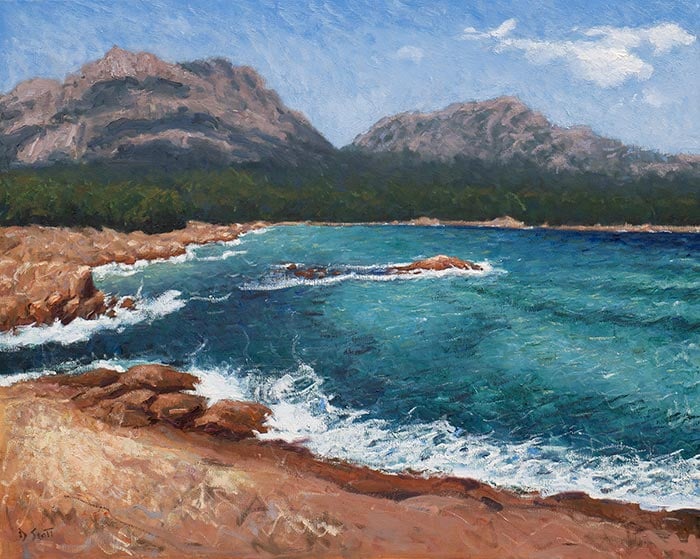
In this post, I walk you through my painting of the stunning Honeymoon Bay in Tasmania. This is a large-scale painting done on a 24×30 inch canvas in oils. I’ll cover:
- Reference Photo and Analysis
- It All Starts with a Blank Canvas
- Blocking in the Major Color Shapes
- Refining and Building up Form
- Adding Highlights, Accents and Finer Details
- Signing the Finished Painting
- Key Takeaways
- Want to Learn More?
- Thanks for Reading!
(Before diving into this post, make sure to pick up a copy of my free Landscape Painting Starter Kit.)
Reference Photo and Analysis
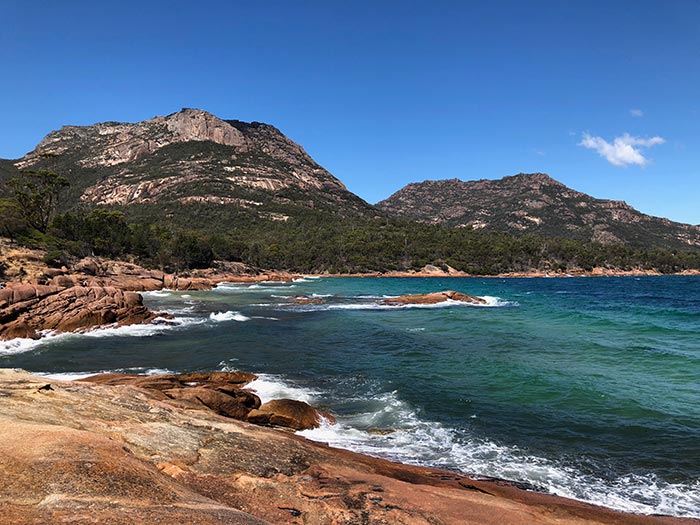
Below is the reference photo I painted from. It was taken under the bright, midday sun. The water was a beautiful mix of blues and greens, crashing against the rich orange rocks.
Here were some of the things I considered before I picked up my brush:
- There is a nice curve created by the edge of the water which I would need to pick up in the painting.
- There is a pleasing contrast of blues against oranges (complementary colors).
- The mountains could be used to create a strong sense of depth.
- The sky appears a bit lacking, so adjustments might be necessary.
- Broken color would be useful for painting the choppy water.
It All Starts with a Blank Canvas
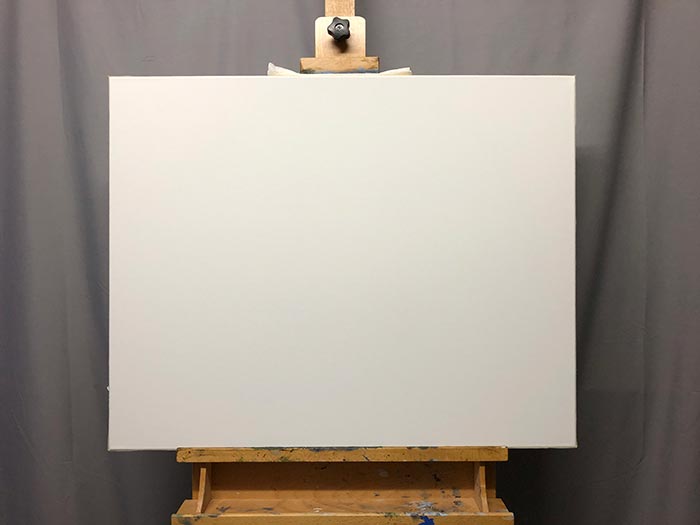
Every painting starts the same way – a blank canvas sitting on my easel. From the moment I put down the first strokes of color, it starts to take on its own form.
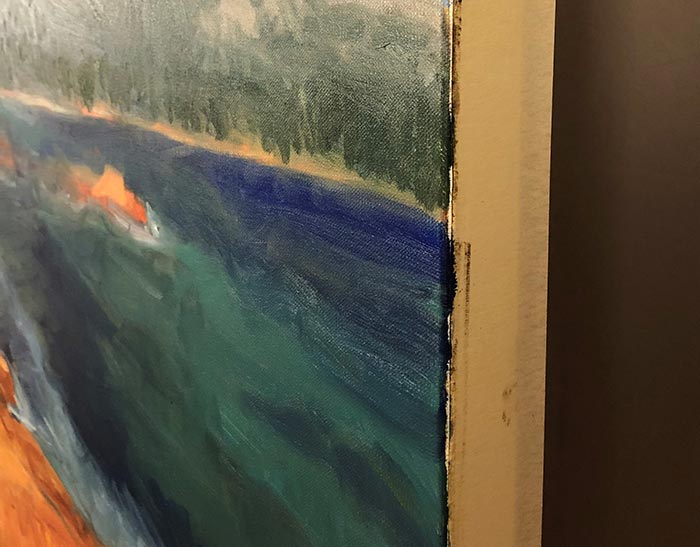
Tip: If you do not intend on framing your canvas and you do not want to paint around the edges, then wrap the edges with craft tape. Once you have finished the painting, you can remove the tape to reveal a clean, professional-looking edge. You can see this in the photo later in the post.
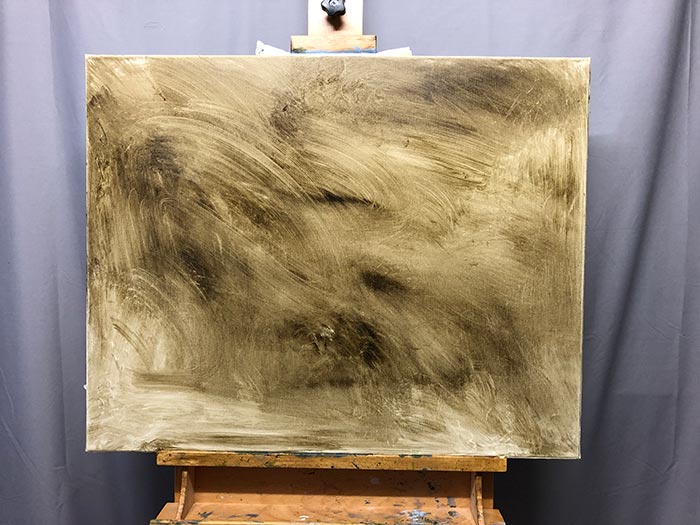
I apply burnt umber straight from a tube to the canvas.
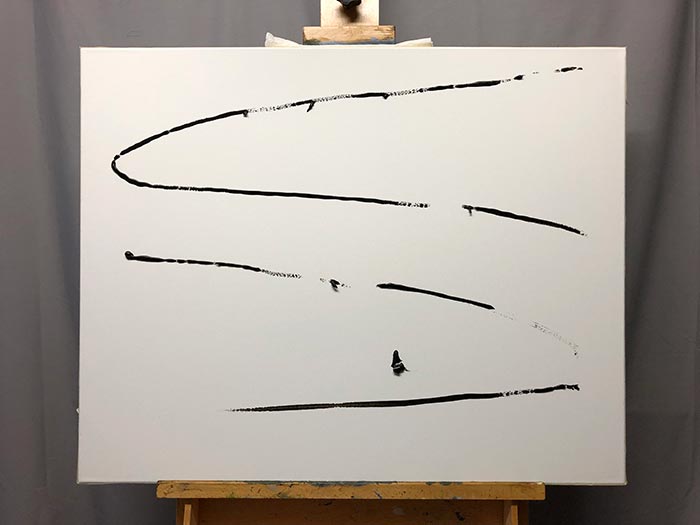
I then use solvent plus a paper towel to wipe it over the surface. Because I am painting a landscape, I am not worried about making the surface smooth and even. A rough, broken surface adds to the appeal of the painting.
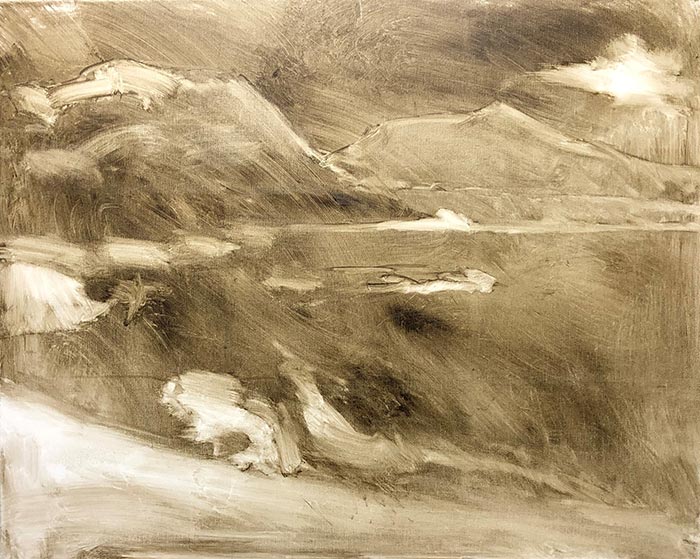
I then carved out some of the basic shapes in the wet paint using a clean paper towel dabbed in some solvent.
Blocking in the Major Color Shapes
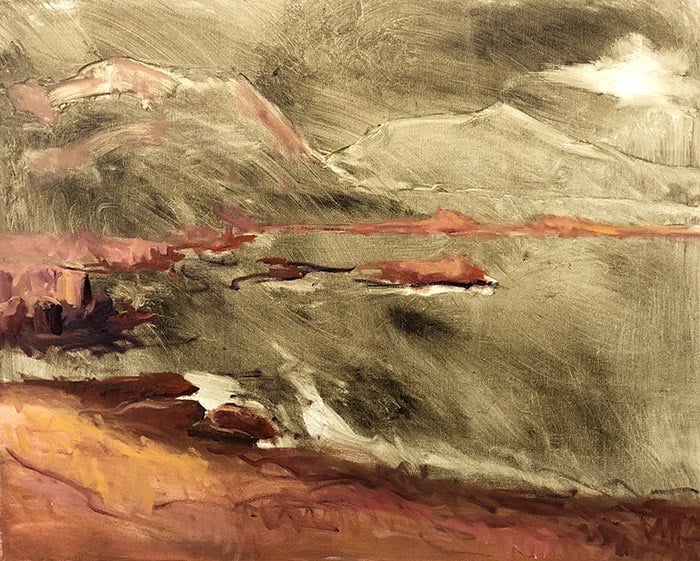
After allowing the stained canvas to dry for about 30 minutes, I proceeded to block in some of the major color shapes. My goal with this stage of the painting was to capture my initial impression of the subject as quickly as possible before I started to get bogged down with the smaller details. My brushwork was rapid and my color selections were based mostly on instinct.
I started with the oranges and reds for the rocks and parts of the mountain.
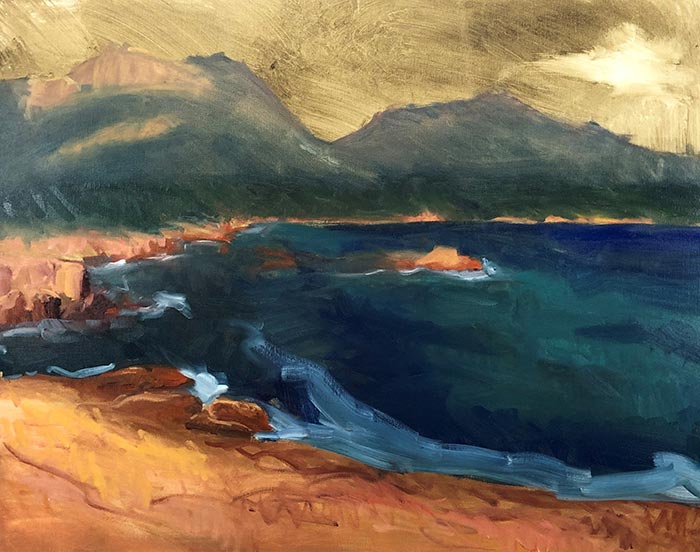
I then moved into the blues, greens and purples. The photo below gives you a glimpse of how rough my brushwork was to begin with.
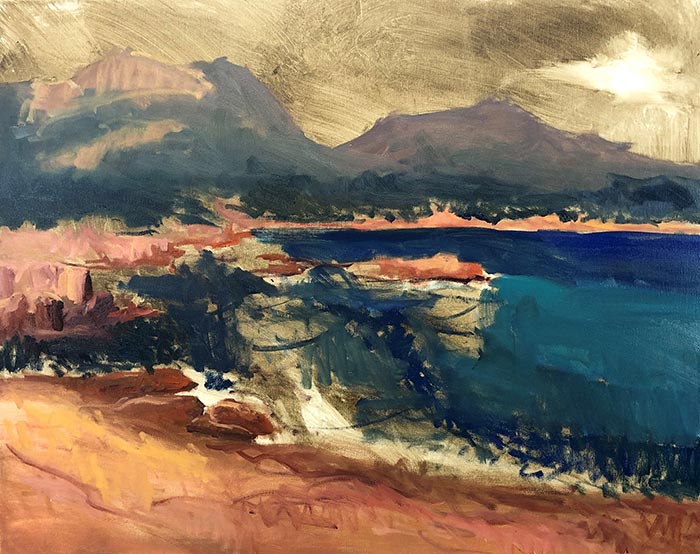
I gradually filled the canvas with color, leaving the sky until last.
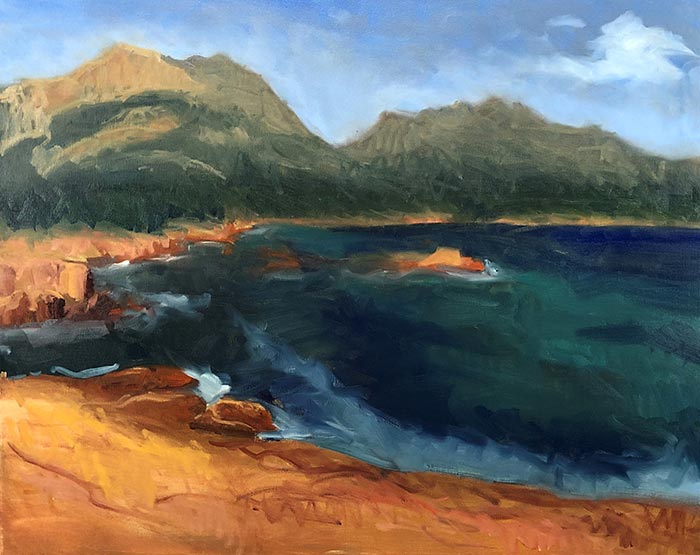
After painting in the sky, the whole canvas was filled with color. Notice how I made some adjustments to the composition by cropping out some of the blue sky out of the reference photo at the top and enlarging the cloud on the right.
Below is a photo of the taped edges I mentioned at the start of this post.
Refining and Building up Form
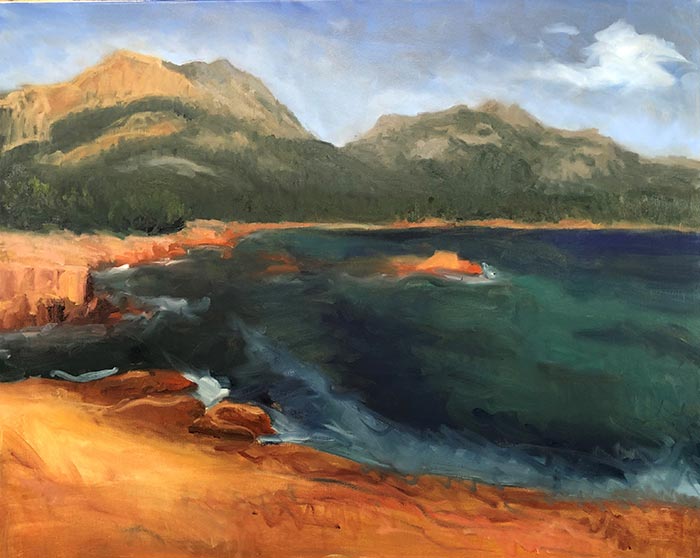
With all the major color shapes in place, I go around the painting and refine the forms. Because I started the painting using mostly instinct, there are of course some errors which needed to be fixed or at least cleaned up.
Below, you can see I started to build up form in the rocks and the mountain in the distance.
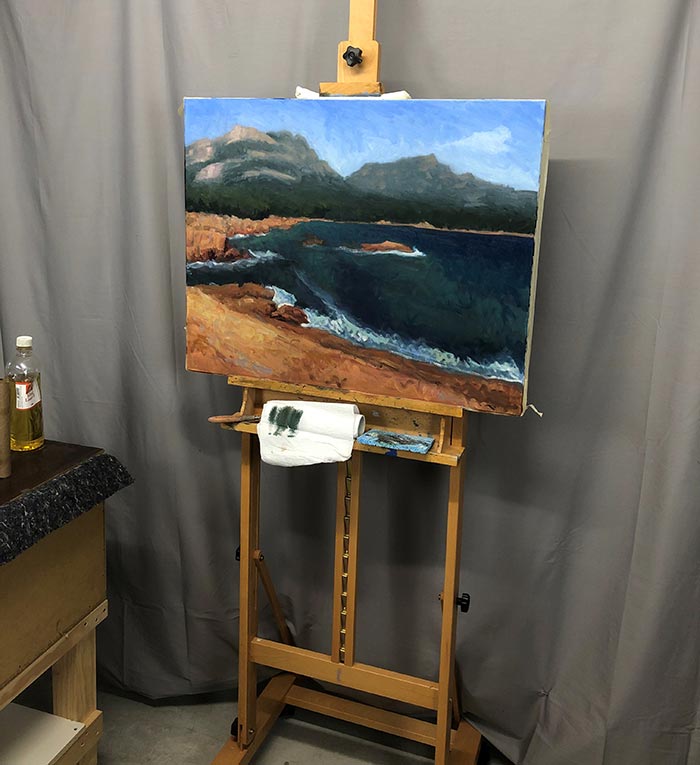
Below is a look at my set-up. Here are some things to note:
- The paper towel is the unsung hero of my painting supplies. I keep a roll handy at all times.
- I also have a cleaning sponge next to the paper towel on the ledge of my easel. I find this handy for wiping any excess solvent or paint from my brush between strokes.
- My palette and any other supplies are on a home-made desk which I can move around the studio (you can see part of it on the left of the photo).
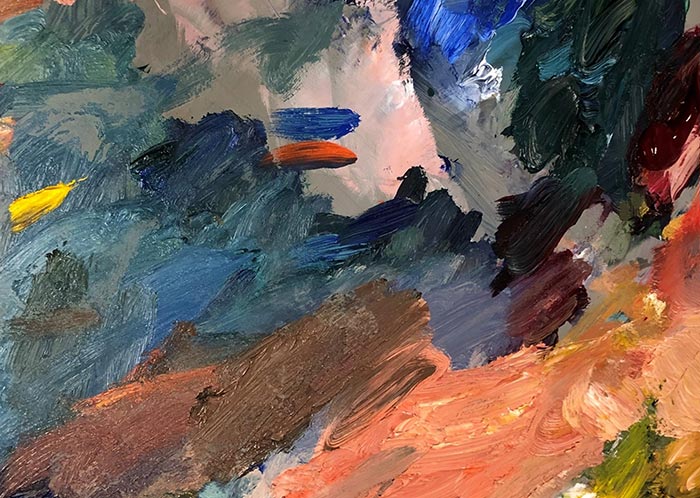
Here is a look at the mess of color on my palette.
Adding Highlights, Accents and Finer Details
The final stages of the painting involve adding highlights, dark or colorful accents and any of the finer details.
During this stage, I spent most of the time trying to inject light into the painting (so to speak) and getting everything to work together. If you were a fly on the wall of my studio watching me paint, you would see me constantly stepping back and viewing the painting from different perspectives. I do not spend much time looking at the painting up close.
I am careful not to tunnel-vision the smaller details and lose sight of the big picture. This is always a risk during the later stages of the painting when I am using smaller brushes and adding the final (and often tedious) details.
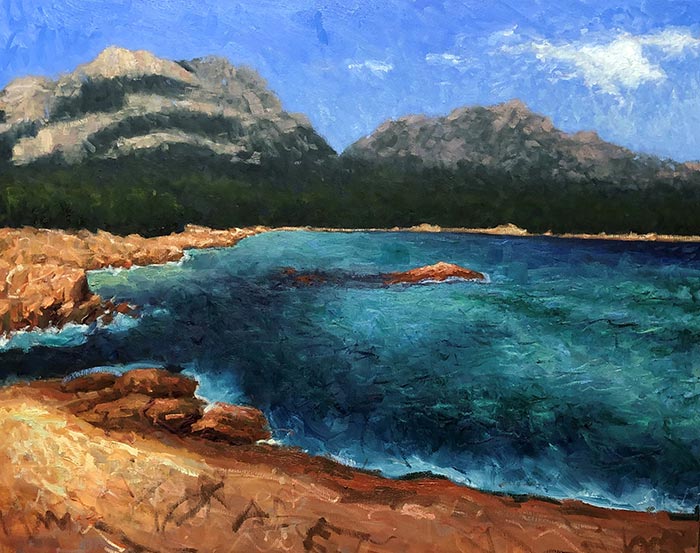
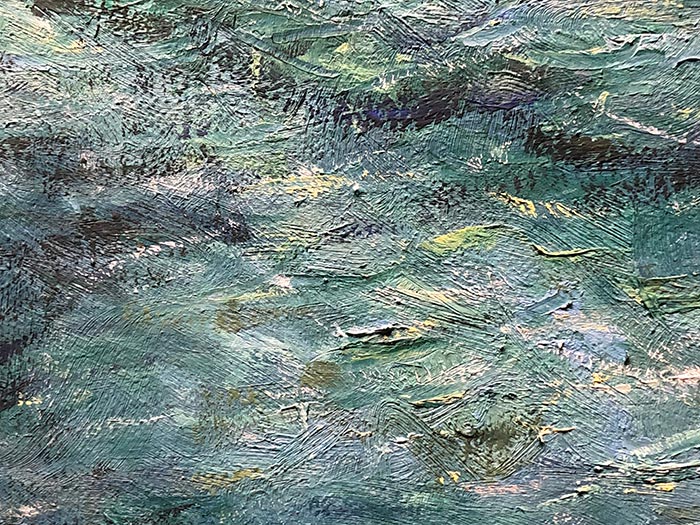
I spent a lot of time working on the water, as I really wanted to pick up the choppy mix of blues and greens. I worked my brush around the wet paint, trying to reiterate the ebbs and flows of the water.
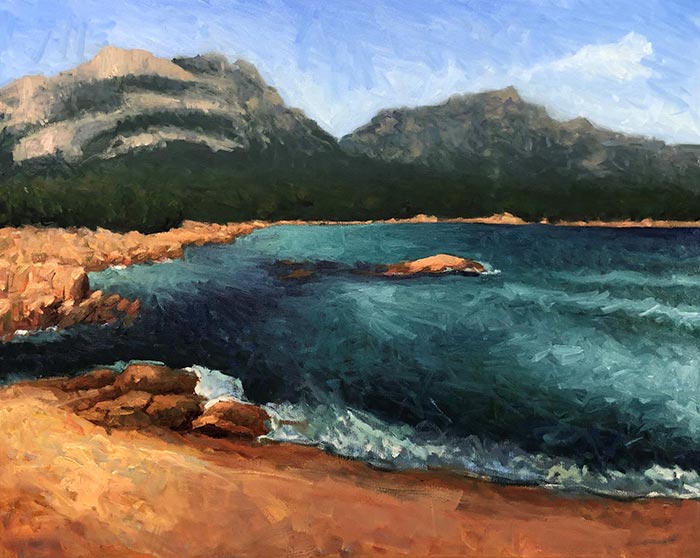
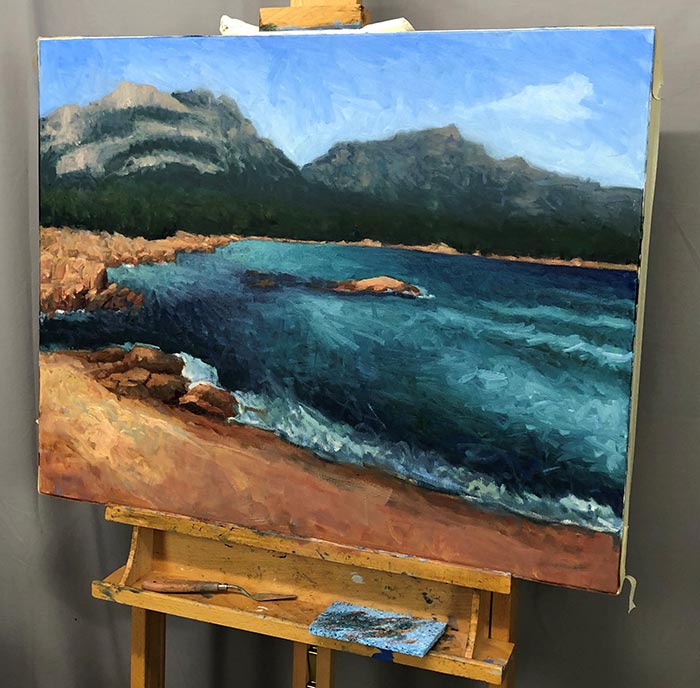
I gradually built up layers of broken color in the water, drawing inspiration from many of the great Impressionists. I also made several changes to the mountains and sky to make sure they fit in with the rest of the painting.
Signing the Finished Painting
Whenever I think a painting is finished, I do not sign it immediately; I leave it on the easel for a couple of days. When I walk past the painting, I tend to pick up small annoyances which I change on the spot. I consider the painting complete when I am able to walk past without feeling the need to change anything.
This painting sat on my easel for a good two days until I felt it was complete. I signed the painting in the bottom left corner with a dark orange.
All up this painting took about a week, spaced out over numerous sessions.

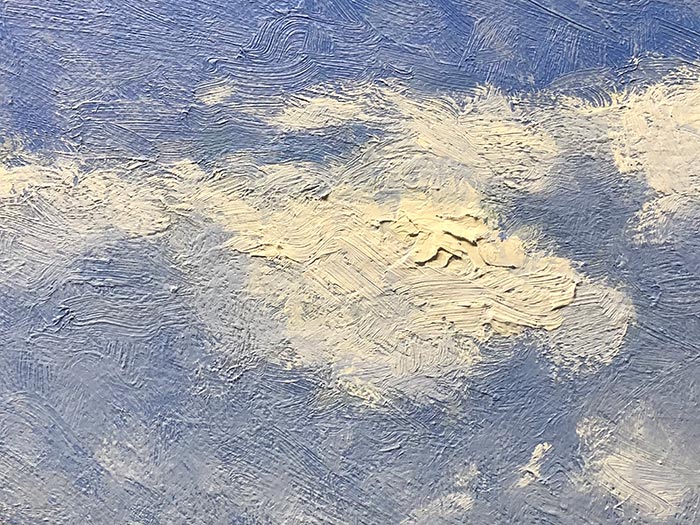
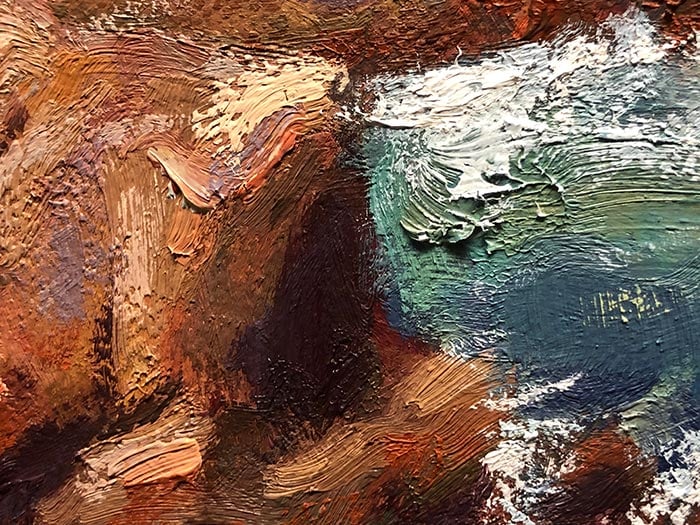
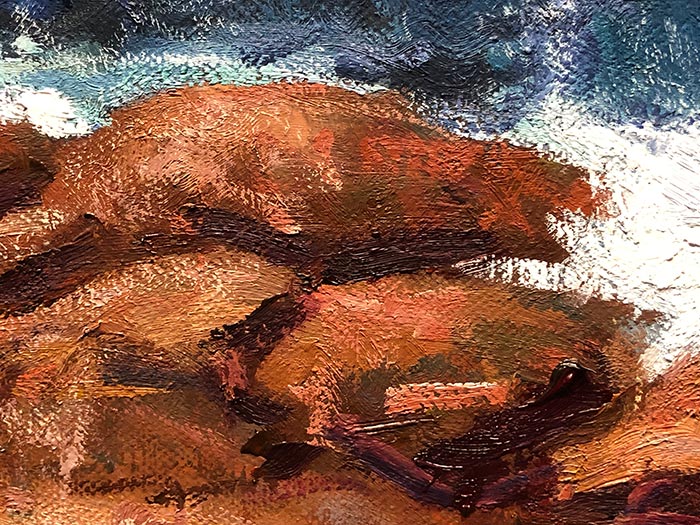
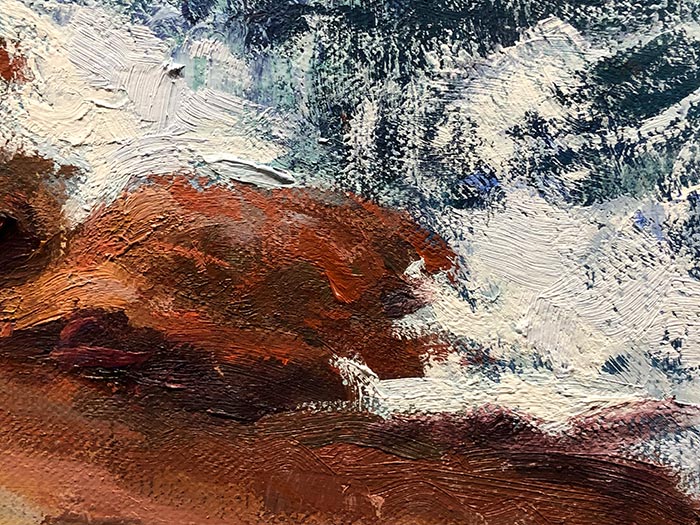
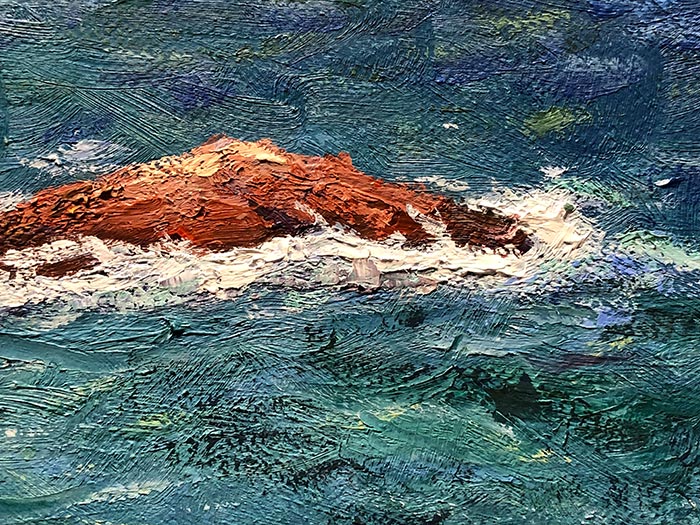
Below are some detail shots of the painting (taken on a different camera, so the colors appear slightly different from the photo above).
Key Takeaways
- You will encounter some difficulties of scale when working on larger pieces. First, it can be a challenge to capture your initial impression of the subject because there is so much surface to cover. As Joaquín Sorolla once said:
“The great difficulty with large canvases is that they should by right be painted as fast as a sketch. By speed only can you gain an appearance of fleeting effect. But to paint a three yard canvas with the same dispatch as one of ten inches is well-nigh impossible.”
- The second difficulty occurs if you are painting alla prima (wet on wet), you may not be able to finish the painting in a single session and therefore some of the paint may dry between sessions. This means you may need to paint both wet on wet and wet on dry. If you are not careful, your painting may look incoherent due to the different techniques used.
- One of the biggest challenges in painting is getting everything to fit together. Painting the perfect mountain, or the perfect wave in the ocean is pointless if they don’t fit. In this painting, I made several adjustments to the sky and mountains to make sure they fit in with everything else.
- Don’t be afraid to adjust the composition as I did with the cloud and sky in this painting.
Want to Learn More?
You might be interested in my Painting Academy course. I’ll walk you through the time-tested fundamentals of painting. It’s perfect for absolute beginner to intermediate painters.
Thanks for Reading!
I appreciate you taking the time to read this post and I hope you found it helpful. Feel free to share it with friends.
Happy painting!
Dan Scott

Draw Paint Academy


I must learn to be more “casual” when I pick up a brush. You made me realize I dwell too much of the small stuff. Thank you!
Happy to have helped Marian! Dan
It’s wonderful, im an amateur ,not a very good drawer … and Iv never attempted sea or landscapes…
But I will try…I have acrylics.. I have never used oils ….. any tips please …..
Acrylics are paints made of plastic and polymers. You can use also glazes and mediums that alter the drying time of the paint.
Unlike oils they dry fast.
Get a spray bottle with water to help new strokes sticks over old oned
I use 90% rubbing alcohol to blend colors via rubbing them with any rag, removing errors and cleaning brushes.
How wonderful to get your email this morning.
This has to be the best “tips and treats” that I have ever seen. The begininning of the canvas, the scratching in of shapes, and the closeups are my very favorite. I will surly be saving and using this technique on my paintings and my small practice pieces.
Thank you so much,
Ann
Thanks for your kind words Ann! It was my pleasure to share this with you all. Thanks, Dan
I, too, truly appreciate the steps and details you have provided.
Thanks!
Happy to hear this Rhonda! Thanks, Dan
Dan…..what colors did you use for this?
Hi Jill, I used cobalt blue, ultramarine blue, cadmium red, alizarin crimson, yellow ochre, cadmium yellow, cadmium orange and titanium white from memory. Thanks, Dan
Another lesson learned!
Thanks..
Glad to hear! Dan
Very nice!! Love to see the closeups of the rocks and water, how many values you have managed to get in… Fabulous!
Again, thank you for sharing. Very used to see your process.
Great to see how you developed this painting, Dan, and I think it captures the essence of a Tassie landscape. I have trouble combining different elements in a large landscape and have gone back to small ones- but this is helping to give me the confidence to try again. Particularly liked the close ups of details. Thanks for all your interesting and helpful posts.
Thank you Dan
The close up of the cloud made me realize the importance of texture and brush strokes in cloud formation.
Thanks Bill, Dan
Happy to be able to help you out Judi. Thanks, Dan
I too, love the explanations of each photo-area…With “oils” there is this sense of depth……Have you or could you paint the same scene in watercolor (and maybe acrylics) so we could appreciate not only YOUR SKILLS, but the QUALITIES of watercolor and acrylics…….
Huge request, but what a “statement” that would make!!!!!!!!
Thanks so VERY MUCH for your work AND your descriptions and notations!!!!!!!
WOW!
Thanks Dan for sharing! I always learn something new. Was there a particular solvent you used when “sketching “ in the painting? And if I were to try this technique with Acrylics, what solvent would I use?
Hi Betty. I just used odorless solvent by Winsor & Newton. For acrylic painting, you could just use water.
Thanks! Dan
I’m a newer painter and I love the concept of blocking. Do you mainly work in oils or do you use many mediums?
Hi Christie. I used to work in acrylics and have done some work in watercolor. But I love oils. Dan
This was incredibly helpful to see your whole process laid out step by step! I’ve just taken up painting recently and have been painting in acrylic and now just beginning to be introduced to oils. I’m totally confused about which mediums to use for various effects along with the wet/ dry thing. I’ve just begun your landscape class and know I’ll be learning a lot from you. You explain things very well! Hope I might see the bay when I visit in November!
That is great to hear Cathy! You will love Tasmania when you go. Thanks, Dan
what a beautiful painting! Your generosity as a teacher and ability to guide us through the steps is a great gift to your students. Thank you so much.
Thanks for your kind words Patricia! Happy to be able to help. Dan
Great! Beautiful work on everything, especially the water! I, too, wish to know what solvents and any other mediums you use. Great step-by-step tutorial! Thank you for sharing, teaching, and inspiring!
Thanks Holly! Odorless solvent plus paint in the early stage. At the end, just paint straight from a tube. No other mediums. Thanks! Dan
Love your work. I have never tried oils either. I have always used acrylics. Any tips on acrylics?
Thanks Frankie. For acrylics, you just need to be aware of the fast drying time. It can be hard to work wet on wet, so you need to learn how to work wet on dry. Otherwise, I use acrylics in a similar way to oils.
Thanks! Dan
Dan, Thank you for sharing your artistic talents free. God bless you.
I am going to try this out. What type of solvent did you use?
My pleasure! Odorless solvent. Thanks Sara
Lovely painting! Thankyou for sharing your process. Very helpful.
Thanks Anne! Dan
BEAUTIFUL PAINTING! Thanks for sharing your process. However, I could not access the Color theory cheat sheet
Thanks Gerri! I will send you the cheatsheet separately. Dan
IHi Dan, I am NOT thinking of doing oils (at least not soon) but I still learn a bit from each thing you share. I got a lot from your water. As usual Many Thanks for sharing your painting with all of us.
Helen
Glad to hear thanks Helen! Dan
Hi Dan,
Thank you so much for all of the emails that you have sent, I have learned so much from them all including your ‘Udemy’ course. I used acrylics for that but I think that I will try it again using oils. This painting is beautiful and inspirational. Tasmania looks a lovely country.
Thanks again
June
Thanks for the very kind words June! Really glad to help 🙂 Dan
Lovely painting and interesting to watch your process. I must admit seeing your painting and demos I feel a bit uncomfortable about one area of the p ainting. The pre painting with more warm colors on the rocks in the middle ground and extension to the left was more appealing before making them under water and the white foam in the painting heading down doesn’t seem logical. The eye is never led to the shore across from the rock which I feel gets lost in the final painting. Just my opinion…can’thelp Being a former university teacher.
Hi Shirley, interesting comments. Appreciate the feedback! Always something to learn. Dan
Hi Dan,
You make it seem simple. Not so for myself. I watch artists complete a painting on Youtube in under two hours or thereabouts and it takes me a week or more before I lay down my brushes. I know it requires practice and I’ve been trying to paint more frequently but life keeps interfering.
At my level of experience, even though I get the concept, I have to continually adjust for value. You seem to breeze through it. I’m assuming again that experience will help overcome this?
Thanks for sharing your talent.
Ralph
Hi Ralph. It always looks simple in hindsight, but trust me, there are many bumps along the way! And remember, most artists don’t show you the paintings which don’t work out… But yes experience and practice will help dramatically.
Thanks so much Dan. I really appreciated the way you took us through each step of your painting. This really helped me a lot, such practical and straight forward advice. I love getting your emails.
Really glad to hear thanks Jenny! Dan
Hi, Dan
This was absolutely helpful! Thanks so much. I paint in acrylics but I feel I can apply the basics I learned here quite well for my next scape. Your painting turned out beautifully! Thanks for so generously sharing your knowledge with us. You’re a great teacher, and I loved the step by step method you used.
Hi Anita
Thanks for your kind words! I am just happy to be able to help.
While I paint in oils, a lot of the information I put out is about the fundamentals and can be applied to all mediums.
Glad you found the post helpful.
Thanks
Dan
I really like your approach to teachings!
Thanks Judy, glad to hear! Dan