Alla prima refers to a direct painting approach where paint is applied wet on wet without letting earlier layers dry. In Italian, the term alla prima means “at first attempt”.
Paintings created in this approach are usually completed within a single session. This made it popular with the Impressionists, as they were able to more easily capture the fleeting light and color of the environment.
Prior to the rise of alla prima painting, artists commonly used a layering approach, which involved painting one layer, letting it dry, then painting another layer on top. Artists sometimes built up over 50 layers of paint. As you would expect, this is a very laborious and time-consuming approach, especially considering the slow drying time of oil paint.
Many artists seem to struggle with painting alla prima. This usually comes down to a lack of understanding about how to control and manipulate paint. Other times it is because of an inability to paint in a relaxed manner. In light of this, I put together some alla prima painting tips. I cover:
- 1. Capture Your Initial Impression of the Subject
- 2. Account for Mixing on the Canvas
- 3. Save the Dark, Light and Vivid Accents for Last
- 4. Contrast Different Types of Brushwork
- 5. Scrape Away Detail in the Wet Paint
- 6. Paint at a Comfortable Speed, Not Too Fast or Too Slow
- 7. Embrace the Unpredictable Nature of Your Paint
- Want to Learn More?
- Thanks for Reading!
1. Capture Your Initial Impression of the Subject
There are many ways you can start an alla prima painting, but I think one of the most effective ways is to capture your initial impression of the subject as fast as possible with thinned paint. Then you can go over the painting with more detail.
This achieves a number of things:
- You can quickly cover the canvas with color. This ensures you do not get caught up in the tiny details before you have established the bigger picture.
- It allows you to tap into your instinctive painting skills.
- You save paint because you are not covering the whole canvas with thick, impasto paint.
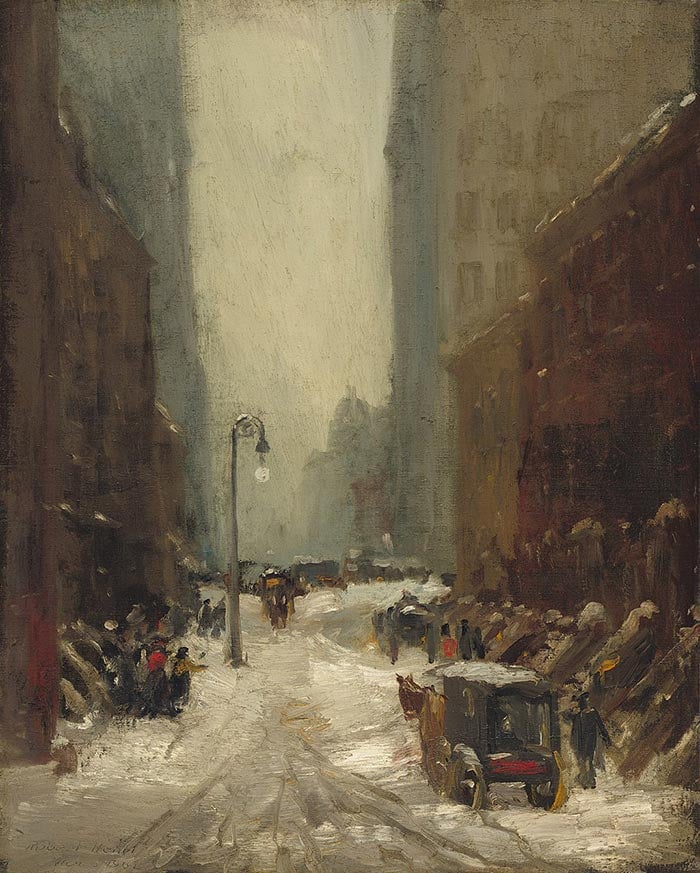
I am not sure how John Singer Sargent went about creating the painting below, but I imagine he quickly painted his initial impression with dull tones then went over the top with finer details and highlights. I would not be surprised if this painting started with nothing but a solid shape of varying yellow and orange tones.
I bet many artists if asked to paint this same subject, would immediately start worrying about all the windows, ledges, highlights and chairs. But in doing so, they would miss the big picture.
The point is, do not ignore your initial impression of a subject. Your initial impression is often your big picture perspective of the subject. Then as you look harder, you start to focus on all the smaller details.
2. Account for Mixing on the Canvas
Colors mixing on your canvas will either be an exciting challenge or a headache, depending on how you like to paint. I personally find it to be an exciting challenge, but that is probably because I do not like to fuss over tiny details or mistakes.
Here are some tips to help you account for mixing on your canvas:
- Compensate for the color already on the canvas. For example, if you are mixing a dark color which needs to go on top of a light color on the canvas, then make your dark color just a bit darker than it needs to be. If you are mixing a vivid red which needs to go on top of a dull green, then make your red a touch more vivid than what it needs to be to compensate for any toning down caused by the green.
- To apply paint on top of a wet layer without much mixing, use a very loaded brush or palette knife and drag paint loosely over the top.
- Take your time with mixing on your palette before you commit brush to canvas. Try not to rely on guesswork with your color mixing. Once paint hits the canvas, it is harder to control.
- Work fat over lean (oily over thin paint). You will struggle to paint thin paint over fat paint without any mixing. I usually start a painting with thin washes then build up to paint straight from the tube.
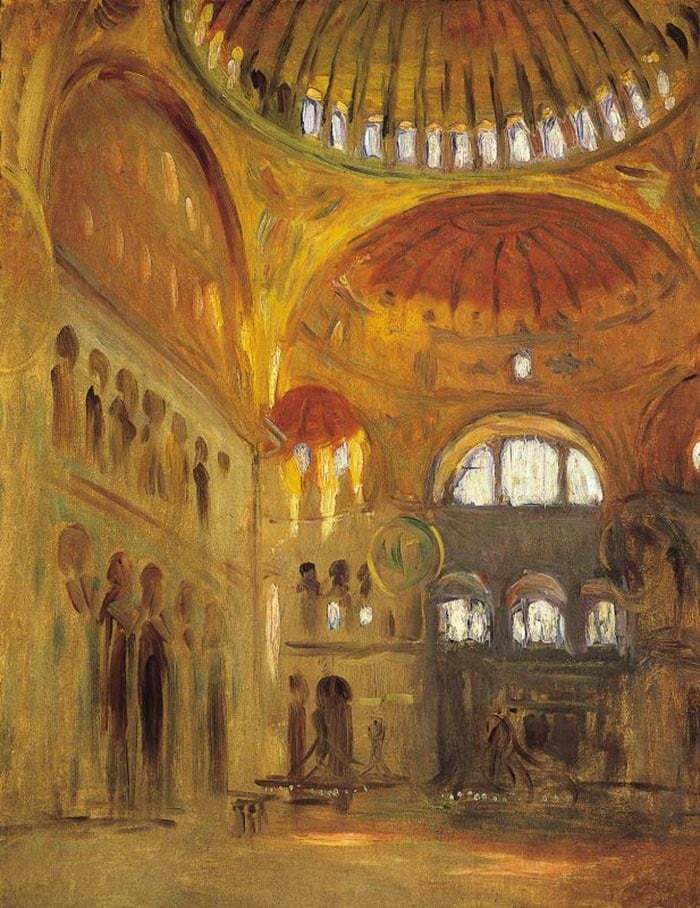
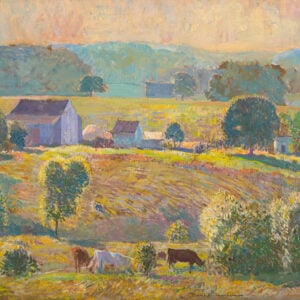
If done correctly, mixing on the canvas can result in a very harmonious effect like in the painting below. George Bellows appears to have done much of the color mixing on the canvas rather than on the palette. In particular, take a look at the buildings in the background.
3. Save the Dark, Light and Vivid Accents for Last
This comes down to personal preference, but I like to save my dark, light and vivid accents for last in most of my paintings after, I have established the general structure with mid-tones. This way, I can ensure my accents are at full strength.
Some artists like to put in their accents first and use them as boundaries to paint within. But I find if I do this, then I need to spend the rest of the painting trying to preserve the accents.
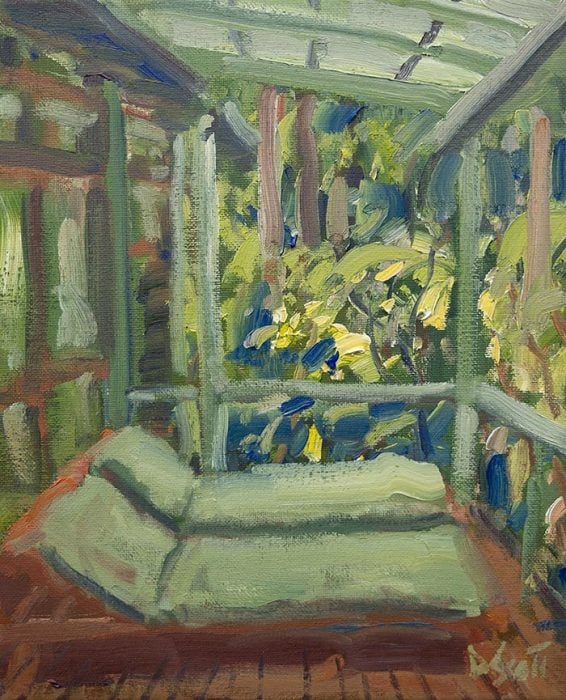
This is how I worked with this small forest painting I did recently. I laid down a base of mid-tones then went over the top with my accents. This is a very efficient way to paint in my opinion. It ensures you get off to a fast start so that you can spend more time on the tedious details at the end (which are often more challenging to paint).
4. Contrast Different Types of Brushwork
When painting alla prima, you can use pretty much any painting technique apart from glazing. This leaves you with many options for contrasting different types of brushwork. It’s also easier to make all the different types of brushwork fit together when painting alla prima, because there is always some subtle mixing. If you are painting with a layering approach (painting one layer, letting it dry then painting more) the different layers and techniques can look disjointed if you are not careful.
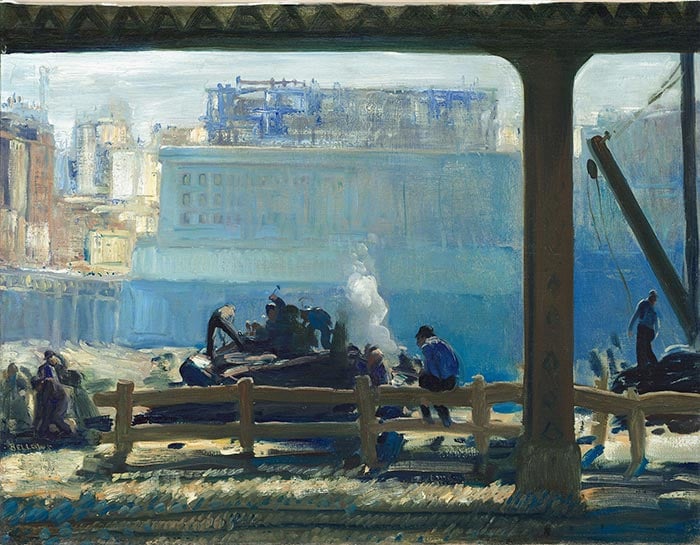
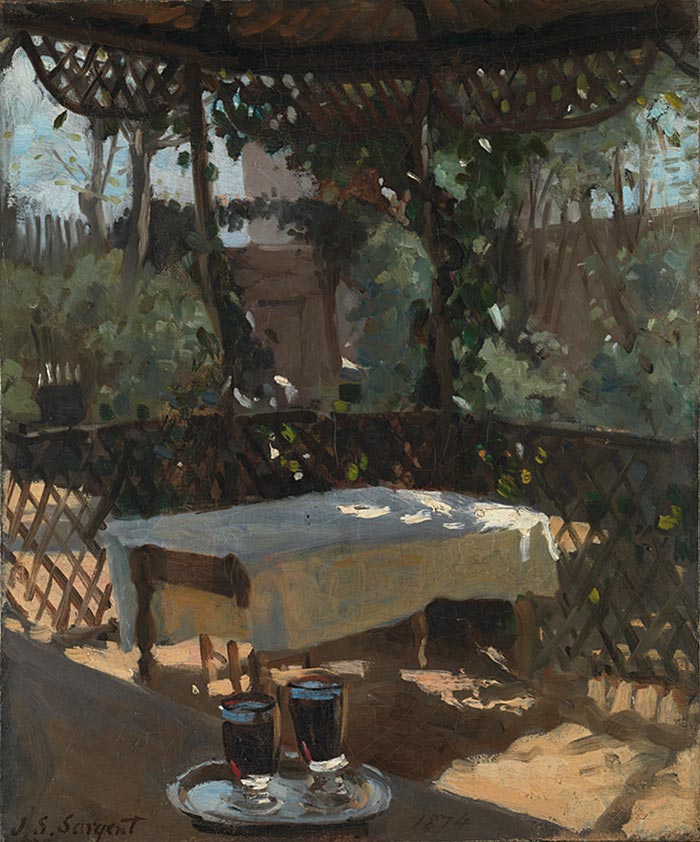
In the painting below by Sargent, notice the smooth brushwork used for the darks and thick, impasto brushwork used for the lights. This helps reinforce the contrast between dark and light.
5. Scrape Away Detail in the Wet Paint
One of the key advantages of working alla prima is that you not only have the option of applying paint, but you can also take it away. To do this, you could use the tip of your palette knife or the blunt end of your brush to scrape away paint from the canvas.
Here are some examples of when you could use this technique:
- To paint delicate tree branches in a landscape. This is particularly useful when painting on top of a colored earth-tone surface like raw umber, because the exposed color would match the color of the branches.
- To create a rough texture on rocks by using a palette knife to scrape away some paint from a wet surface, leaving a broken color appearance.
- To sign your painting once finished. I find it easier to sign my paintings by scraping away wet paint rather than to try to apply more paint to a wet surface.
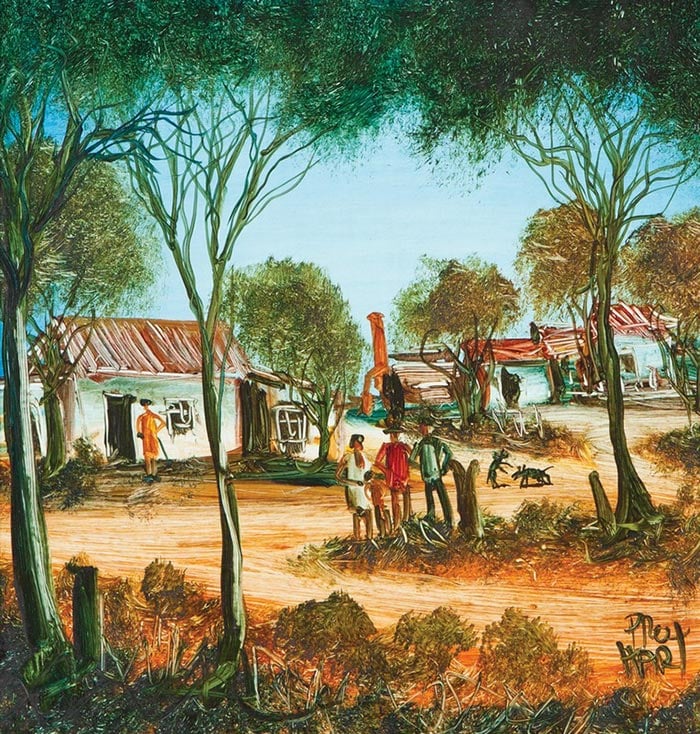
Prominent Australian artist, Pro Hart incorporated scraping into many of his paintings. He would block in solid shapes of color then scrape in details over the top, exposing the color below.
6. Paint at a Comfortable Speed, Not Too Fast or Too Slow
When people think of painting alla prima, they usually picture an artist painting in a flurry of activity as color quickly fills the canvas. But alla prima does not need to be fast. Nor should it be slow.
You should work at a pace which feels comfortable. A pace fast enough to allow some instinct to take over, but slow enough to remain in control and make informed decisions.
Also, be aware that what might look fast to you, may be slow and controlled for someone else. That is usually the case when amateurs watch the masters paint. The masters make it look effortless as they seem to throw paint on the canvas without hesitation. But to them, it all feels slow and under control.
Joaquín Sorolla was known to paint very fast, but that is what felt comfortable to him. He once said:
“I could not paint at all if I had to paint slowly…. Every effect is so transient, it must be rapidly painted.”

7. Embrace the Unpredictable Nature of Your Paint
When painting alla prima, there will always be an element of unpredictability, no matter how much control you paint with. It might be the way colors mix on the canvas, edges getting lost or some areas drying faster than other areas.
Whatever the case, don’t let this unpredictable element discourage you. Instead, embrace it because it is what often results in those pleasant surprises in your painting.
Nobody is so skilled that they are able to predict the exact outcome of their strokes.
If something doesn’t turn out as planned in your painting, like two colors accidentally mixing together, then see if you can pivot and make it work instead of trying to backtrack.
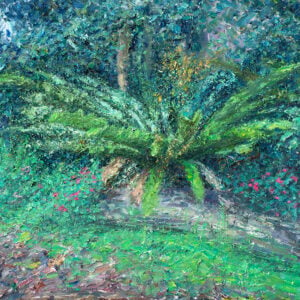
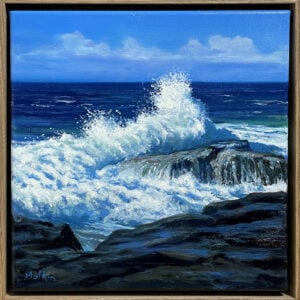
As an example, in the small painting below the trees and land in the background caused me problems. My strokes did not turn out as I had planned, so I decided to pivot by taking a palette knife and using more bold and general strokes. Not what I initially had in mind, but I was happy with the result.

Want to Learn More?
You might be interested in my Painting Academy course. I’ll walk you through the time-tested fundamentals of painting. It’s perfect for absolute beginner to intermediate painters.
Thanks for Reading!
I appreciate you taking the time to read this post and I hope you found it helpful. Feel free to share it with friends.
Happy painting!
Dan Scott

Draw Paint Academy



I so enjoy seeing the other artist’s work that you send with your notes. Thanks!
No problem Linda! Dan
A GOOD MEDIUM FOR MOISTURIZING THE CANVAS FOR WET ON WET IS THE BOB ROSS LIQUID COLOURS. THEY MAKE LIQUID WHITE, LIQUID CLEAR AND LIQUID BLACK.
Dan, thank you so much. I look forward to your email catch ups and take tremendous pleasure from reading them. Full of useful information and tips, and so good to have them illustrated by real works of art. It makes me feel guilty not to join your instruction class, but have to say I am nervous paying online these days. Anyhow your work is very much appreciated.
Yolande having a hard time following how to day a painting in 1 day. Have a hard
time decided on doing the background. Need help on that.
me too feel guilty not to join your class but have to say too I am nervous paying online these days too.
Appreciate your work is very appreciated.
Thanks for your kind words Suzanne! Glad to hear this. Dan
Thank you
No problem Heidi! Thanks, Dan
Thanks for your insight! I really enjoy how you have so many relevant examples to explain what you are teaching.
No problem at all Joanne, examples are useful! Thanks, Dan
The best
I just recently began reading your articles, and look forward to reading more. I have found answers to so many of my questions. I enjoy your illustrations, and your art.
Thank you.
Thanks Carolina, happy to be helping! Dan
Yolande having a hard time following how to day a painting in 1 day. Have a hard
time decided on doing the background. Need help on that.
me too feel guilty not to join your class but have to say too I am nervous paying online these days too.
Appreciate your work is very appreciated.
Hi Yolande
Thanks for your comment.
Here is a link to a post from my website on How to Create the Perfect Background For Your Painting that you may find helpful.
https://drawpaintacademy.com/painting-the-background/
Thanks, Dan
All your articles are so helpful and I enjoy the examples you provide. Thank you!
Great to hear Sonja! Thanks, Dan
Lot of artists post just a little info and then want you to buy their product. You are generously sharing your knowledge. I am always looking forward to reading your posts full of good tips and information. Thank you Dan.
Thanks for your generous comments Silvija, happy to hear this. Dan
Thank you, Dan! As usual you are so helpful when sharing painting tips so succinctly. I like the common sense ‘how to’ approach to painting that you convey. It certainly makes doing art less challenging or intimating.
Anytime Liz! Thanks, Dan
Hi Dan,Thanks for the info. Where you suggest mixing the
colours on the canvas does this apply just to oils or would
it work with watercolours as well.?
The paintings you have used I thought were mainly oil or
acrylic, Sargent “Wine Glasses” maybe watercolour??
Hi Judy, sorry for my delay. It applies to any medium, but it is more effective for oil painting due to the slow drying time. There is no set procedure for it. If I have a color on the canvas and I need to change it, I will mix another color with it directly on the canvas. But you just need to be careful that you retain control over your colors.
Thanks! Dan
Dear Dan, you are so generous to share your tips – most painters want to guard their methods and techniques and keep them to themselves. Thank you for being open and transparent. Now – if only one can apply your tips as plainly and simply as you explain them – that’s the challenge. You are the master!
Thanks for your kind words Sophie. I am happy to be helping others! Thanks, Dan.
Thank you
No problem Tasha, Dan.
Your posts are so useful, like the lectures one receives in university. Thank you so much for your time and sharing your knowledge.
Great to hear Reza, no problem at all! Thanks, Dan
Dan,
I enjoy your mini lessons. Thank you.
Glad to hear it Carol! Dan.
It was a very useful lesson. Thanks Dan!
Have a nice day:-)
Thank you Dace, happy to help! Dan
Hi Dan, how big are your paintings in this article? I find it hard to figure out techniques sometimes when I can’t guess the scale of what I’m seeing ? Thanks!
Alla Prima is the technique Bob Ross used.