
Water is a challenging subject to paint. There are just so many variables you need to deal with such as reflections, transparency and movement.
In this post, I will provide some simple tips for how to paint water with quality of realism. I cover:
- Observing the Water and Understanding How It Works
- Painting the Flow of the Water
- Painting Accurate Reflections
- What Is the Color of Water?
- Creating Form Using Varied Brushwork
- Shallow Versus Deep Water
- Summary
- Want to Learn More?
- Thanks for Reading!
“How to paint water” is admittedly a bit vague. Water comes in many different forms – the crashing waves at the surf beach; the glassy water of a lake which reflects the surroundings; the turquoise water at the beach.
Because of this, it is difficult to give you any standard formula for painting water. But what I can give you are some general tips which you can apply to all forms of water, rather than to just one special circumstance. If you can understand how water works, moves and interacts with the environment, then you will be able to paint all forms of water.

I’ll walk you through the entire process using one of my recent paintings. You’ll see how I go from idea all the way through to reflecting on the finished painting.

Observing the Water and Understanding How It Works
The first step to painting realistic water is to observe the water and understand how it works. The better you understand a subject, the easier you will find it to paint.
Why do you think portrait artists spend so much time learning about anatomy? Could they not just paint exactly what they see? Well, they could, but they would be required to copy everything from observation. With an understanding of the anatomy, they would understand why the body looks the way it does, how it moves and where things should be. So instead of needing to rely on observation to paint the portrait, you could employ a combination of observation and knowledge of anatomy to create the portrait.
If you are a landscape painter, then you need to do the same thing with the environment as portrait painters do with the anatomy.
You need to learn and understand how water, sky, land and trees work. By doing this, painting the landscape will come so much easier.
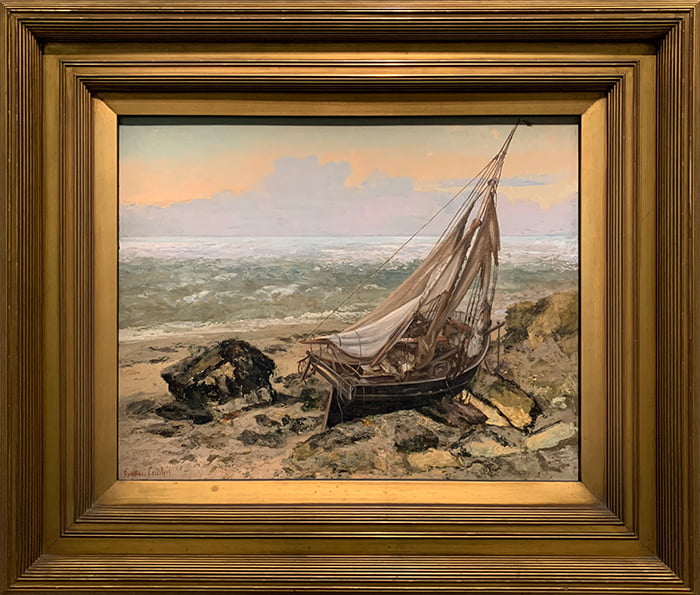
Painting the Flow of the Water
One of the most important aspects of painting realistic water is to capture the flow and movement of the water. This is easy when you are painting a glassy lake and the water is stagnant. But it becomes much more challenging when the waves of the ocean are crashing on the rocks.

In rough conditions, the surface of the water will be chopping and changing. But it is all mostly connected. The water will rise in some areas, and fall in other areas.
A great way to paint the flow of water in rough conditions is to illustrate some of the major contours in the water. At the top of these contours will usually be foam and reflected light. In the deep of the contours, you will usually have your darker colors. Just remember that it is all connected so when there is a high, there must be a low.
You also want to make sure all the contours appear natural. Try not to get repetitive with the contours.
In practice when painting these rough seascapes, I will often lay down a layer of very broken color, then paint the darks of the major contours, and finally, I will paint the lights at the top of the contours.

Painting Accurate Reflections
One of the main challenges of painting water is that some light will be reflected. Sometimes, the reflection will appear almost as a mirror image of the real thing, like on a glassy lake. Other times it will not be as clear.
A general guideline for painting realistic reflections in the water is:
The darks will be slightly lighter, and the lights will be slightly darker. So in other words, all the values will be compressed towards the middle range in the reflection.
By just following this simple guideline, your reflections will usually appear realistic, despite the level of detail you paint them with.
In the painting below by Henri Martin, notice how the darks are slightly lighter and the lights are slightly darker. All the values are compressed towards the middle range.

Some other tips for painting reflections in the water are:
- It can sometimes be appropriate to drag the color of the main subject down through the water using a large brush. This will pick up most of the color from the main subject and will also give a smooth feel of glassy water.
- Sometimes, a few small lines to indicate ripples in the water are needed to separate the reflection from the actual subject.
- Don’t forget to use observation before assuming anything about how light is reflecting on the water. Water is unpredictable, so observation is key for painting realistic reflections.
Also, it is important to note when painting the reflection of a subject is that the reflection is not necessarily an exact, upside down mirror image of the subject. The reflection you see is based on a different perspective, so what you see in the reflection may be slightly different to how you see the actual subject.
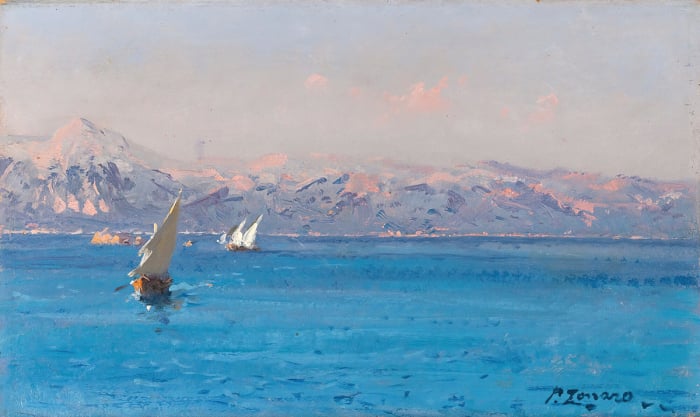
What Is the Color of Water?
Most people tend to think of water as being blue. But in reality, water is not necessarily blue. It can appear to be blue, sometimes, but not always.
There are just so many variables which influence the way we see water to be able to say it is any one color. On a clear day on the surf beach, the deep water may appear blue. But under the warm light of a sunset, the water may appear to be a warm gray.
This is why color recipes generally fail to deliver. It is much more effective to rely on observation and an ability to mix the colors you see than to rely on any color recipes.
When trying to determine what the color of the water is, first ask yourself what the color of the light which illuminates the water is. Is it a warm orange from the sunset? Or a cool blue from an overcast day? The colors you see in the water will vary dramatically based on the light source.
On an overcast day, you may see lots of deep blues and greens. But under the warmth of a sunset, you may see lots of warm grays and dark purples. Then you need to take into account the reflections and the transparent nature of water.
So “what is the color of water” is actually just a hypothetical question which you cannot answer without seeing the water for yourself.

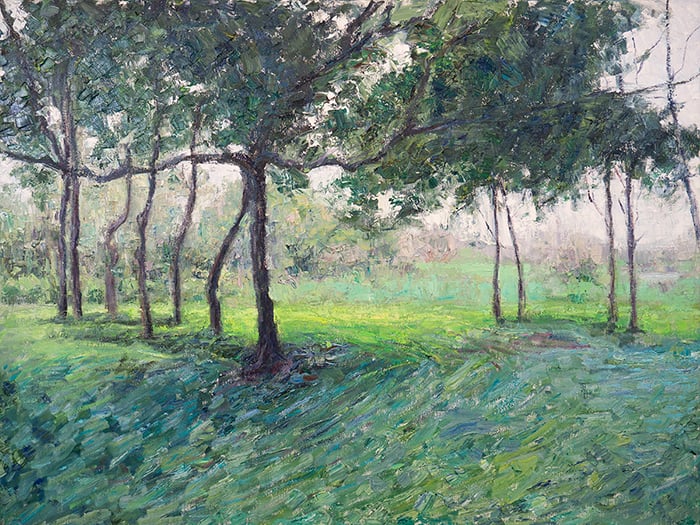
Creating Form Using Varied Brushwork
When painting water, a great technique is to match the brushwork to the type of water you are painting.
You can use your brushwork to create a sense of the flow of the water. Long, fluent strokes can indicate the back and forth sway of the water. Short, energetic strokes can indicate broken and choppy water. Thick, impasto brushwork can indicate the whitewater of crashing waves.
In general, the more activity in the water, the more visible your brushwork should be (but as with anything, this is just a general suggestion and certainly not a strict rule).

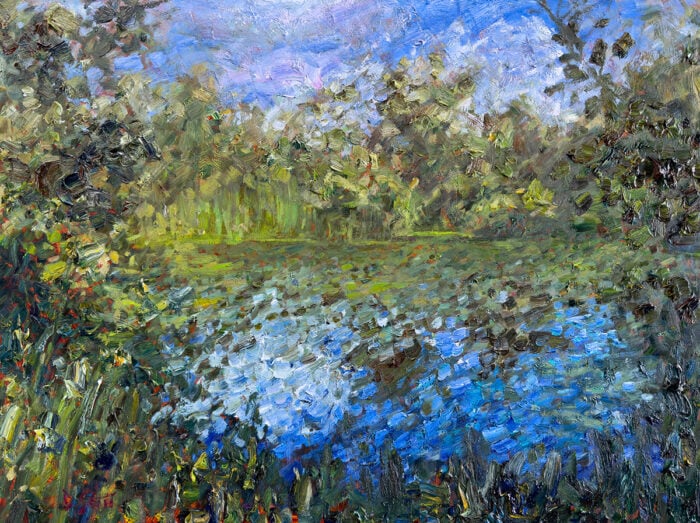
Shallow Versus Deep Water
The way you paint shallow water is often dramatically different from how you paint deep water.
With shallow water:
- You will usually be able to see through to the ground, which will influence the colors you use. If you are painting a shallow body of water with a bed of sand, then you may use a cool and earthy yellow (maybe yellow ochre mixed with some blue) to depict the water. This is because the color you see is partly the color of the sand and partly color being reflected by the water.
- You may need to add more detail for all the rocks and other objects you see on the ground.
- The flow of water will usually be erratic and jarring. So short, stabbing brush strokes may be more appropriate.

With deep water:
- The flow of water will usually be slow and smooth, so you should match your brushwork to this. Use large brushes and long, flowing strokes and keep your edges soft. Try not to get caught up in all the details.
- The calmer the water, the more it will reflect the color of the sky.
- The deeper the water, the darker it appears (generally).

Summary
I hope you found these tips on how to paint water helpful. Let me know in the comments if you did or if you have any of your own tips you would like to share.
To summarize:
- “How to paint water” is a vague question. There is no standard form or color for water. You need to learn how to observe and paint what you see.
- If you understand how water flows and works within the environment, then you will find it much easier to paint.
- To paint a realistic reflection, the darks will be slightly lighter and the lights will be slightly darker in the reflection.
- The color of the water is not always blue. It varies significantly based on the circumstances.
- The way you paint water will often match the environment. For choppy and dramatic waves crashing on the shore, you may want to paint with short, energetic brush strokes. For calm, glassy water, you may want to paint with long, smooth strokes.
Want to Learn More?
You might be interested in my Painting Academy course. I’ll walk you through the time-tested fundamentals of painting. It’s perfect for absolute beginner to intermediate painters.
Thanks for Reading!
I appreciate you taking the time to read this post and I hope you found it helpful. Feel free to share it with friends.
Happy painting!
Dan Scott

Draw Paint Academy


A very informative and clear coverage of a challenging topic, including lovely examples.
Thank you, Dan.
Thank you for posting this excellent advice on painting water, as an artist I am always researching articles like this to improve my abilities. I am wanting to paint a stream, and 2 Koi with little water movement at the edges of the vertical painting and the water running diagonally and the edge at the top reflecting shallow water with yellow leaf reflections stones showing. I have made some progress, however I still feel that I need to give it more of a look of flow and being diagonal. I made my brush strokes diagonal also. Now I see that I might overpaint with more impressionistic, but horizontal strokes. for the shadows and highlights, does this make sense or am I missing something? Oh dear I always set such challenges for myself.Unfortunately, I cannot show you what I’ve done here, but if you have any suggestions, I would be grateful.
Thanks for this Dan, I’m doing a project on creating a water effect using lights and I found your colour remarks very helpful with this.
Great tips and will help when i next paint water Thanks
Great summary of key tips thanks and great examples to inspire us
There is always something new to learn about painting water! Thank you.
Thanks for your info on paint, very interesting 🤨
Thanks for detailed tips, water is always difficult to paint!
You are so generous!
Lily
Thank you for your tips! I look forward to trying your suggestions! I struggle getting the water to take on that glassy look for reflective water! Again, thanks and stay safe in this crazy world!
Thanks Dan! I always struggle with the colors, especially when transfer photo to a canvas. Any tips how to avoid kitsch in colors?
Hi Iris. My best advice would be to try your best to get the right color, in the right place. But of course, easier said than done. Dan
Hello,
I am wondering what you mean exactly by ” to paint a realistic reflection, the darks will be slightly lighter and the lights will be slightly darker in the reflection.” Do you mean that you’d want to paint a lighter color than what is seen in the photo (or in real life) for the dark colors? Like if the reference photo shows the lake’s reflection having some deep blue in it, would you lighten that up a few shades in your painting to make it look more realistic, even though it is actually darker than that in real life? Or instead of painting shadows in black, you’d use a lighter dark color like purple or grey? Or if I was painting the water that had reflections of golden yellow trees, I’d darken that shade a couple shades darker? I loved this whole page! It’s been so eye-opening!
Hi Cara. Basically, the lights won’t be as strong and the darks won’t be as deep in the reflection. It kind of pushes the colors towards the middle-value range. Hope that makes sense.
Dan
Thank you for your suggestion, I did finally figured it out, by trail and error. And by your suggestion.
Again Thank you.
I am having trouble painting the reflection of the sun as it just about reaches the ocean, I can’t seem to find the right color of yellow paint to use. The scene is the rising of the sun the first thing in the morning, out of the clouds and over the ocean. I’ve tried a few colors, but, have not found one that work. Hope you can help.
Sincerely,
Ronnie
Hi Ronnie. Have you tried a slightly duller version of the sun color itself? The water will be made up of deep shadows and reflected light.
Thank you for the examples in your direction. I will try water more often, I want to practice now.
I really enjoy your sharing your knowledge with us. Lynne. lynne@jpelkins.com.
GREAT READING,
Super insight!! I live on the sea in Ireland which can change in colour and form all day… fascinating to watch, difficult to capture… now I understand a lot of issues I was experiencing. Rushing to get my paint brushes… Most appreciated, thank ypu, that lesson just made my day!! Upeee!
Hi Dan, I love the way you include paintings by way of an example to show what you are explaining. As a beginner I am appreciating your efforts.
Glad to hear this Belinda! Thanks, Dan
Very comprehensive and helpful article.
Thanks Jan!
Thank you for your very clear descriptions and explanations. I look forward to learning more.
My pleasure Bev, Dan
I live on the ocean and this really gave some great insight on how to observe the water while painting. Mahalo!
Really glad to hear Daisy. I am jealous you get to live on the ocean side.
Dan
I enjoyed this. Thank you.
No problem Debra!
Dan
I have painted water but never quite understood it. This definately gave me a better understanding. I liked the idea of it being different colours other than blue.
Glad to hear Gina 🙂
Dan
Very useful and clear information Dan . Thankyou.
No problem Julia, Dan.
Thanks Dan! Excellent tips! I forgot where I read that the darker the water the less reflections or that dark deep water doesn’t reflect. I painted very little water so far but I found it challenging to do give it a realistic and interesting look.
Thanks Jola 🙂 Yes water can be a real challenge, but once you break it down into parts it is not as intimidating.
Dan
Thanks. I have been trying to paint a rowing 8 man race in watercolor. Do the same rules apply for moving water in a watercolor painting?
Hi Fran! Generally yes. The main difference will be the way in which you apply the paint. Watercolors require a more delicate touch and you won’t be able to rework mistakes. But color, form, structure, contours, value – all this is the same.
Cheers!
Dan
I never realised the darks get lighter and the lights darker in a reflection. Thanks for this.
(Please note new email address: ancremer@icloud.com)
No problem Anne. I will change over your email in my system.
Regards
Dan
thank you
very effective tips on this difficult subject!!!
No problem Gargi
Dan
GREAT READING,Thanks Again Young Man….
Very helpful, thank you!