In this post, I will walk you through this very simple seascape based on a photo from Tasmania.
I will say firstly that just because a subject is simple, does not mean it is easy to paint. In fact, it can sometimes be even more challenging to turn a simple subject into an interesting painting than it is for a complex subject. I cover:
- Analyze the Reference Photo
- Prepare the Canvas and Sketch the Composition
- Use Thinned Paint to Block in the Shapes and Colors
- Detailing
- Finished Painting
- Additional Readings
- Want to Learn More?
- Thanks for Reading!
Below are photos of the finished painting and my reference:
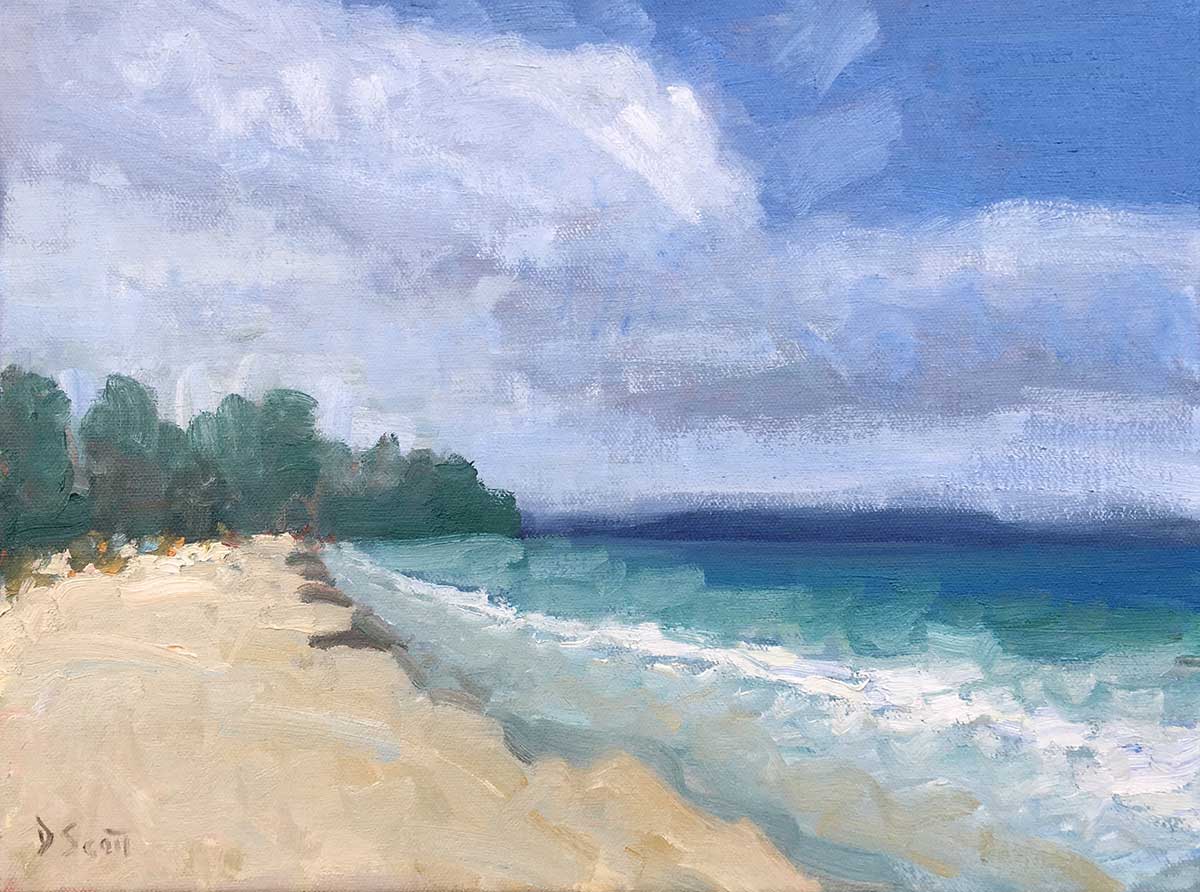
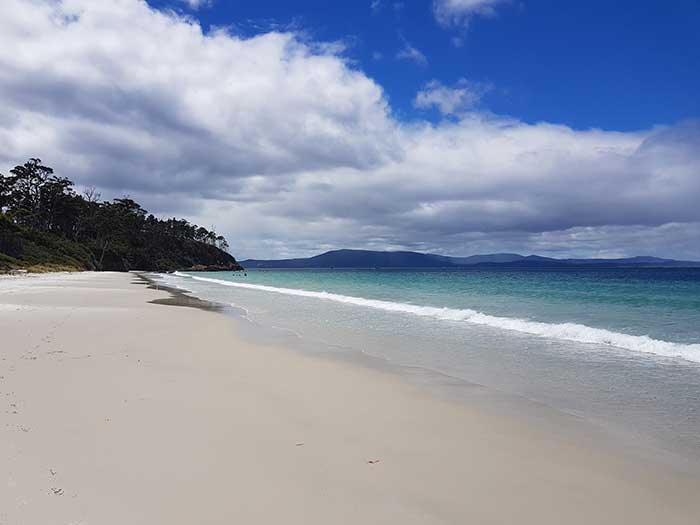
It is important to note that I was not trying to re-create this photo, but rather create something new based on my interpretation. This is something I often tell my readers, but I too struggle to follow this. It can be very easy to fall into copy-mode and forget that I have the creative license to change the subject (hopefully for better not worse).
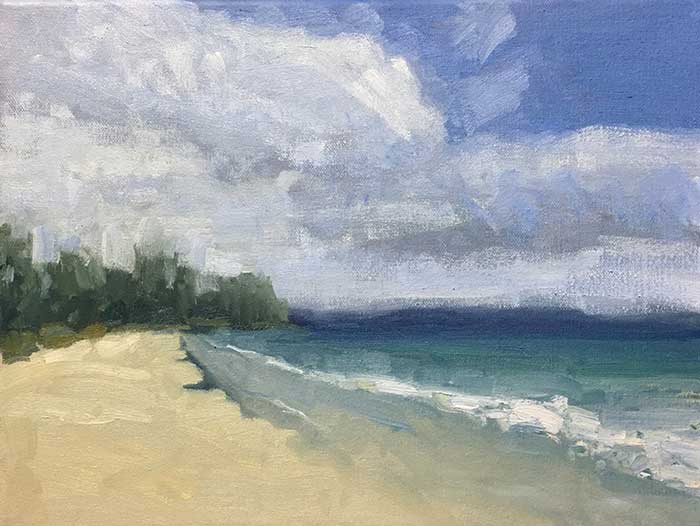
The most notable example of me exercising my creative license in this painting is the compressed value range I used. I pushed the darks to around the middle-value range, so they are much lighter than in the photo. I did this for two reasons:
- I thought it would result in a more pleasing harmony of colors; and
- When taking photos during the day, the darks tend to be underexposed, so I wanted to counter this effect.
This is just one example of me using my creative license to change the subject. Sometimes it works out, sometimes it doesn’t. Copying is not bad and most artists, including myself, will tell you to paint what you see. But don’t forget you are trying to create a beautiful painting, not a beautiful copy.
Anyway, here is the step-by-step tutorial for this Tasmanian seascape.
Analyze the Reference Photo

This is a very standard seascape composition. Here are some important things to note from the reference photo:
- There are a few areas where there is not much going on (the sand and the blue of the sky). In these areas, I can use my brushwork and subtle changes in color to create some kind of interest.
- What interests me most about this scene is the beautiful blue-greens of the water, so I want to make sure I capture this. The water is also a perfect opportunity to use some Monet-like brushwork.
- The dark area of the trees looks underexposed in this photo. If I were looking at this scene in life, I would probably see much more color in this area.
- The mountains in the distance are a perfect opportunity to demonstrate depth in the painting, so I want to make sure I capture that rich blue correctly. I could also create even more of an illusion of depth by using soft edges for the mountains.
Additional reading: How To Choose The Perfect Reference Photo To Paint From
Prepare the Canvas and Sketch the Composition
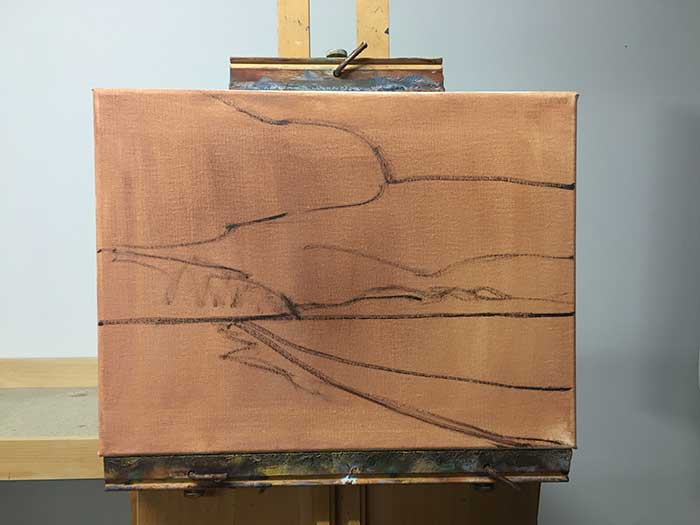
This is how I start most of my paintings. I stained the canvas with a thin wash of burnt umber and then quickly sketched the composition.
Notice how simple the sketch is? I did not try to capture every single detail, just the really important parts. Depending on how you like to paint and the subject you are painting, you may want to use more detail in the sketch.
Use Thinned Paint to Block in the Shapes and Colors
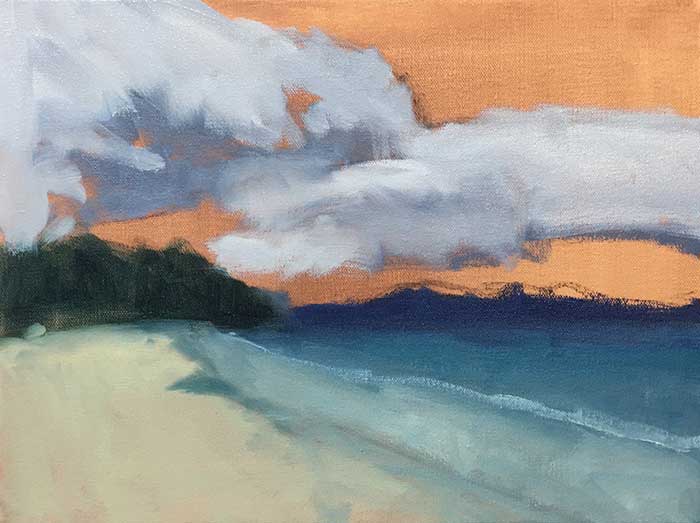
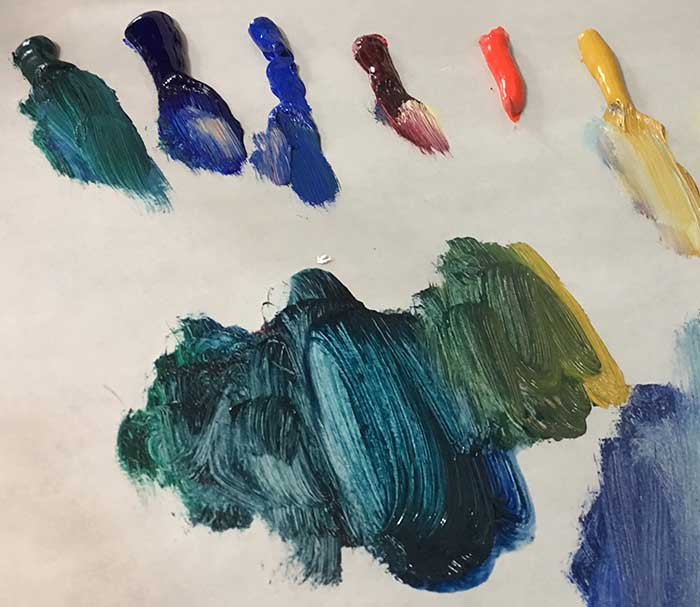
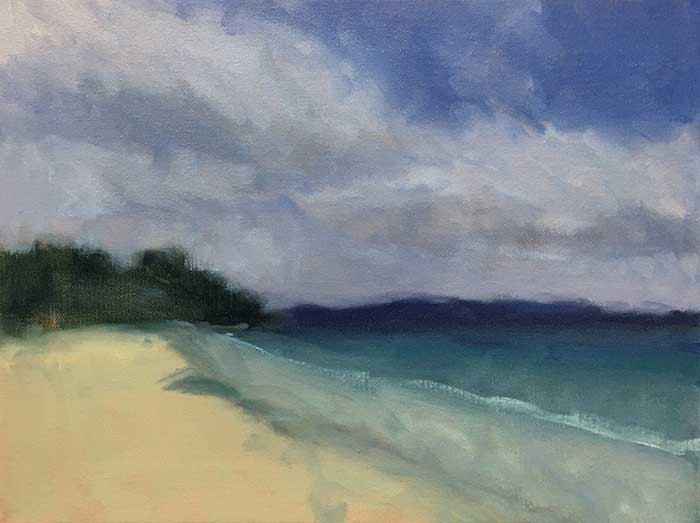
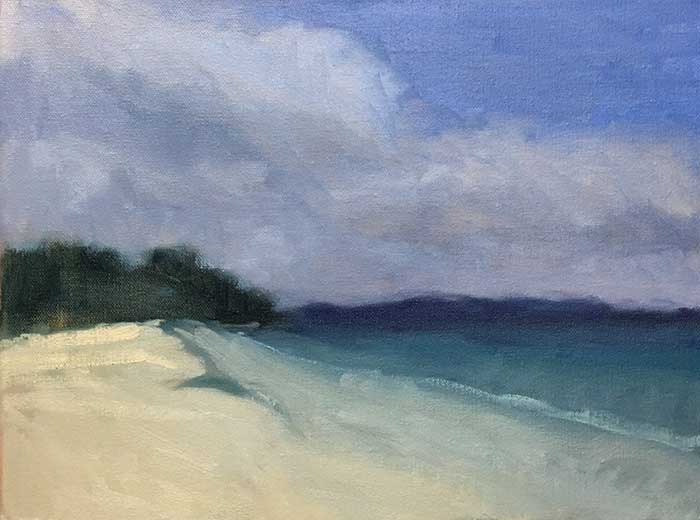
I then start to block in the general colors and shapes using moderately thinned paint (oil paint plus some solvent). This allows me to quickly cover the canvas without hesitation. This part is all about capturing my first impression of the subject, before I start to overthink it.
Here are some key points from this stage of the painting:
- I used mostly medium-large sized filbert and flat brushes.
- I used lots of soft edges, as I feel this provides a great foundation for harder edges later in the painting.
- Color harmony and overall composition are extremely important to me at this stage. These are very big-picture aspects of the painting.
- My colors tend to be slightly darker than what they should be, as I usually go over with lighter colors later in the painting (it is easier to go from dark to light than light to dark in oil painting).
Detailing
By this stage, the foundation has been established and the painting is starting to take form. Now for the fun part – adding those tiny details which seem to make everything just work.
I find that once you hit the detailing stage of a painting, you have two roads to go down:
a. You could take the safe approach and just refine what is one the canvas; or
b. You could take risks to really make it a stunning painting.
We often take the safe approach because we fall in love with certain parts of the painting and then do not want to make any more changes.
I try not to fall in love with any particular parts in a painting until the very end. This way I am not afraid to make changes throughout the painting.
Remember, you have to consider the painting as a whole. An area may look great by itself, but if you change the surroundings it may look out of place.
Here are the important points from this stage:
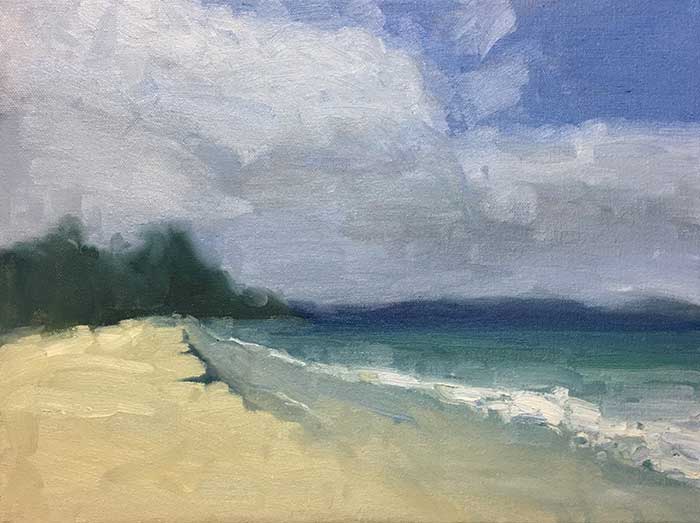
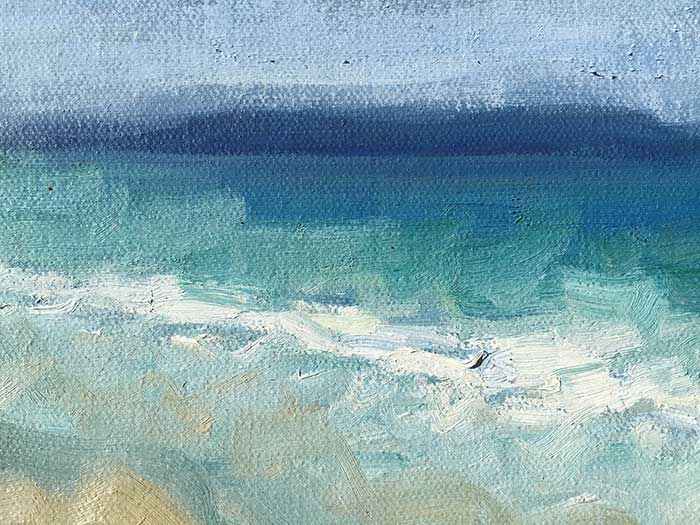
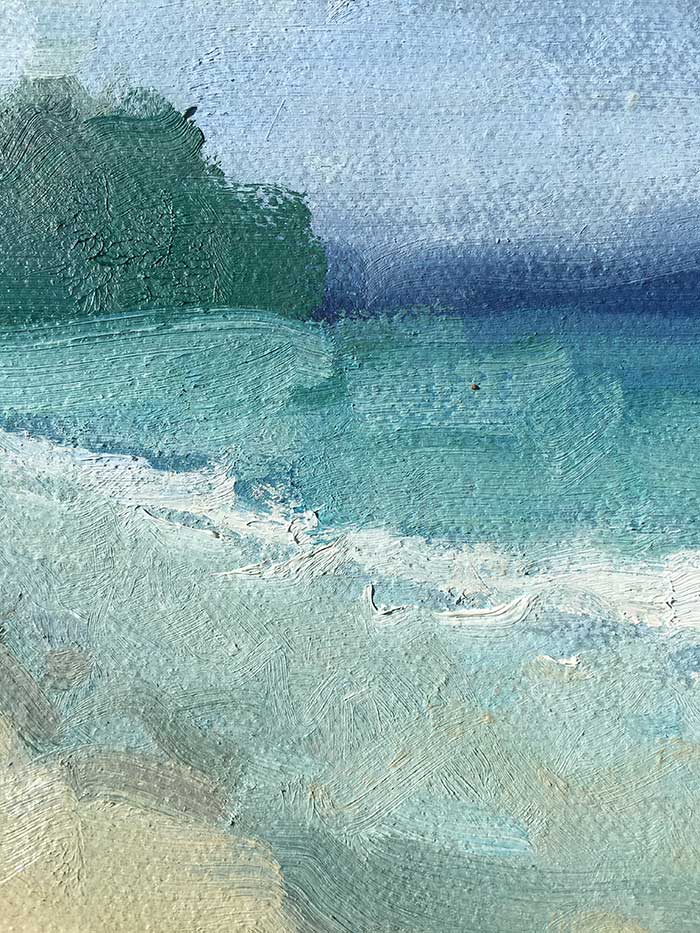
- I drew inspiration from the great Russian impressionists when painting the breaking water. I used relatively large brushes, thick paint and decisive strokes, with lots of small dabs of color here and there. This technique relies on the brushwork to do most of the heavy lifting.
- I did lots of work to make sure all the elements “fit” together. This mostly involved constant adjustments to edges, values and brushwork.
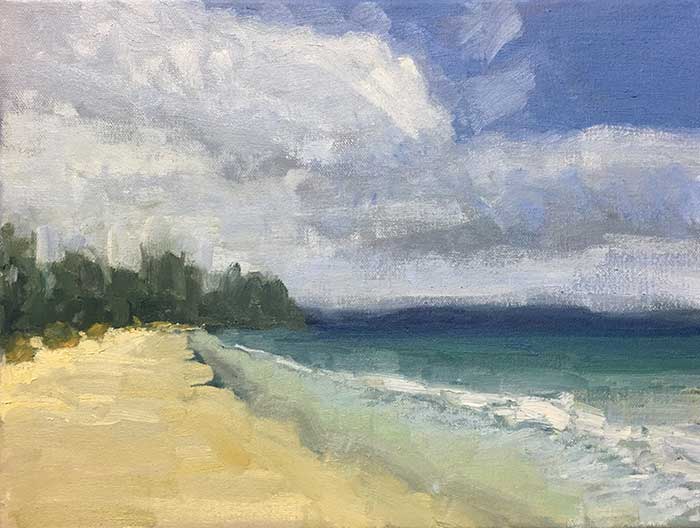
- I was certainly not delicate with the sky. I used a scumbling technique and dragged light blues and grays over the darker background. The scumbling technique can produce a very interesting broken color effect which is particularly evident just above the mountains.
- To create depth in the water, I contrasted short, choppy strokes of varied color in the foreground against long strokes of more consistent color in the background. I thought of it kind of like layering a cake horizontally:
Layer 1: Light yellows for the sand
Layer 2: Bluish yellows as the sand mixes with the water
Layer 3: A mix of light blues, yellows and greens in the shallow, choppy water
Layer 4: Greens and blues as the water gets deeper
Layer 5: Rich blues for the deep water
In between each layer, it is important that there is some kind of smooth transition.
Finished Painting
Below are photos of the finished painting plus some close-ups. Note that the painting appears clearer and slightly bluer as the photo was taken outside under more appropriate lighting conditions.


Additional Readings
Oil Painting – The Ultimate Guide For Beginners
Seascape Painting Inspiration (Plus 9 Famous Seascape Painters)
Inspiring Seascapes By Frederick Judd Waugh
Want to Learn More?
You might be interested in my Painting Academy course. I’ll walk you through the time-tested fundamentals of painting. It’s perfect for absolute beginner to intermediate painters.
Thanks for Reading!
I appreciate you taking the time to read this post and I hope you found it helpful. Feel free to share it with friends.
Happy painting!
Dan Scott

Draw Paint Academy

Wonderful Do you ever paint in acrylics ?
Hi Noela
I used to paint in acrylics when I started out, but I certainly prefer oils.
Dan
Thankyou so much for these fantastic tips.Im self taught well still very much in ‘ Nursery stage’ lol
I’m painting everyday different medium’s, styles,Size & Topics.Ive always enjoyed Quirky interior design,Since very young.
Art became my coping mechanism 3 years ago and I’m so grateful for any lessons,Advice criticism always teachers.
Appreciate your information/Education.
Kind regards Clementine Croft
I’m
Hi Dan, Where do I find these readings?
Is this a sample from your course?
Thanks, Tom
tomfm124@gmail.com
Hi Tom
This is similar to the information you will find in the course. The course is more targeted on the fundamentals rather than showing you step-by-step how to paint something.
Which readings are you referring to?
Dan
One of my problems is that I don’t put enough paint on my pallet and when I mix colors I don’t mix enough – I put the paint on the canvas too thin – so haven’t learned to use the thick brush strokes that you have used here. It really helps me to see the close ups of the painting. I am going to try this after I finish doing the Notan exercise. Thanks!
Glad this helped Joan!
Dan
Nice painting and tutorial Dan!
Thanks Robert!
Dan
I enjoy all of your articles, Dan! I paint following nearly the same process that you use. Here is a question regarding paint strokes. I tend to think that paint strokes toward the middle ground like the sand area would vary in size compared to the foreground. How would you explain your paint strokes? Thank you.
Hi Liz, sorry for my delay. It really depends on what I am painting. Most of the time, in the foreground I will use rough and varied brushwork. My brushwork will become flatter as it goes into the distance. But it changes from painting to painting.
Thanks! Dan
Dear Dan, this is very helpful article. Please do more of such demonstrations as how to paint, start to finish. All your posts are valuable. Thanks so much.
Thank you Reza, glad you are enjoying the articles! Dan
Thank you, Dan.You are wonderful teacher, helping to learn important techniques and steps in process of painting, but also helping to realiz why certain art work making such huge visual effects and impressions on people.
Thank you, l am learning a lot and enjoying your posts .
That is great to hear! Happy to help. Thanks, Dan
Very helpful, Dan. I particularly liked your point of compressing the value range to create more color harmony when painting from photo references taken in broad daylight. That was an “aha!” moment for me.
Hi Dan
I have an allergy to some solvents used in oils and prefer acrylics but a lot of your instructions and examples are in oils. Can the seascapes be painted using acrylics and still have the wow factor of oils.
I have tried but am getting results I am not happy with
It seems to be hit or miss but the feedback is positive and I have sold some pieces but I am not that happy with some of them
Help!!!
Thank you
Hi Rose! I started using acrylics many years ago. I only transferred to oils because of the slower drying times.
Feel free to use acrylics if you prefer. Most of the information is applicable to acrylics.
Thanks!
Dan