
In this post, I walk you step-by-step through my New Zealand Reflections painting.
This was done in oils on a 20×24 inch canvas. For those of you who paint in acrylics or watercolors, many of the fundamental concepts still apply; the main difference between the mediums is the way you apply the paint.
I cover:
- Preliminary Work
- Color Study
- Supplies
- Stain and Sketch
- Dark Trees
- Distant Mountains and Remaining Land
- Water and Reflections
- Sky and Its Reflection
- Rock and Refining the Painting
- Finished Painting
- Key Takeaways
- Want to Learn More?
- Thanks for Reading!

I’ll walk you through the entire process using one of my recent paintings. You’ll see how I go from idea all the way through to reflecting on the finished painting.

Preliminary Work
A lot of the important work happens before I even pick up a brush. Things like:
- Getting in the right mindset;
- Analyzing the reference photo (or subject in life);
- Identifying potential problems and challenges; and
- Visualizing the process and the finished painting.
I will show you what I mean using the reference photo below as an example.

Here are my preliminary thoughts:
- There is a strong sense of contrast in terms of light and shadow.
- The mist sitting on the water is a key feature (I wrote about the mist here).
- The main rock in the foreground blends in with the surrounding shadows.
- The darkest darks are around the trees on the left and right-hand sides.
- The lightest lights are the clouds, their reflections, and the mist.
- On the mountain, there is a relatively hard and straight edge which is created by a cast shadow (see if you can spot it around the bottom of the mountain). In the painting, I exercise my artistic license and exclude this shadow, as it appears awkward and may confuse viewers.
- The snow can be challenging to paint, as it has a local color of white (typically a challenging color to depict), it is in the distance (atmospheric perspective comes into play), and it is in shadow. This area is prone to color illusions.
- There is a sense of clarity and crispness about the landscape. This is something I want to capture in the painting.
Color Study
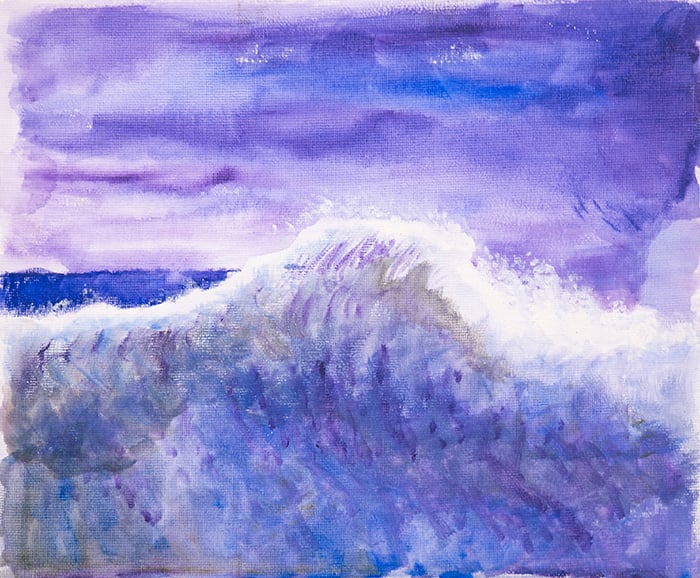
For larger paintings, I like to explore my preliminary thoughts using a small color study. This allows me to get a feel for the scene without committing to something more serious. It also helps me identify any problem areas that I would need to pay more attention to in the main painting.
The idea of these studies is not to create a finely rendered painting-it is all about exploring the major colors, shapes, and design. With that being said, they can end up being quite charming and painterly (you may be pleasantly surprised at what happens when you let down your guard and stop worrying about the finished outcome).
")
Supplies
You can read about the supplies I use here.
The photo below gives you an idea of my studio set up for this painting. From left to right, I have the main painting, the reference photo on my tablet, and the preliminary study. The palette is to the left of the painting (out of the photo).
")
Stain and Sketch
Like most of my paintings, I start by staining the canvas with raw umber, followed by a quick but careful sketch. In this case, I also draw a three-by-three grid over the painting to help with the sketch (I wrote more about the grid drawing process here).
")
")
Dark Trees
From here, my usual process is to loosely block-in the general color shapes, then refine everything. However, it is easy to lose control with this process.
I take a different and more careful approach with this painting-I start and almost finish one section, then move onto the next.
I start with the darkest and most imposing shape in the painting: the group of trees on the right-hand side. It is important that I make this area dark enough, as it will anchor the rest of the painting.
Around the bottom, I add a small hint of light blue to indicate the exposed shoreline. This area is in shadow, so I need to be careful with how light I make this color (you always want your shadows to look like shadows).
")
Distant Mountains and Remaining Land
The next logical step in the painting is to start working on the darks of the distant mountains. These darks appear to blend in with the darks of the trees, forming a subtle link between the two areas.
I work carefully through the shadows, as it is an intricate area and the mountains are a key feature of the painting.
")
I proceed to map out the rest of the shadows, the snow, the light hitting the mountains on the left-hand side, and the other trees.
The snow is the most challenging part. If I get it wrong, it will stand out. I have more room for error with other areas.
I focus on capturing the relationship of the snow color compared to the surrounding colors which are already on the canvas. However, as you can see, only part of the painting is filled with color; the rest is still in the sketch stage. This makes it difficult to accurately judge the snow color, especially given the absence of the sky colors above.
For the group of trees on the left-hand side, there is a complex arrangement of shadows, highlights, rocks, trees, etc. I do my best to simplify this area down to basic shapes and forms, without losing the important details. That sharp contrast between light and dark is also important to capture.
")
Water and Reflections
I take a slightly different approach for the water. With thinned paint, I block-in the major shapes with mostly solid color. I want to capture the sense of stillness in the water, so thick paint and broken color may work against me in this area.
Also, notice how I have done some more work on the sketch on the left-hand side. I feel this is necessary given the complexity of the shapes.
")
Sky and Its Reflection
I leave the sky and its reflection until last. These are important as they are, broadly speaking, the lightest areas in the painting. If I make them too light or too dark, the rest of the painting will look off.
The color I use is a mix of titanium white and cobalt blue. The reflection is a touch darker than the sky itself. I also use slightly different brushwork for the reflection, resulting in softer edges, less detail, and broader strokes.
")
Rock and Refining the Painting
Large rocks like the one in the bottom left-hand corner can be surprisingly challenging to paint, mainly due to the awkward shape and all the different light and dark planes.
This rock is mostly in shadow, but it is picking up some light on the top planes. I start by carefully mapping out the shadows with a dull, dark blue. I then add in the mid-tones which start to lean towards green. There are no highlights in this case.
With the rock painted, the whole canvas is filled with color. I spend some time refining what is on the canvas, but at this stage most of the hard work is complete.
")
")
")
Finished Painting
After refining all the details and adding the mist, I sign the painting in the bottom left-hand corner with a dark blue.
For signing paintings, I look for areas of solid color and flat texture. As for the color, I tend to go with one of the main colors used throughout the painting. Then, I go either lighter or darker than the base color to create some contrast. I want my signature to be clear, but not obtrusive. I also take into consideration the overall balance of the painting when deciding which side of the painting to sign.

Key Takeaways
- Preparation is key! Spend time planning and visualizing the finished painting. This will save you from some of the mistakes and frustrations throughout the actual painting process.
- Do not be afraid to change your approach from time to time. With this painting, I took a more controlled and careful approach than what I usually do.
- Be careful with color illusions and traps. In this painting, the snow presents all kinds of problems for my color perception. It has a local color of white (typically a challenging color to depict), it is in the distance (atmospheric perspective comes into play), and it is in shadow. This makes it very difficult to accurately judge the color of the snow.
- Make sure you match your technique to the subject you are painting. I used different techniques for the land, sky, water, and mist.
Want to Learn More?
You might be interested in my Painting Academy course. I’ll walk you through the time-tested fundamentals of painting. It’s perfect for absolute beginner to intermediate painters.
Thanks for Reading!
I appreciate you taking the time to read this post and I hope you found it helpful. Feel free to share it with friends.
Happy painting!
Dan Scott

Draw Paint Academy


this is AMAZING 🙂
Are there any painting orders which is painted first, second, and last? I tend to paint the sky first and then go down. Is it wrong to do so?
Hi Keiko! Great question. Probably something I should write about. I do provide a bit of detail here on the order when it comes to overlapping objects: https://drawpaintacademy.com/overlapping-objects/
Thank you for sharing so much . I have not painted in years and I needed help getting started! The instant that I got organized and started I felt that calm , peaceful time of years ago. I’m sure this would not have happened with out your paintings and beginning instructions!!!!!
Hi Dan,
I know this is an old post but I love the photo and thought I would give it a try. I’m wondering what oil colors you used. I have most of what you usually use but I wanted to know on this specific painting. Thanks.
Hi Cindy
I believe I used Ultramarine Blue, Colbalt Blue, Cadmium Yellow, Yellow Ochre, Titanium White, Cadmium Red, Raw Umber and Alizarin Crimson.
Dan
HI,
I’ve been playing with a painting that has a similar feel and was really struggling with the reflection portion so this was a great help on how to approach the painting! I do have a more ‘procedural’ question. What would be your suggestion on how to save your colors when a painting takes multiple days? I hate to lose that color that I finally got just right because it will be a few days until I can get back to the painting. (this using oil paints)
Thanks,
Carrie
Hi Dan,
As life would have it I’m extremely busy at present but I look forward to every email and read them with great intensity, getting me ready for when I’ll have a break in my schedule. Reading your posts is truly inspiring and encouraging. If fact, I joined a local sketching course because of what I have leant from you so far. I am going back to basics to get a better grip on how to paint well.
Thanks again. LeeAnne
I don’t know what to say!! many thanks for this. A goal for this year to is build ‘wellness’ into life, due to COVID stress, this is vital. part of this was the thought to pick up the brush and paint some of the beautiful NZ scenes I have as photo’s from various holidays, most recently to Fiordland. Your generous post has come at just the right time to encourage me to push ahead. Appreciate the insight into your ‘before painting’ process as much as the step by step colour tutorial. I will attempt this in watercolour. Blessings on you in 2021!.
It is a beautiful painting and I very much appreciate how you explained this different approach.
Hey!
You really are a wonderful teacher. Loved the step by step.
I really enjoy learning how you recreate this beautiful scenery Dan. Thanks for sharing your tips. If you don’t have one already can you make a YouTube channel teaching us how to paint?
Thanks for your kind words Anthony! I actually prefer the written word. But I do have videos in my courses.
Thanks! Dan
Nice break down of the painting and step by step sequence!
All your posts have been helpful and this step by step approach has clarified for me the process of beginning a painting. Nice to have a system instead of just jumping in with a paintbrush and and trying to make something work. Your help is making it possible to start a painting knowing I can end up with a good result. Thank you for your generosity in sharing your expertise. The world is better for your helping us express ourselves creatively.
Oh my goodness, the first thing I saw was a naked woman ! Is this the artist or the idiot coming out in me? Perhaps I should visit a shrink!
Very interesting and informative article all the same.
Haha thanks Julia! I don’t see it myself? Will look again later today.
Julia, I saw that, too. Personal perspective, let me know what the shrink says.
The left side of the rock seems a little too rounded as though it’s sitting on the water instead of coming up out of the water. Hope you don’t mind me saying so. Would it help to extend and darken on that side?
Thanks Sue! I see what you mean. Doesn’t bother me too much though (not enough to make changes anyway). And I don’t ever mind. Thanks!
Hi Dan,
I am a beginner in acrylic painting, and I would like to do a simple landscape. What do you recommend?
Hi Sarah. I suggest you take a trip to a local park or even hiking trail. That is what I do when I am need of a simple landscape to paint.
The water line almost cuts the painting in half , yet the composition still works . Why us that ?
Hi Tina. To be honest, the horizon line is closer to the middle than I had planned. But not an issue with this painting as the symatry is part of the appeal (the strong mirror reflection). Thanks!
This looks so excellent, Dan. Thank you for sharing such do-able art lessons. Truly appreciated.
Jean
Another good article, full of information, thank you.
I have been sharing your emails with some art students at the Continuing Ed. class at Rose State
College. We, retired ladies and have so much to learn and you help us through it.
Thank you.
Thanks Patricia – feel free to share!
Hi Dan love the posts
Do you let the stain dry before painting?
Hi Jacki – sure do. Usually takes about 20 minutes. Thanks!
Dan
Hi Dan. This is such a wonderful generous post you have shared… and I just love the subject.
I learn so much from you. You are truly gifted with talent but more so with wanting to share your knowledge where others don’t means more than you may or may not realise. I’m one grateful Nana.
Thanks a million.
I understand that the painting is done in oils. What about watercolours? I love the photo. It reminded me of my last trip to New Zealand.
Dan,
Not only are you a terrific artist, in addition you are a marvelous teacher!
Thanks for your valuable – and very interesting – lessons.
Cheers,
David
It looks like you started with the color yellow over and number. Why did you use these colors for the first coat
Hi Norma. It is actually raw umber, but it looks like yellow because the white canvas is showing through. I use raw umber because it is a low-saturation color which forms a solid foundation. It is also easy to judge other colors against.
Thanks!
Dan
You really are a wonderful teacher. Loved the step by step.
Very generous of you to share this…..a very helpful guide!!
Thank you … ( I do continually follow you and save your postings)
Also provide video to observe different steps in painting.
This is such a helpful post and I feel reasonably confident that, as a beginner to watercolour, I can at least follow the process and learn from it. thanks very much Dan.
I understand that the painting is done in oils. What about watercolours? I love the photo. It reminded me of my last trip to New Zealand.
Hi there! Many of the fundamental concepts still apply for watercolors; the main difference between the mediums is the way you apply the paint. Feel free to try and paint it for yourself. Would be interesting to see a watercolor interpretation.
Thanks!
Dan
Oh my goodness this New Zeland painting explanation is the BEST for me. Thank you so very much. I’ve learned so much. Awesome.
A beautiful piece of work. Thank you so much for explaining the process. I learn so much from the posts.