
The palette knife is not just a tool for mixing paint on your palette. You can actually use the palette knife to create some pretty stunning effects in your paintings which are not possible with a brush. Some artists ignore the brush completely in favor of the palette knife.
This is a detailed guide to help you get the most out of your palette knife for your paintings.
- The Pros And Cons Of The Palette Knife
- What To Look For In A Palette Knife
- Palette Knife Techniques
- Common Uses Of The Palette Knife
- Artists Who Use The Palette Knife
- Creating Harmony Between Your Palette Knife And Brush
- General Palette Knife Painting Tips
- Palette Knife Demonstrations
- Want to Learn More?
- Thanks for Reading!
I’ll walk you through the entire process using one of my recent paintings. You’ll see how I go from idea all the way through to reflecting on the finished painting.

The Pros And Cons Of The Palette Knife

Here are some of the pros and cons of using a palette knife for painting:
Pros:
- It is so easy to clean a palette knife. You literally just need one wipe with a cloth or paper towel and all the paint is gone. This is a huge advantage over brushes, which require much more care.
- It can be cheap, depending on the quality of the palette knife.
- It is great for building up a thick texture and creating a broken color effect.
- You can use the edge of the palette knife to create sharp lines.
- The bold strokes created by the palette knife can complement the more delicate strokes created by the brush.
- You can paint on top of wet layers without having to worry about the paint blending (like it does with your brush).
Cons:
- You are not able to paint with as much accuracy using a palette knife.
- It is not as versatile as a brush.
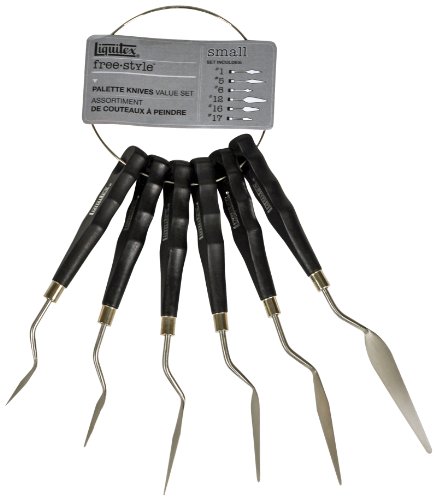
What To Look For In A Palette Knife
Below is what I look for in a palette knife:
- A flexible but sturdy blade.
- A comfortable handle.
- A long, straight edge.
You do not need any unusual shapes. Just a standard-shaped palette knife in a few different sizes is more than enough.
High-quality palette knives crafted with stainless blades and ergonomically designed handles.
Palette Knife Techniques

Thin lines
You can use the palette knife to create thin, usually broken lines which can look very natural in a painting. All you need to do is load the edge of the palette knife with a thin amount of paint and then dab the edge on the canvas. Just make sure the paint is evenly spread across the edge of the knife. Also, you will usually only get one line per stroke, so you will need to keep reloading your palette knife between strokes.
Dragging one color into another
The palette knife can be fantastic for blending edges by dragging one color into another. What you are left with is a very rough and scattered edge. If you were to do this with a brush, you would get a much softer edge.
Scraping away paint to fix errors or add details
This is where the palette knife really shines. You can quickly scrape away paint from the canvas to clear an area where you went wrong.
You can also use the palette knife to scrape details into your painting. For example, you could scrape away a thin line of paint to imitate a tree branch. When doing this, you just need to be aware of what color will be exposed in the underpainting. Staining the canvas comes in handy here as you will get some nice earthy color exposed rather than just the glaring white of the bare canvas.
Multi-colored palette knife strokes
This is one of my favorite techniques. Just take a few different colors and mix them together but not that well. Then take your palette knife and create a thick stroke of broken color.
Scumbling over an underpainting
I usually prefer a brush for scumbling over an underpainting as I feel it gives me more control, however, you can use the palette knife for this also. You can get some very interesting results by doing this with a palette knife.
What this involves is dragging paint very loosely over an underpainting so that the paint breaks off onto the canvas. This can be useful for adding variance to water or grass.
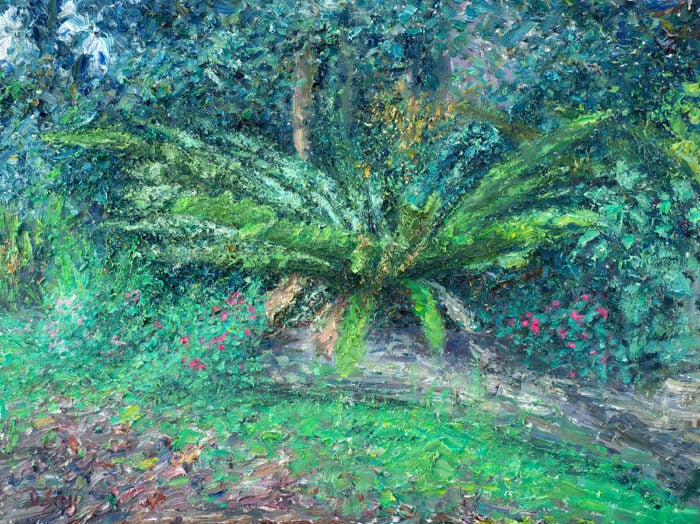
Dabbing small bursts of color
This technique involves loading the tip of the knife in thick paint (usually some kind of vivid color) and then dabbing it onto the painting. I use this technique in the later stages of a painting when I want to add a few small bursts of color.
Below is a close-up of one of my paintings which demonstrates this technique. Notice the small bursts of vivid reds, blues, and yellows on top of a dull foundation. This is great for creating a sense of activity without actually having to render all the details.

Broken color
Because the palette knife allows you to paint layer on layer without having the paint blend together, you can achieve some beautiful broken color effects, which are not possible with a brush. The Russian impressionists take advantage of this in many of their paintings. The result is a vibrant display of color that almost seems to vibrate.
Common Uses Of The Palette Knife
Here are some of the ways I use the palette knife in my paintings:
- To paint the highlights on rocks.
- To paint snow on a mountain.
- To build up texture in the foreground to imitate the grass, rocks, and other nature.
- To paint the leaves or bark on a tree.
- To quickly cover the canvas with paint.
- To paint lines for fences, tree branches, or sharp edges.
- And, of course, I use the palette knife to mix colors on my palette and also to clean up space on my palette if things start to get out of control.

Artists Who Use The Palette Knife
The palette knife seems to be gaining popularity as artists realize its benefits. Here are some artists who make skillful use of the palette knife in their paintings:
- Tibor Nagy
- Brent Cotton
- Bato Dugarzhapov (featured in my Exploring the Masters series)
- Daniil Volkov
- Richard Schmid (particularly in his flower paintings)

Creating Harmony Between Your Palette Knife And Brush
I think the palette knife is best used in combination with a brush. You can get some beautiful contrasting effects by using both in your paintings.
However, you don’t want too much contrast. You want all the elements in your painting to work together, so make sure your palette knife work is somewhat in harmony with your brushwork.
A technique I frequently use is to soften the edges of any palette knife strokes with my brush or run my palette knife over visible brushwork. This can create a subtle connection between the palette knife work and brushwork.
You should also make sure there is dominance on palette knife work or brushwork. You probably shouldn’t use both equally throughout your painting as it may look slightly confusing.
If I use mostly palette knife work in my painting, I could incorporate small areas of visible brushwork to break things up. On the other hand, if I mostly use brushwork, I could break things up with small areas of thick palette knife strokes.
Just remember that you need all the elements in your painting to work well together. There is no point in having some beautiful strokes of color in your painting from a palette knife if they do not fit with the rest of the painting.
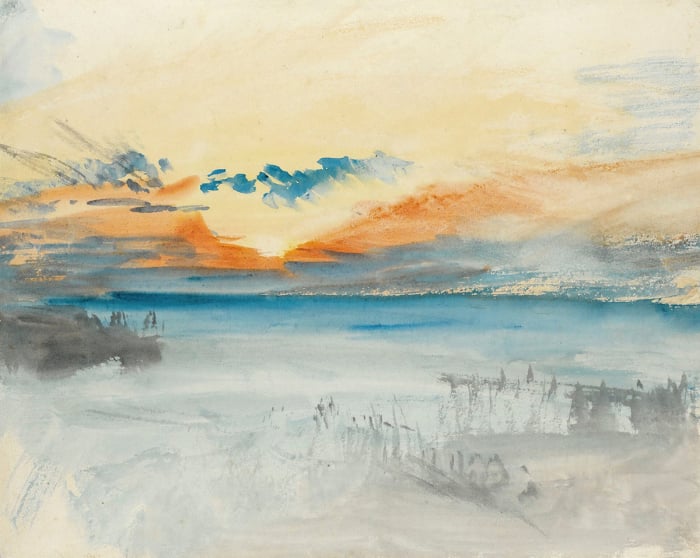
My painting below is a demonstration of both palette knife work and brushwork. I used the palette knife to build up that thick texture on the canvas, particularly for the sun. I used the brush to add some of the finer details.

General Palette Knife Painting Tips
Here are some general palette knife painting tips:
- Make sure to clean your palette knife after you have finished. If you forget, the paint will dry and your palette knife will be almost worthless (as it will have a rough edge). You might be able to save your palette knife by scraping the dried paint away with a razer, but sometimes this is just not worth the hassle.
- Don’t get too regular with your palette knife strokes. Try to mix things up in terms of stroke length, color or texture.
- You don’t need all the unusual palette knife shapes. You just need a few sizes of standard-shaped palette knives.
- The palette knife can scrape away paint just as easily as it can apply paint.
- The palette knife comes at the sacrifice of accuracy and intricate brushwork, so try to make up for it with stunning use of color.
- The palette knife is great for sharp shifts in color. For example, if you want to indicate some sunlight peering through a dark cluster of trees, the palette knife would be great for this.
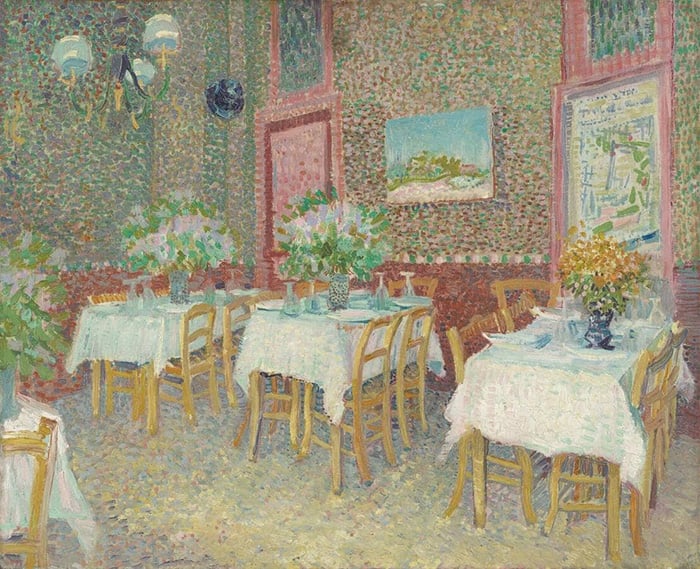
Palette Knife Demonstrations
Here are some painting demonstrations featuring the palette knife:
O’Reilly’s Sunset

Magenta Flowers, Brisbane

New Zealand, Stroll in the Park

Gold Coast, Path to the Sea

Manly Rock Wall, Moody

Want to Learn More?
You might be interested in my Painting Academy course. I’ll walk you through the time-tested fundamentals of painting. It’s perfect for absolute beginner to intermediate painters.
Thanks for Reading!
I appreciate you taking the time to read this post and I hope you found it helpful. Feel free to share it with friends.
Happy painting!
Dan Scott

Draw Paint Academy


Dan,
If I am going to paint in acrylics, do I need to use a palette knife? Would I use the Ampersand Gessobond with acrylics or something else?
Hi Dan
I believe I already emailed you directly about this 🙂
Chontele
Dan I find your information on art techniques very helpful and you are my go-to when I need to learn something new.
You are so generous with your sharing of information, as a senior this is so appreciated.
A fellow Queenslander at Cleveland.
Thank you
Laurel
Just took a class and you explained a lot more (and better) than the teacher we had. I’m used to a brush and acrylic paint and the class used a palette knife and oils so it was very different but I will add a palette knife to my tools.
nicely explained will surely try knife painting soon seems very pleasing
Very helpful but you haven’t pointed out the difference between a pallet knife and a painting knife.
You are talking about painting knives, they have a stepped handle which keeps hands clear of the paint.
it helped me alot, thanks
Could you comment on best surfaces for knife painting?
Was very helpful to me as I have recently started using the palette knife it’s a great tool I feel so comfortable and natural using it has improved my art so much
Thanks for the tips
I don’t need palette knives for watercolours, right? BTW, thanks a lot. Your articles help me a lot in painting.
Good helpful tips Dan. Thank you. Just got some palette knives and can’t wait to get started.
Hey there! I enjoyed reading this post and the way you educate us is fantastic. I had also learned Knife Painting On Chopping Board from the best courses of Penkraft’s Knife Painting. The best thing about this course is they not only provide Art Kits but, also they’re very good at teaching the art courses.
Here is the website where you can see more details – https://diy.penkraft.in/
Thx this actually told me a lot about pallets knife painting I had no idea what it was at all until now
A beginner.Trying out the pallet knife,thanks greatly for your tips.Very valuable information.
First time I knew these details about Mountain painting. thanks . Rajan. India.
No problem Rajan! Dan
Thank you!
I love your way of teaching. I use the palette knife a lot.
Thanks Gunvor! Glad to hear. Dan
Thank you Dan. Love reading about the use is palette knives. Hard to find articles that I can incorporate quickly. Information is direct and to the point. I don’t read many articles to the end but I do read yours. Short to the point and full of good information
Really good overview, thanks, Dan! I started with palette knives long ago, switched to brushes after a short while, and have recently just really wanted to get back to playing with paint with palette knives again; much appreciate the links, esp to videos – thanks!
Adan
You forgot to mention how frustrating they can be! Seriously good tips thanks!
I learn a lot from your informative and generous tips. Thanks a million. I live in India so signing up for the courses is difficult for me, my paintings are just hobby ideas. Art helps me de-stress, as I’m a full time carer for my disabled brother. I gift my art to friends. ☺️
This is was useful for me. Thanks a lot.
Reza
Very interested and helpful tutorials for my paintings. Thanks a lot!
No problem Michelle! Dan
Roxer Videl has some great tutorials on you tube
Informative,esp. for people like me who are self -taught.
Ia interested in abstact palette knife painting any artist tutorial also in pouring medium. Thanks