
I started landscape painting as a child and have been captivated by it ever since. I feel like I have hardly even scratched the surface. The following is a comprehensive guide for those looking to join me on the landscape painting journey. It’s aimed at beginners, but intermediate painters may also find some value.
- Step 1: Get Your Supplies and Equipment in Order
- Step 2: Find a Subject to Paint
- Step 3: Planning and Strategy
- Step 4: Paint the Subject
- Step 5: Reflect on Your Work
- Step 6: Move On to the Next Painting!
- Next Steps
- Thanks for Reading!
Step 1: Get Your Supplies and Equipment in Order
Your first step is to get your supplies and equipment in order. You don’t need anything specific for landscape painting. Your usual paints, brushes, and painting surface will do. Just make sure you have at least a white, red, blue, yellow, and an earth tone (such as raw umber or burnt sienna). A good starter palette is titanium white, cadmium red, ultramarine blue, cadmium yellow, and raw umber. You could also add a black to your palette, like ivory black, but it’s optional as you can mix a near-black color with ultramarine plus raw umber.
Below are some additional details about what I use and some broad suggestions. Keep in mind, I don’t believe in providing you with a strict supply list that you must follow. I prefer that you find what works for you. There are so many ways you can approach art and I don’t want to be a limiting factor for you.
Paints
My preferred brands are Langridge and Winsor & Newton (artist quality). My most frequently used colors are:
- Titanium White
- Raw Umber
- Ultramarine Blue
- Cobalt Blue
- Viridian Green
- Magenta
- Permanent Alizarin Crimson (a touch warmer than magenta)
- Cadmium Red
- Cadmium Orange
- Yellow Ochre
- Cadmium Yellow
- Cadmium Yellow Light
Brushes
I use the following brushes by Rosemary and Co:
- Ultimate Bristle Filbert and Flat (Various Sizes)
- Hog Bristle Filbert and Flat (Various Sizes)
- Pure Kolinsky Pointed (Size 2)
Most of my landscape paintings are done with two or three flat and filbert brushes. I vary my strokes by changing my grip, pressure, and direction rather than changing the brush.
Palette Knives
I don’t have a preferred brand. Any good-quality palette knife will do. Find one that feels good and balanced in your hand and has a flexible and responsive blade.
Easel
I currently have two studio easels:
- H-Frame Easel: My primary easel for medium to large paintings; and
- French Easel: For smaller paintings.
Palette
My main palette is a glass palette by New Wave Art Supplies. I also use the toned wooden palette from time to time, as it has less glare for filming purposes.
Solvents
I use odorless solvent by Art Spectrum or Gamblin for thinning paint, cleaning, and keeping brushes wet between sessions. I typically start a painting with oil paint plus a liberal amount of solvent. Then, I transition to undiluted paint straight from the tube.
Painting Surface
I use professional-quality stretched canvas by Winsor and Newton and Ampersand Gessobord. Gessobord is my preferred surface, particularly for plein air painting.
Other Accessories
- Paper Towel (for cleaning up and wiping my brush or knife between strokes)
- iPad and Tablet Holder (for viewing reference photos)
- Cups and Containers (for holding solvents and mediums)
- Old Painting Clothes
- Neewer Studio Lights (adjustable studio lighting)
My Plein Air Setup
For plein air (outdoor) painting, I use:
- A limited color palette. Usually just cadmium red, ultramarine blue, cadmium yellow, raw umber, and titanium white.
- Ampersand Gessobord, usually 5 by 7 inches.
- New Wave pochade box secured to a camera stand.
- Guerrilla Painter carry box.
- A few versatile brushes and palette knives.
- Odorless solvent.
- Paper towel or an old rag.
- A rubbish bag to clean up at the end of the session and keep the landscape as I found it.

Different Mediums
I use oils, but you could use watercolors, gouache, acrylics, pastels, or any other traditional medium. Your supplies and equipment will vary slightly from medium to medium. For example, watercolorists use paper, whereas oil and acrylic painters typically use canvas. I won’t go into exact details on what you’ll need for each medium as there’s too much to cover. If you’re unsure, your local art supply store should be able to get you set up with a starter kit. You can then add/subtract from there.
Color Palette
Some artists like to use a brighter color palette for landscape painting compared to portrait or still life painting. That’s because painting the landscape generally involves more light and color. But this comes down to personal preference. You are fine to use the same color palette as you do with other genres.
Rough Versus Smooth Surface
Given the nature of landscape painting, it can be effective to paint on a slightly textured surface. The texture could play into the idea of leaves, grass, dirt, etc. With portrait painting, you typically want to paint on a smooth and even surface, as rough texture or irregularities could work against you (you want more control for portraits).
Step 2: Find a Subject to Paint
It’s time to find a subject to paint. This is an important topic that doesn’t get enough attention. Most of my “painting” time is spent searching for inspiration and interesting subjects to paint.
When looking for a new subject to paint, see the world as an arrangement of basic elements rather than as representational things and objects. That is, instead of seeing a tree as a tree, see it as an interesting arrangement of shapes, forms, lines, and colors. Seeing the world in this way makes everything a potential subject.
For those new to landscape painting, I recommend starting with simple and balanced compositions that are visually appealing. As you become more experienced, you can gradually tackle more complex subjects.
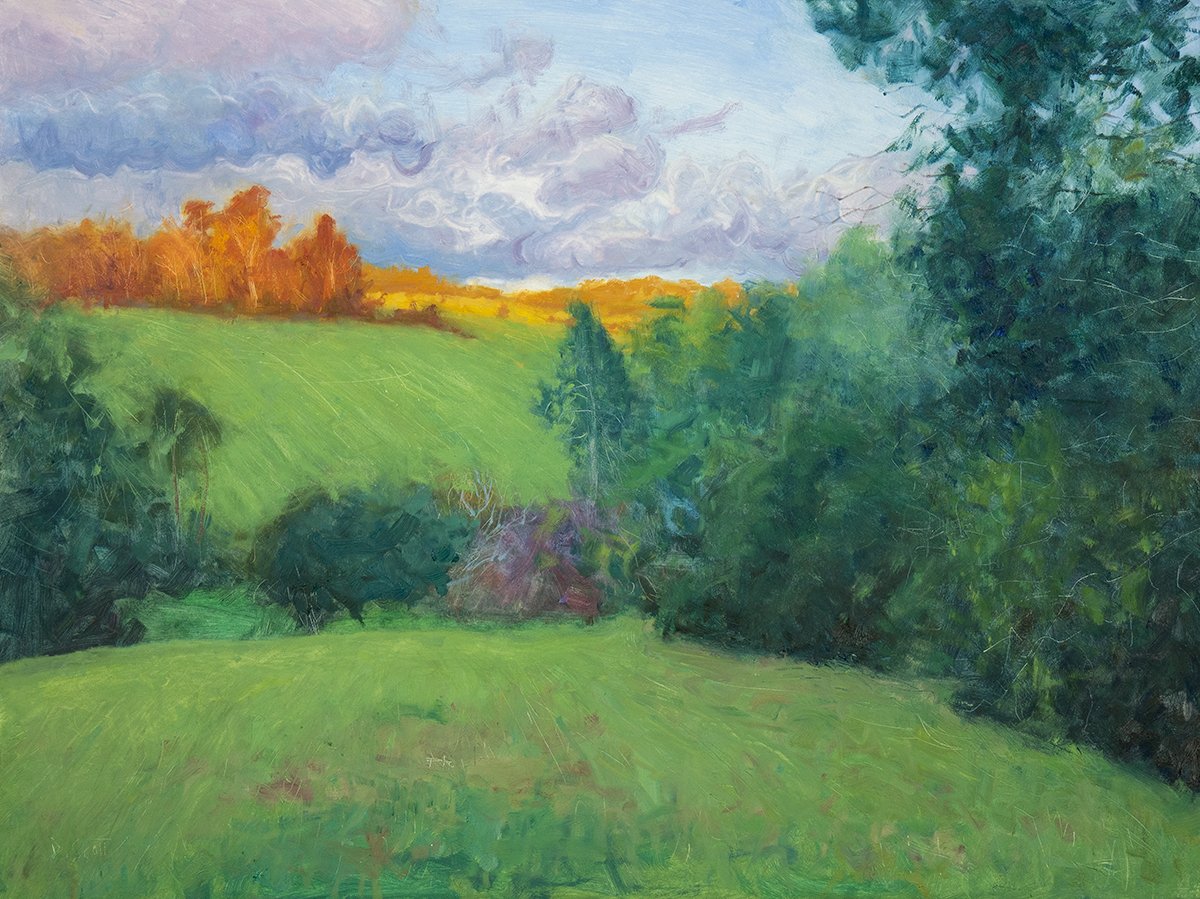
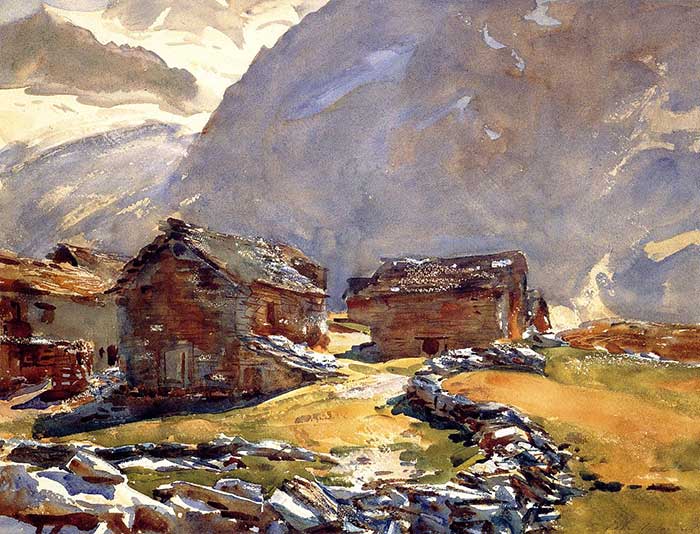
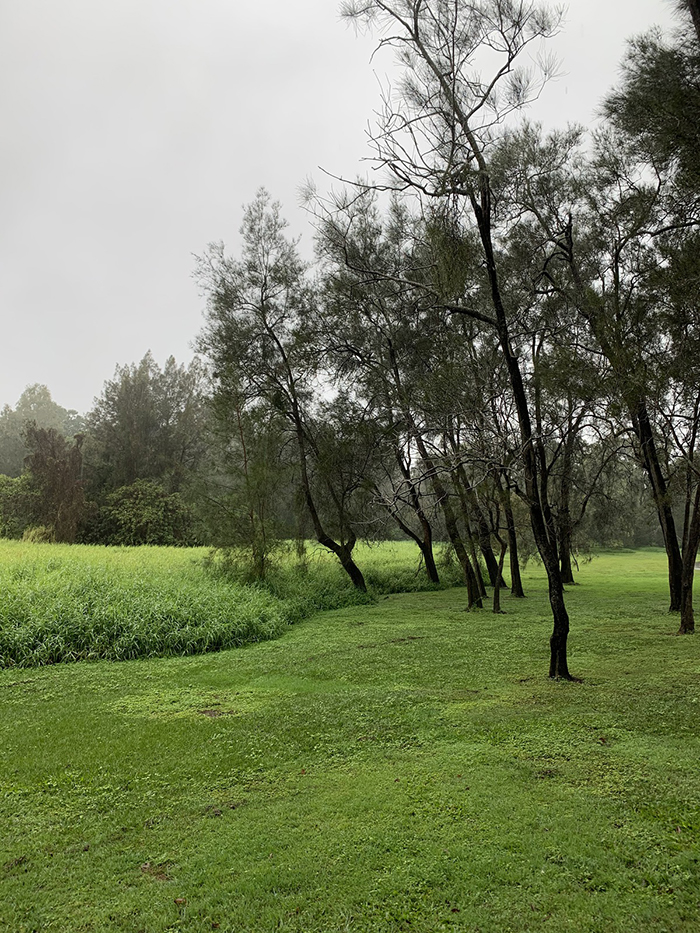
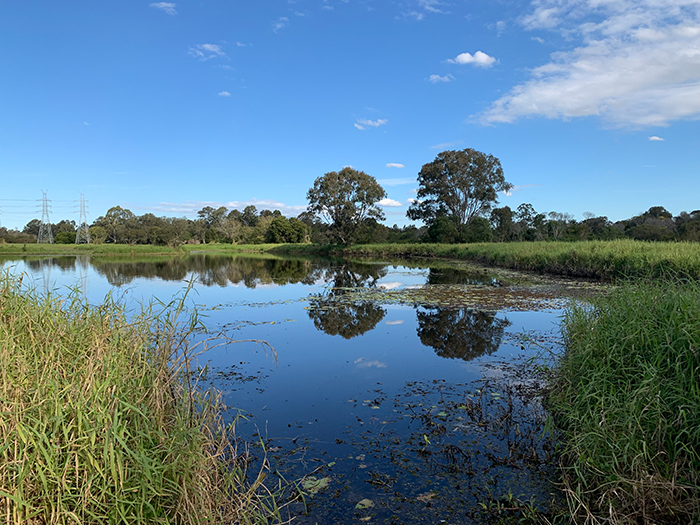
Below are a few examples of simple landscapes to paint that follow the popular composition “rules”:

I suggest you paint from reference photos when starting out. Ideally, they will be your own photos, as finding and seeing the subject in life is an important part of the process. But it’s okay to paint from someone else’s reference photos, provided you have permission. (You can get access to my entire reference photo library here if interested.)
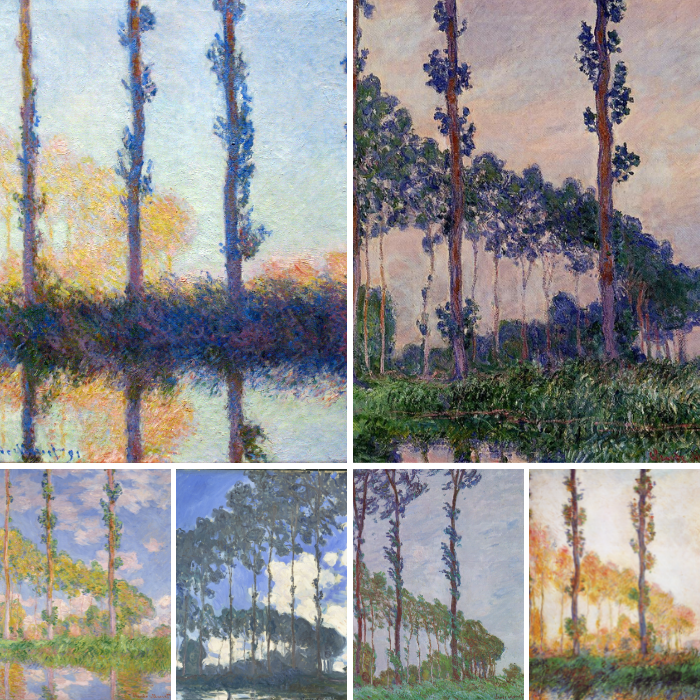
Painting plein air is great but it’s a logistical challenge. I suggest you get comfortable painting from reference photos before you venture outdoors with your paints and brushes. But this is just for beginners. If you’re more experienced, getting some plein air painting under your belt will do you good. It’s the most honest and exciting way to paint, if you can handle its challenges. As Claude Monet once said:
“I have never had a studio, and I do not understand shutting oneself up in a room. To draw, yes; to paint, no.” (Source)
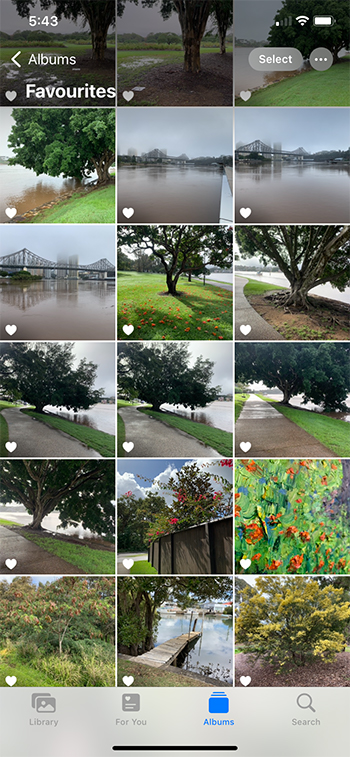
When I want to start a new painting, the first thing I typically do is look through the photos on my phone. This is my inspiration hub, which stores many years’ worth of ideas. I also have a “favorites” album with photos I have shortlisted as having potential (see image below). I suggest you start building your own inspiration hub that you can turn to whenever you need a new subject to paint. This could be a photo library, sketchbook, or even a journal. Anything to capture and store your ideas before they fade.
I look for photos backed by a strong idea and through which I can see a finished painting. If I don’t see a finished painting at the end of the line, I don’t paint it—simple as that.
The photo doesn’t need to be “good” by photography standards. You won’t be judged on the photo, only on the painting. The photo’s core purpose is to provide a rough guide and, most importantly, to remind you of your first impressions and ideas of the subject. Those first impressions are gold and should form the foundation of your painting.
I prefer to paint from recent photos while my memory of the subject is fresh. As time passes, my memory fades and I’m forced to rely more on the photo and less on my first impressions and experiences. This typically leads to a painting that’s less inspired and honest.
Note: Photos do not replace observation. They merely complement it. Photos are flawed in that they don’t capture how you see and experience the world. A photo cannot capture the wind, rain, movement, feelings, what happened before and after, or what’s happening outside the photo. It’s just a snapshot in time. Part of our job as artists is to capture all this other stuff. That’s what makes our work unique.
Step 3: Planning and Strategy
Once you have a subject to paint, it’s time for the planning and strategy stage. This will allow you to start the painting with momentum and a plan of attack. It will also make the painting process smoother, with fewer mistakes, and a better end result.
What this stage looks like in practice will vary from painting to painting. It might be a brief visualization before you pick up a brush. Or it might be something more detailed and structured for more complex subjects.
Below are some of the things you can do in the planning and strategy stage:
Adjust the Dimensions if Necessary
Can you adjust the dimensions of the reference photo to make the composition more appealing? By cropping certain parts, you can reposition the focal point, alter the sense of balance and space, or exclude parts that don’t add anything to the composition.
Grid
For complex subjects, you could apply a three-by-three grid to the reference photo and your painting surface to assist with your drawing (you can use our free grid and grayscale tool for this).

Grayscale
Take a look at the value structure. You’re interested in relationships rather than individual values. That is, how light or dark is one color in relation to the surrounding colors. Or how light the sky is compared to the land. Or how dark the shadows are compared to the mid-tones. Also, take note of the general balance of light and dark shapes.
Special Supplies and Equipment
Does the subject require any special supplies and equipment? For example, I often add naples yellow to my palette when painting ambient sunrises or sunsets (inspired by Joseph Turner, who was particularly fond of that color). I could mix it myself with my usual color palette, but it’s convenient to have it there on the palette.

Overall Strategy, Challenges, and Opportunities
Before you pick up a brush, look at the photo and try to visualize the painting process. What path will you take? What challenges will you encounter? What opportunities will there be to demonstrate your skills and showcase the subject? What techniques will you use? Can you visualize all the way through to the finished painting?
A word of warning: Don’t get stuck here. Planning and strategy are important, but they shouldn’t get in the way of action. If you find yourself stuck, just start painting and see how it goes.
Step 4: Paint the Subject
Time for the fun part—painting the subject.
You should paint the subject in a way that’s honest and conveys your ideas. It’s not about copying the subject pixel by pixel.
Remind yourself of your first impressions of the subject and try to carry those ideas through to the finished painting. As you paint, you may stray from your first impressions of the subject, but try to bring yourself back to them if you can.
There’s no perfect step-by-step process for you to follow. Every painting is unique and should be approached with fresh eyes and an open mind. However, the following a good and reliable process that you can start with. I’ll use one of my recent paintings to illustrate my points.
1. Stain the Surface
This kills the white and provides a more balanced surface to paint on, making it easier to judge your colors. The color doesn’t matter too much. I usually go with an earth tone, such as transparent oxide red. I go into more detail in this video.

2. Initial Sketch
The initial sketch helps you establish where all the major shapes and lines will be. The more complex the subject, the more detailed you should be. And remember, small mistakes here can compound into critical mistakes later in the painting. So be accurate with the key details.

3. Color Block-In
Paint in the major shapes and colors. Be simple in your approach and don’t focus on the tiny details, highlights, or dark accents—you can paint them in later. The end result should be a no-frills version of the subject.

4. Refine and Detail
Now it’s time to add the tiny details. Small brushes are more welcome here. Make sure all the parts work together as a whole. It doesn’t matter if you paint the perfect tree or mountain if it doesn’t fit with the rest of the painting. The painting as a whole is all that matters.


5. Sign the Painting Complete
When there are no more strokes to be made, mark the painting complete with your signature. I typically use magenta for this, but it comes down to personal preference. I also try to position my signature on a side that balances well with the rest of the painting. For example, if most of the activity is happening on the right side, I’ll sign on the left side.

Here’s how this painting turned out:

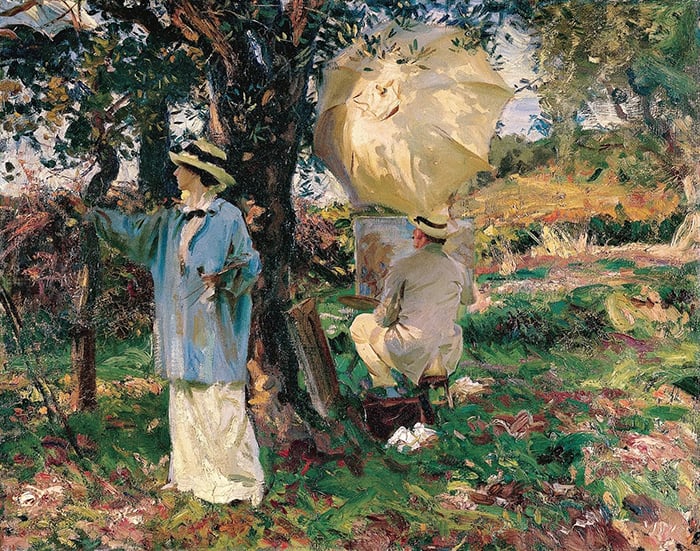
When Is the Painting Finished?
“An artist painting a picture should have at his side a man with a club to hit him over the head when the picture is finished.” – John Singer Sargent
The tricky part about finishing a painting is, if you finish too soon, your work may appear incomplete; if you finish too late, you risk muddying and overworking the painting. I generally call a painting finished once I’m confident that my next stroke will not add any value to the painting, and everything just seems to work together.
I’ll also share some advice that was sent in by a Draw Paint Academy student, Wanda:
“Hi Dan,
Here is a helpful tip regarding this problem of not knowing what else to do on a painting or other piece of art… Put your piece up on a wall or propped up in your home somewhere where you will see it often and leave it alone for a while. As time goes on and you wait with your painting, it will “tell you what it needs” and then finishing becomes a little less difficult – either you will settle on it as is or you will know what needs changing or adding.
Wanda”
Step 5: Reflect on Your Work
Once you finish a painting, briefly reflect on how it went. This will help you improve with each painting rather than stagnate. You can use the following three questions:
Am I happy with the painting?
This is a high-level question that summarizes your general thoughts about the painting. The answer is typically a straightforward “yes”, “no”, or “it’s alright”.
What went well?
Consider what stands out in the painting or aspects that turned out well during the process. This might include effective use of technique, successfully solving a difficult problem, correcting a mistake, or creatively conveying the subject.
What could be improved?
Even the best paintings have areas that could be refined. The challenge is identifying those weaker aspects accurately. If you’re new to painting, this can be difficult—you might sense that something is off but struggle to pinpoint the exact issue. However, it’s important to try. Start by looking at broad categories, then narrow down the specifics.
(Bonus download: Artwork Self-Critique Worksheet.)
For this process to be effective, you must remove any sense of ego. Don’t be arrogant or humble. Just say it as it is. Be objective. If you’re struggling with this, pretend another artist did your painting and take yourself out of the equation.
Also, be careful about comparing yourself to others. I mostly reflect on my work in relation to my previous work. I’m not looking to create the best painting in the world; I just want this painting to be a bit better than the last.
Step 6: Move On to the Next Painting!
Some artists like to tinker and adjust the painting for months or even years. But I prefer to just move on to the next one. Otherwise, you might get stuck in an endless loop of unfinished paintings.
If you made a mistake or are unsatisfied with your painting, don’t worry, there’s always the next one!
Next Steps
If you found this post helpful, here are your next steps:
- Sign up for the newsletter. This is where I share new landscape painting tips and insights.
- Take the free Painting the Landscape workshop. I’ll walk you through the entire process of creating one of my landscape paintings.
- Enroll in the Landscape Painting Masterclass. This is a deep dive on landscape painting and how to capture nature’s beauty on a flat surface.

Thanks for Reading!
I appreciate you taking the time to read this post and I hope you found it helpful. Feel free to share it with friends.
Happy painting!

Dan Scott
Draw Paint Academy


This is a fantastic overview of landscape painting — both insightful and motivating for artists at any level. I especially appreciate the emphasis on capturing mood and atmosphere rather than just copying nature. At https://www.pastelbrush.com, we also celebrate this expressive side of landscape art through curated works that evoke emotion and connection. Thanks for sharing such valuable guidance!
Thank you! Very Useful.
Ana
Great comprehensive list from beginning to end! Always good to read through for a refresher again. Thank you, Dan, for all of your insight and knowledge that you share!
Very informative instruction
Blessings always, Dan, I love what you do! Always motivating and inspiring. Thank you so much and happy painting.
Keep up the good work. Much appreciated.
Thank you so much, I normally paint with acrylic but have been wanting to try oil for some time now . Went out got my oil paints brushes etc. I thank you so much not only for teaching me, but it also helps me at least, for you to share the process with photos , such as palette. Paints, etc on your deck. It makes it more realistic for me. I’ve always admired famous artists from years ago but we of course didn’t get the inside into what how . So I appreciate this and you so very much and you give me the confidence that I could do it and it’s ok if I make mistakes. So thank you for all that you do and also your wife .😊
What a great reminder of what to do and not to do. Thank you.
Catherine.
Many thanks, Dan, so helpful, as ever. Practical and thoughtful, the best combination!
Best wishes
Shelagh
Excellent! Thanks!
Thank you for your guide. When you listed supplies, it would be a tad more helpful to show the brushes and maybe an image of what they can do. I get confused on which brushes to use for what effect. Thank you. I enjoy your postings.
I really like your attention to detail on what you do while at the same time leaving “space” for each artist to do those things which have worked for each individual student during their own journey of painting. As an amazingly gifted professional advised me during my journey as a classically-trained tenor performing sole recitals, “love the process.” You provide an excellent map for how a painter can embrace your process, while at the same time, developing one’s unique technique and style. Thank you very much!
Thanks so much for such a comprehensive guide.
I’m an acrylic artist but the guide works regardless.
Enjoy your continuing journey and sharing with we beginners who appreciate your guidance
Colleen