The sad reality of painting is that you will make mistakes, especially if you are just starting out. Things rarely go as planned. The drawing might look slightly awkward, the colors might not work together or you might have just made one too many strokes.
In this post, I want to discuss how you can deal with making a mistake in your painting. But before I get into it, I will say that mistakes are certainly not limited to beginners. You will always make mistakes, no matter what your skill level is. However, the difference between a master artist and a beginner artist is that the master will be able to quickly and efficiently resolve mistakes. So try not to get frustrated by mistakes. They are just part of the game.
So let’s get into it. I cover:
- Work Out What The Problem Is
- Problem Solving Tips
- Can You Fix The Problem?
- Option 1: Keep Adjusting Until You Are Happy
- Option 2: Get Out Your Palette Knife
- Option 3: Cut Your Losses, Wipe Down And Start Over
- Want to Learn More?
- Thanks for Reading!

Above is a recent painting, before it all went wrong…
Work Out What The Problem Is
If you think you made a mistake in your painting, the first thing you should do is stop working and identify the problem. You do not want to try and guess your way to a solution. That would often just lead to an overworked mess on the canvas.
If you can identify the problem, then you will have a much greater chance of resolving the problem. In painting, there are few mistakes that cannot be fixed if you identify them early. But you do not have unlimited attempts at fixing a problem. Eventually, your paint on the canvas will get overworked and will not be pleasant to work with. That is why it is important to work efficiently when you are trying to solve a problem in your painting. Trial and error is not a great approach.
When you make a mistake, it is often not clear what the mistake actually is. You will notice that it just looks wrong, but you will not understand why. So, that is why you need to go into problem-solving mode when you think you have made a mistake.
Here are some of the most common areas where mistakes occur:
- Your drawing is wrong. This is probably the most common mistake.
- Your values are wrong. This can be a tricky problem to identify, as you might have the right hue but the color is too dark or light.
- Your edges are wrong. With edges, you have hard, soft and lost edges (I wrote about edges in this post). Edges provide a lot of information about a subject, but if you use the wrong edges, then that may look awkward and confusing. For example, a hard edge may look out of place when used for the horizon line in an overcast seascape painting.
- You have not painted in accordance with the light source.
- Your colors are wrong. Color (or more specifically, hue) is the last and least important on this list, as it does not actually provide that much information about a subject. But it is still a common area to make mistakes.
More often than not your problem will sit in one of the areas above. If you can narrow your problem down to one of these areas, then you just need to continue narrowing down until you are very confident in what the issue is.
Problem Solving Tips
Here are some practical tips for problem-solving.
Grids
If you think there is an accuracy issue with your drawing, you can place a grid on a photo of your painting and the reference photo to identify any discrepancies and where those discrepancies occur.
Side-by-side photo comparison
If I feel like something is off in my painting, I will sometimes take a photo of it and compare it side-by-side to the reference photo. You can use a website like Canva to do this.


Color checking
You can use a color checker in Photoshop or some other editing program to compare the colors in your painting and the colors of your reference photo. However, I would only do this if there is a serious concern about the colors. You do not want to start relying on editing software.

(Additional reading: The Cliffs Of Étretat Through The Eyes Of Different Artists)
Thumbnails
When you look at a full-sized image, you are exposed to all the details, no matter how insignificant. As a result, you tend to overlook the “big picture” stuff like color harmony and composition. As the old saying goes….
“It can be difficult to see the forest through the trees.”
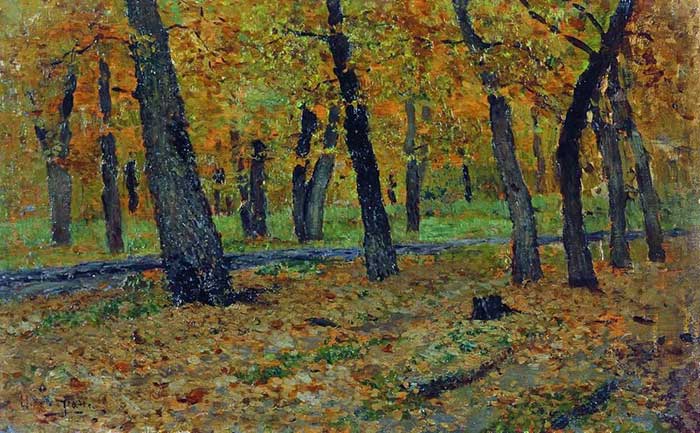
Thumbnail images are a great tool for seeing your painting without all the detail.
After I have finished a painting, I will often compare a thumbnail image of the painting to a thumbnail image of the reference to see if there are any glaring differences in composition and color. The thumbnail images reveal the “big picture” issues which I may not be able to see with the full-sized images.

Look at the painting in grayscale
If you take a photo of your painting and convert it to grayscale, you can easily see if there are any glaring issues in terms of value.


Can You Fix The Problem?
Once you have identified that a problem exists and what the problem is, then you need to determine if the problem can be fixed. Unfortunately, not all problems can be fixed. Some mistakes are so fundamental that it would be futile to try and work through them. These kinds of mistakes usually occur early and are not picked up until the later stages of a painting.
What mistakes can be fixed?
- Mistakes which you have only recently made in the painting can usually be fixed pretty easily.
- Mistakes which involve minor aspects of the painting. In fact, these mistakes can often be left unchanged if they have little impact on the overall painting.
- Mistakes regarding colors and edges can be fixed easily if working alla prima.
What mistakes cannot be fixed?
- Mistakes which occurred early in the painting process and involve a fundamental aspect of the painting.
- Mistakes which involve the overall composition and color harmony of the painting. These mistakes usually occur before you have even picked up your brush, during the planning and subject selection stage of your painting.
Option 1: Keep Adjusting Until You Are Happy
If the mistake is fixable, you could start making adjustments until you are happy with what is on the canvas. However, you should be very careful before you place brush to canvas here. Have an actual plan for fixing the problem and think very hard before making each stroke.
Remember, every stroke you make could either make your painting better or worse. If you are fixing a problem, then you do not want to keep digging a bigger hole for yourself.
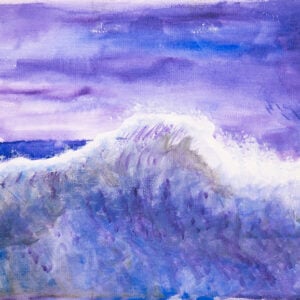
In my painting below, I was not happy with the sunset. At the time it was fixable, so I started making adjustments (but sadly this painting did not work out, as you will see at the end of this post).


Option 2: Get Out Your Palette Knife
If the mistake is more significant, it may be more efficient to just use your palette knife to scrape away the paint from the affected area. This option can save you much frustration in trying to work through the problem.
Just be careful that you only scrape away the affected area and that areas which are fine are left untouched.
Also, you do not need to get rid of all the paint from the canvas. You just need to scape away enough paint so that the canvas is once again responsive (the more paint you have on the canvas, the harder it is to work with).

Option 3: Cut Your Losses, Wipe Down And Start Over
The last and most drastic option is to just cut your losses, wipe the canvas down and start again. Sometimes, the mistake can be so significant that it would just be futile to keep working through it.
I will resort to this option when I just do like where my painting is at and I see no possible way of turning it around. But before I wipe the canvas down, I usually make a few last-ditch efforts to get the painting back on track. There is nothing to lose at this stage so I can take risks I usually would not take. If those efforts do not work out, then I just call it there and start again.
If the painting cannot be fixed, just take a palette knife and scrape away the bulk of the paint. Then you can take a rag plus some solvent and wipe it down further (if you are using oils). If you are planning to work on the same composition, then you might want to keep some kind of remnants of the painting on the canvas to assist with your second attempt.
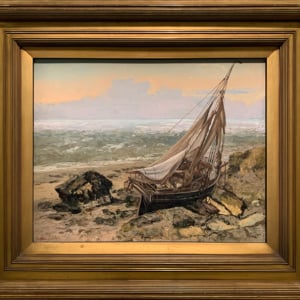
Below is a painting that just did not work out for me. I may have actually pulled the plug on this one a bit early, but sometimes it feels good to just scrap it and start again. I actually took a risk with this painting by continuing to work on it when I could have just left it where it was.
I would much rather take a risk and screw some paintings up, than only ever take the safe approach. The safe approach would have me never improving.

Want to Learn More?
You might be interested in my Painting Academy course. I’ll walk you through the time-tested fundamentals of painting. It’s perfect for absolute beginner to intermediate painters.
Thanks for Reading!
I appreciate you taking the time to read this post and I hope you found it helpful. Feel free to share it with friends.
Happy painting!
Dan Scott

Draw Paint Academy

Thank you so much for your honesty and generosity-really good to know.
No problem Crystal! Dan
I’m so happy I read this article. I’ve been trying to adjust a painting but now realize I’m going to need to scrape it down. Although acrylic there is too much paint to work over it. My error was in the size of the object. (A canoe) . So guess I’ll go back and start fresh. Thankyou for all the great pointers Dan.
Really glad to hear Jean! Sometimes it is just so much easier to scrape an area down and start again.
Dan
Thanks for this!! I have done the wipe down thing several times!!!
Hi Dan, paint two thin layers of Titanium white over the mistake and let it dry then carry on painting
Sure appreciate your blog and instruction. I really have difficulty determining whether the painting is finished or not. I usually set it aside for weeks on end and give myself time to observe, correct or appreciate the results. Oils allows time to correct errors. I also just can’t lean toward brush work. Have even gessoed canvas like brush work and used marble gesso what is your take on this method?
I LOVE the painting at the end of your article!! But if you don’t like it, then as the painter you are allowed to trash away. I’m new to your posts and am throughly enjoying them and learning a lot.
Hi Dan,
i have a question. For the first time in my life I tried to do a landscape. It was going well in the first stages ( more well than I did expect). Tehen I decides I need more saturation and contrast in some parts. Near the horizon was a little house and behind it a tree line, but the contrast was not enough, so I overpainted the treeline with a more blueish green. And that did not work well. Not well at all. It was too dark and not hazy enough to be at the far horizon. So I know what the problem is, but I do not know how to correct it. Will I need to erase it ( with skyblue paint? Or with white gesso or white acrylics and try to wet in wet paint a new treeline? Or would I try with a light blue glaze? I do not know ( am an amateurpainter) and love to have your advise, Thank you 🙂 The painting can be seen in the link in the website box.
Hi there. Thanks for the comment. Sometimes, if I make a significant mistake I might just move on to the next painting; it can be more frustrating to try and fix than just move on. If the paint is still wet, you could scrape the paint away and start that area again. If it has dried, it becomes more challenging. You could gesso over it but I would probably just start again if that is the option.
Thanks!
Dan
Can you fix say waves that are too large in perspective for how far away they are or is it better to leave them alone if it isn’t too far off? I like how rest of the painting is going but am drawn to the mis proportion of the waves. It is dry, as I am using acrylics.
Thank you for sharing this!
I paint it as my hobby and use painting as stress relief, develop focus, and for fun, these methods I think are very helpful to anyone interested! I hope I will find some content about, how to start with an imaginary, fantasy scene when there are no photos to compare, only in your mind. Most of my work is inspired by roleplaying pen and paper games. Sometimes very hard to catch what I had in my mind. Usually make sketches and versions, what looks better, draw direction where are the light sources. ( some places have more suns and more than one moon and their color even varies. For example, the place I want to paint has a blue and red moon, and I made some experiments with lights how it turns out in reality. These experiments are very interesting! ) Not long ago, I started to make the daily painting regimen and it helped a lot! Thanks!
I’m glad I found this blog! This is helpful especially since we cannot avoid mistakes during the painting. I prefer the side-to-side photo comparison the most as this helps me to be reminded always of my desired finish output. I would like to ask what do you do if paint spilled on your canvas? It happened to me once and tried to wipe off the paint but the shade was too dark that it still left a shade even if I already painted it over. Do you have any suggestions in the case of spilling paints?
Why when i paint and see at the same time a picture i fail, but when i see a video copying it it turns out good! Can you help me