Here is another quick painting tutorial based on the beautiful New Zealand landscape.
All up the painting took about an hour – it was only a quick study.
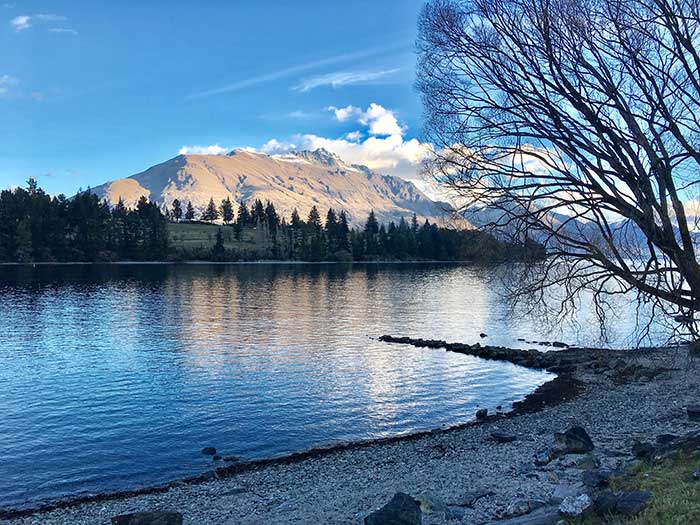
This is the reference photo I painted from:
- Art Supplies Used
- Step 1 – Stain And Sketch
- Step 2 – Color Block-In
- Step 3 – Establishing Form And Detailing
- Step 4 – Introduce More Color And Light
- Step 5 – Overlay The Trees
- Step 6 – Finishing Touches And Sign
- Thanks for Reading!
What I like about this photo is the sharp contrast between the dark elements and the light, distant mountains.
(Before diving into this post, make sure to pick up a copy of my free Landscape Painting Starter Kit.)
Art Supplies Used
The supplies used for this painting were:
- A Large Filbert Brush
- A Few Medium Sized Filbert Brushes
- A Few Medium Sized Round Brushes
- A Medium Sized Flat Brush
- A Medium Palette Knife With A Straight Edge
- Toned Disposable Palette
- Linseed Oil
- Odorless Solvent
- Burnt Umber Oil Paint
- French Ultramarine Blue Oil Paint
- Cobalt Blue Oil Paint
- Spectrum Violet Oil Paint
- Viridian Green Oil Paint
- Alizarin Crimson Oil Paint
- Cadmium Red Oil Paint
- Cadmium Orange Oil Paint
- Yellow Ochre Oil Paint
- Cadmium Yellow Oil Paint
- Titanium White Oil Paint
- 12×16 Inches Winsor & Newton Gallery Stretched Canvas (Thin Edge)
What Brands Do I Use?
I have had great experiences with all the top brands and I do not have any real preference. I have used and recommend the artist quality supplies by Winsor & Newton, Gamblin, Mont Marte, Art Spectrum and Neef.
Where Do I Purchase Art Supplies
I generally purchase all my supplies at my local art store. If you want to support Draw Paint Academy, you can purchase your art supplies at Amazon using my affiliate links.
Step 1 – Stain And Sketch
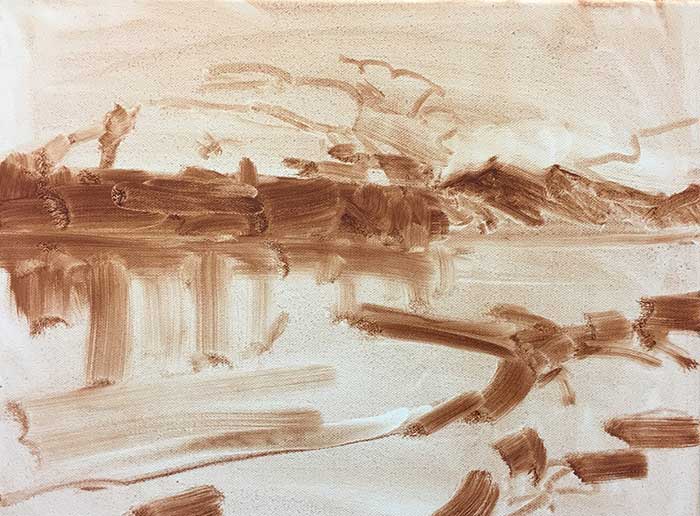
I use burnt umber to kill the white on the canvas. I then sketch the general layout of the scene using a medium-sized round brush.
As you can see, the sketch is very basic. All I am trying to capture is the dominant shapes and values.
Step 2 – Color Block-In
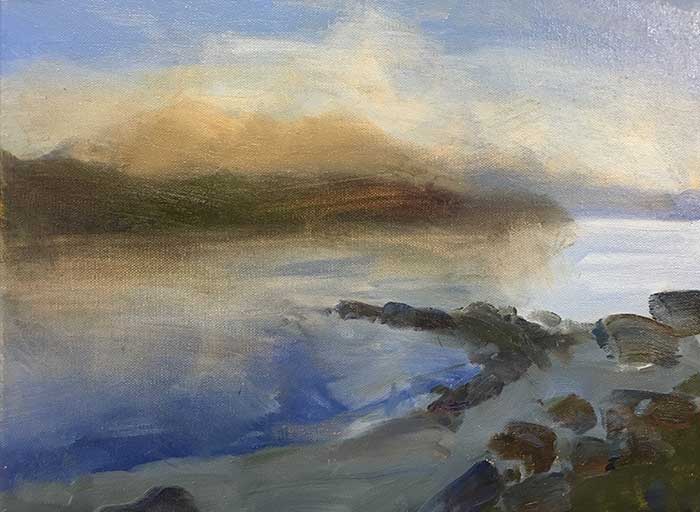
After laying down the sketch, I quickly try to capture the general color harmony of the scene. I very generally lay down areas of mass color.
In the foreground, I start indicating some of the rocks and other elements using bold strokes of dark colors. If you look closely, these bold strokes have streaks of different colors in them, giving the illusion of detail. Each of those rocks is illustrated with just one bold stroke of my brush.
Step 3 – Establishing Form And Detailing
In this step I am basically just continuing to establish form in the painting and adding detail as necessary.
I try not to get caught up in the tedious details just yet.
I also lay down the darkest darks in the painting to set the scene for the lights, which will come in later.
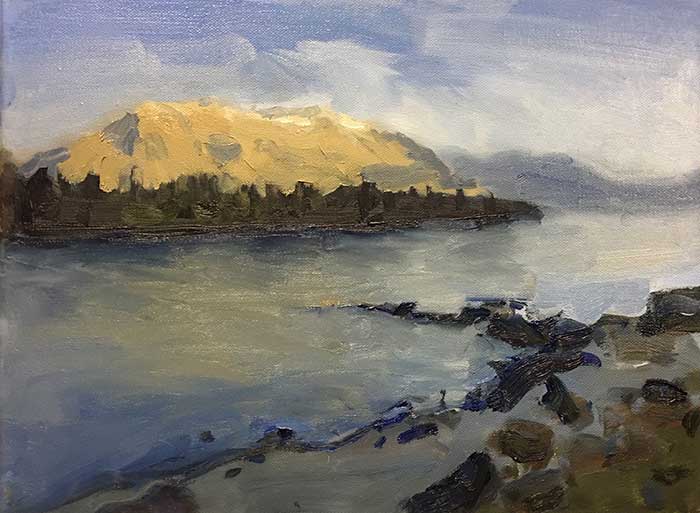
Step 4 – Introduce More Color And Light
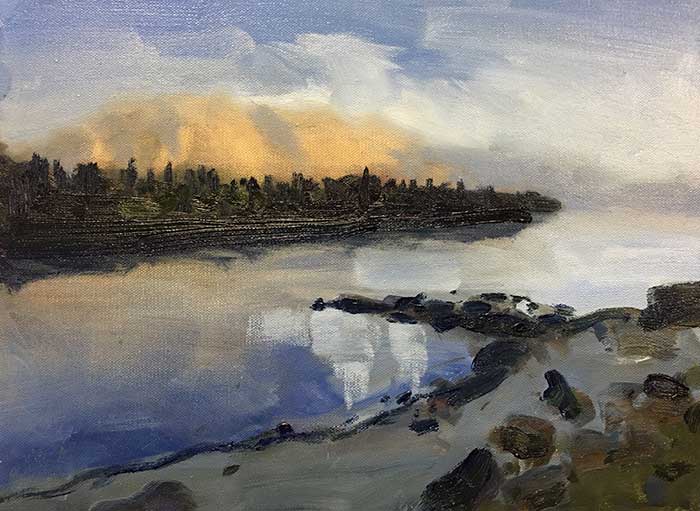
At the end of the previous step, the painting was looking a tad bit gray. So I introduce more color into the painting and also start adding the lightest lights, being the clouds. I use the palette knife to thickly apply titanium white to the canvas and then I clean up the edges using brushes.
You may notice that on our right in the distance there is much less paint and detail. That is because I will be overlaying trees in this area, so it will not be fully visible in the finished painting. I do not want too much paint in this area as it would make it difficult to paint on top of.
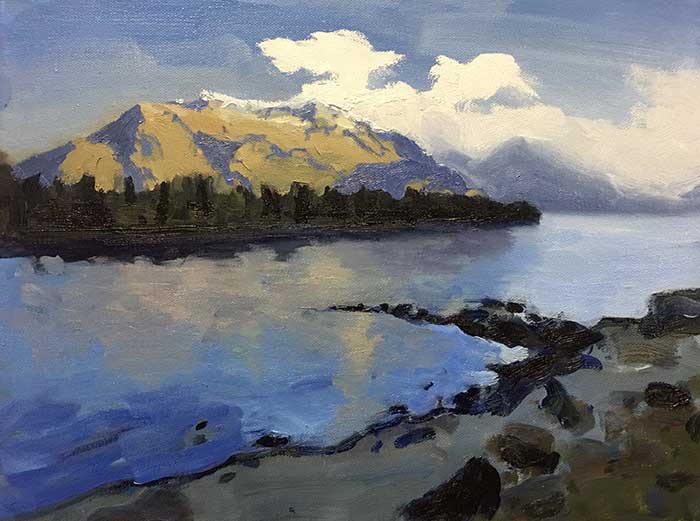
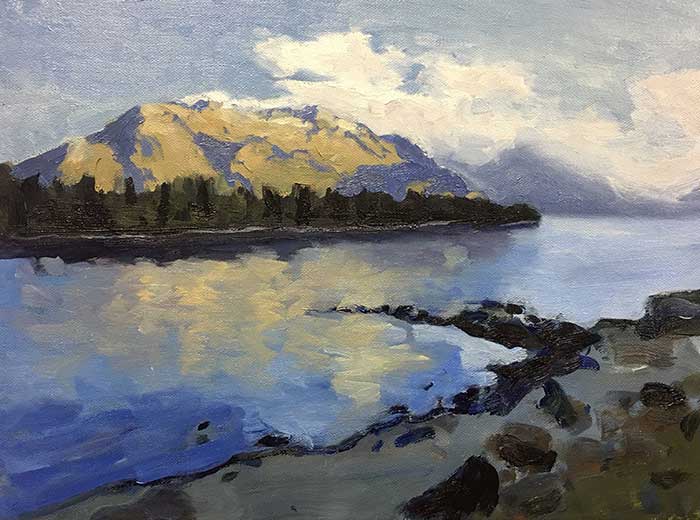
Step 5 – Overlay The Trees
I let the paint dry for a day so that I can paint on top without worrying about the colors being muddied on the canvas.
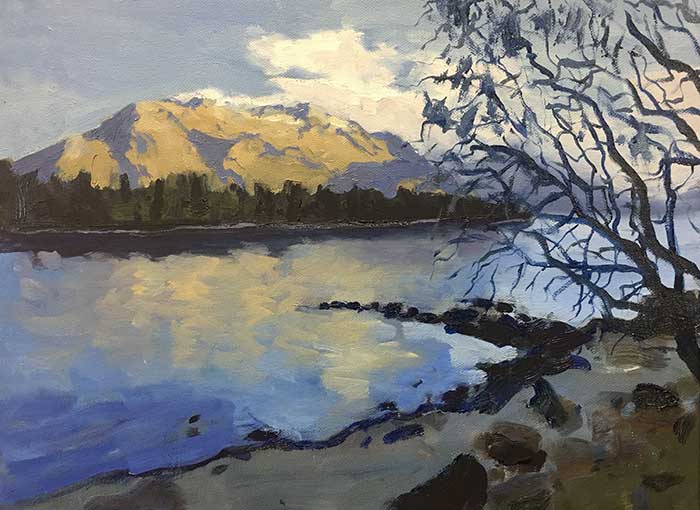
I overlay trees using a mix of ultramarine blue and burnt umber to create a very natural black. To apply the paint, I use a very loose hand and simply drag the brush over the canvas with minimal force.
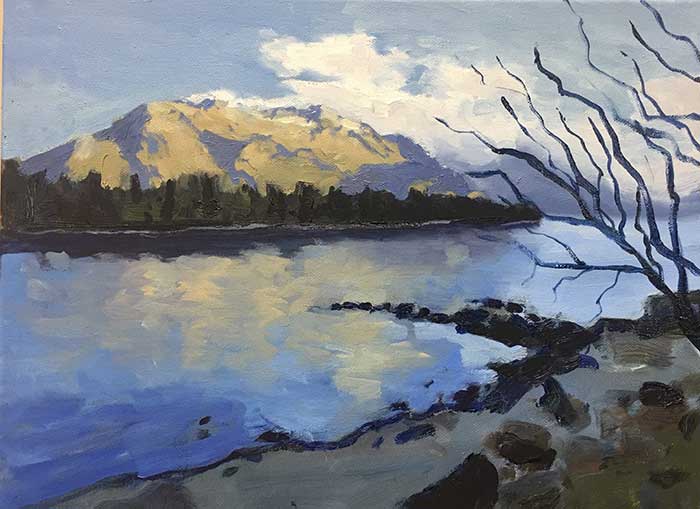
Step 6 – Finishing Touches And Sign
After making some finishing touches, I sign the painting in the bottom right corner.
NOTE: You will see the general color harmony of this photo is much cooler than the previous photos. That is because this photo was taken in full lighting outside. This photo is a more correct version of what the painting looks like. The reason for the significant difference is that the progress photos were shot inside in warm lighting. This is not good practice and I will be purchasing neutral lighting for the studio or painting outside in the future.
I recommend you review the lighting situation of where you paint. If you paint inside, then assess the color temperature of the lighting. Under warm lighting (such as tungsten lighting) you will not be able to see the true state of your colors.

Thanks for Reading!
Feel free to share with friends. If you want more painting tips, check out my fundamentals course.
Happy painting!
Dan Scott
Draw Paint Academy

Your painting and tutorials step by step is awesome I just love it
Thanks Bruno!
I really enjoyed this painting. The mountains and water made for a great painting. Thanks for sharing. I have a pic of the Andes when I went to Peru. The clouds are just hanging low over the middle of the mountain. I’ll try yo copy and send it to you
Thanks Bonnie for the kind words! Yes feel free to send a pic.
Dan