Form is a visual element that refers to the illusion of a three-dimensional object on a two-dimensional surface. If your paintings look “flat” and uninviting, it is probably due to poor use of form.
- Major Forms: Sphere, Cube, Cylinder, and Cone
- Difference Between Shape and Form
- Form and Simplification
- How to Depict Form?
- Tips for Learning Form
- Thanks for Reading!
Major Forms: Sphere, Cube, Cylinder, and Cone
The major forms you need to be aware of are sphere, cube, cylinder, and cone (refer to an extract from my sketchbook below).
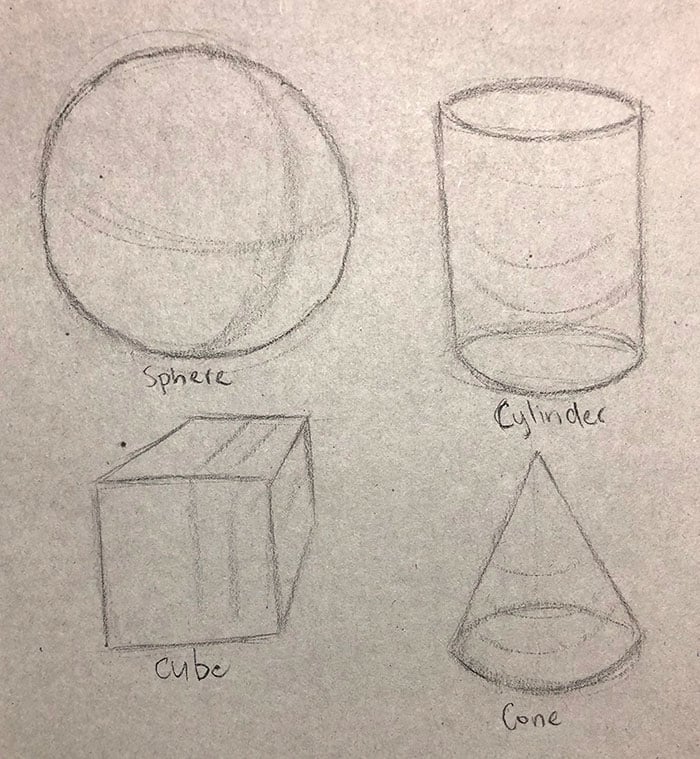
These are geometric forms. They are mathematical.
Forms that have no mathematical structure are organic forms. They are irregular and random by nature.
In practice, it is much more effective to look for geometric forms in your subject because they are easier to reliably measure and draw. Also, most organic forms can be simplified into geometric forms (more on that later in this post).
Difference Between Shape and Form
Shape refers to a two-dimensional (flat), enclosed area, whereas form appears three-dimensional (it looks like something you could hold in your hand).
An interesting point about shape and form is that form without any sense of shading or perspective will look like a shape.
Take the sphere below. What would it look like without the shading and the cast shadow?

Answer: A circle (which is a shape).
The same goes for a cube, cone, or cylinder.
A cube with no perspective looks like a square.
A cone with no perspective looks like a triangle.
A cylinder with no perspective looks like a rectangle.

Form and Simplification
Form plays an important role in the simplification of a subject. If you are able to see the basic forms through all the “noise”, you will be able to paint a more convincing image as you will have a better feel and understanding of the subject. You will know why the subject looks the way it looks rather than having to rely entirely on observation.
In practice, I start by looking for basic shapes, then I move into forms if necessary. As mentioned earlier, shape can represent a simplified version of form. So it makes sense to start with shape.
Keep in mind that not everything needs to be painted with a sense of form. Here are some examples:
- Areas that are actually flat (floor, wall, etc).
- Distant objects. The closer the object, the more apparent the form is. For distant objects, shape tends to be sufficient.
- Unimportant areas that you want to appear flat and uninviting (perhaps a distant figure walking in the background).
Learning how to see basic shapes and forms is something you will need to train actively. You will need to learn how to tune out the vast amount of noise and information so that only the basic shapes and forms remain.
I will run through some examples of form simplification below, starting with a beautiful drawing by Albrecht Dürer.


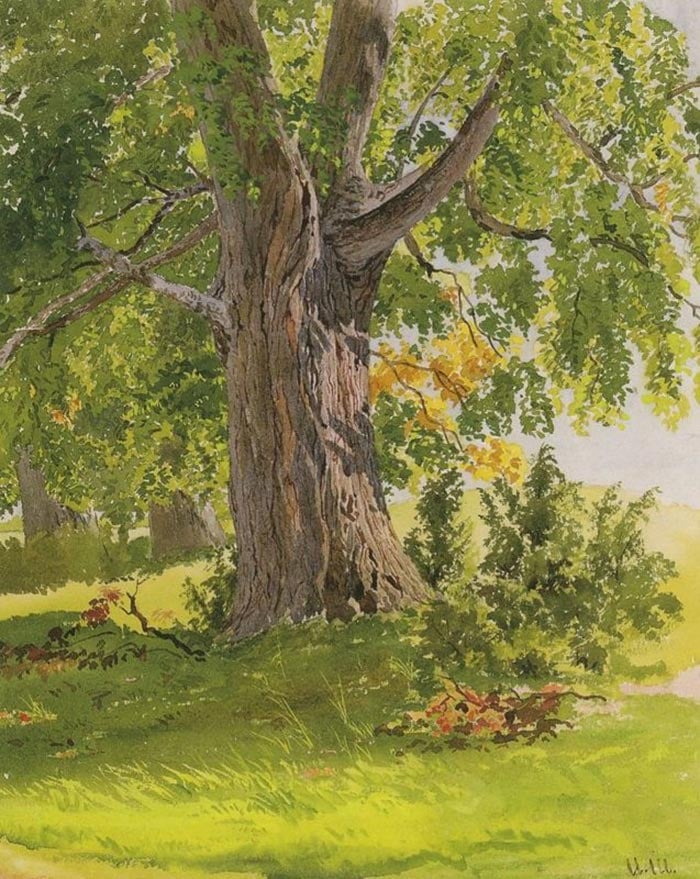

Also, as I mentioned earlier, organic forms can often be simplified into geometric forms. Take this Tasmanian cow pictured below.

As a whole, the cow is an irregular, organic form (outlined below).

But you can break this organic form down into smaller, geometric forms:

How to Depict Form?
Here are some of the common techniques used for rendering form:
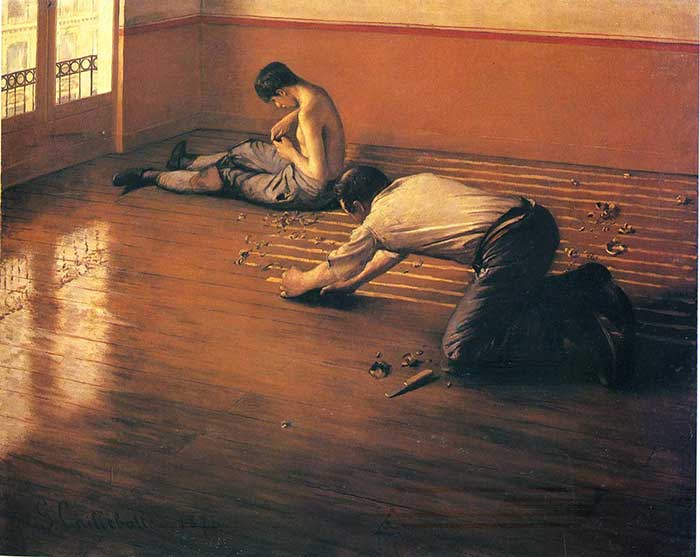
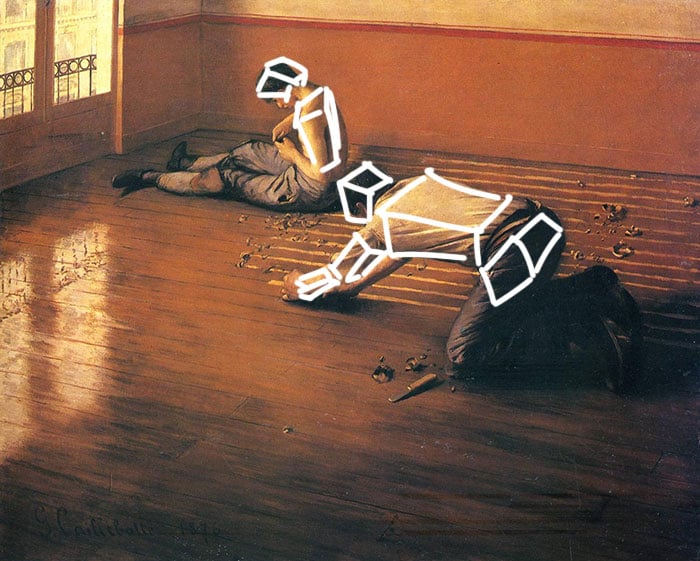
- Use shading to pick up changes in light and shadow. This is perhaps the most effective technique. The idea is simple—planes of the form facing away from the light will be darker than planes facing towards the light. Below is a great example of this by Gustave Caillebotte.
- Ensure cast shadows are present and accurate. They help reinforce the form of the object and give it context. For example, take a look at the sphere below, after I removed the cast shadow. It seems to be floating in space.

- Follow contour lines to reiterate the form. Let your brush follow around, under, and over the form. Try to get a feel for it. In the drawing below, you can see the contour lines that Leonardo da Vinci used to explore and get a feel for the forms. Notice how the contour lines start off adventurous and loose, then gradually get more and more refined as the forms are consolidated.

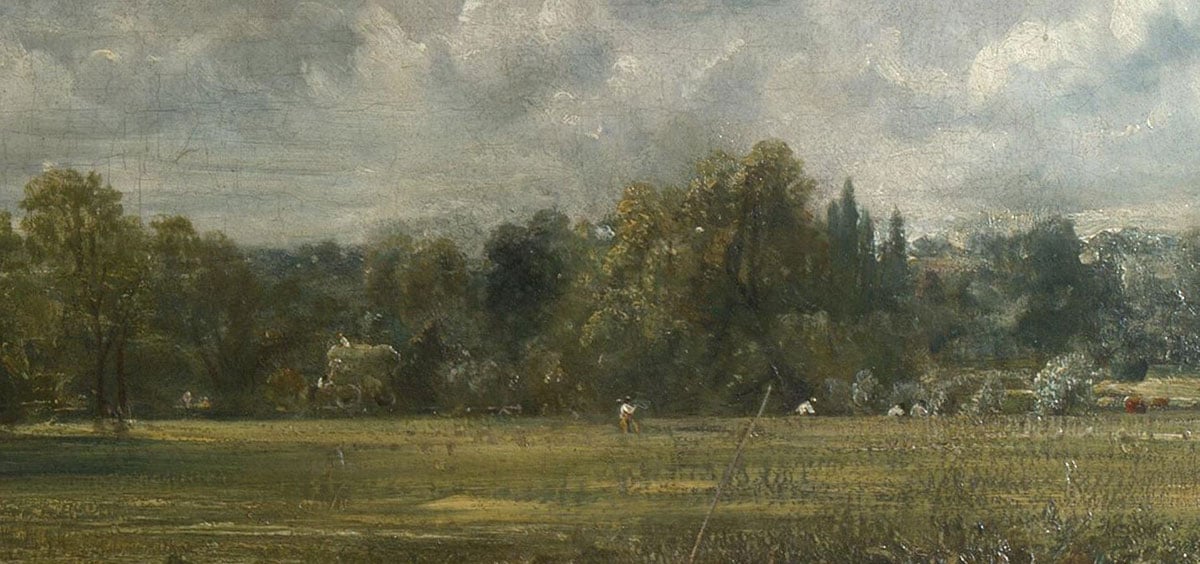
- Use texture variance to reiterate the form. For example, you could use thick paint for the light planes and thin paint for the dark planes, as John Constable did in The Hay Wain.

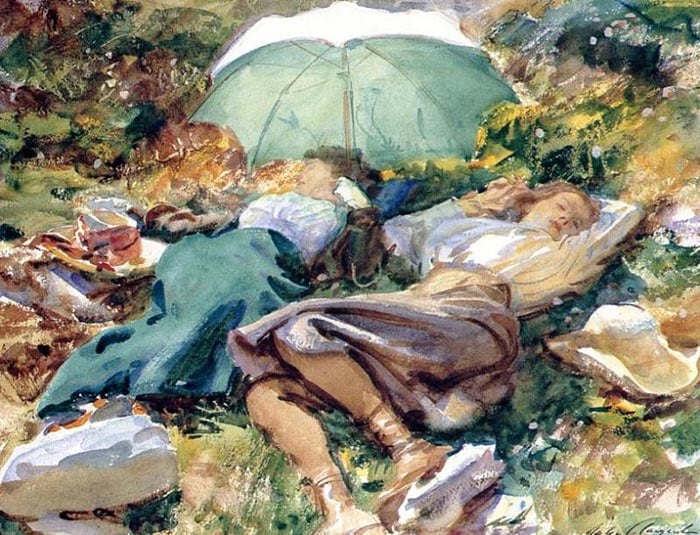
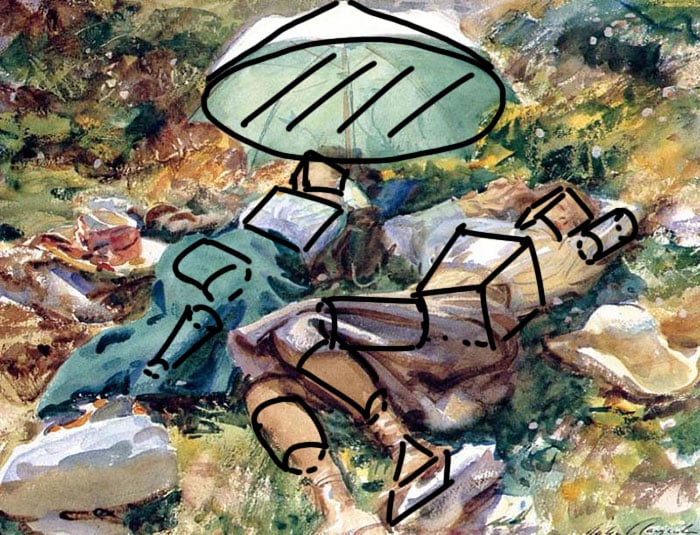
- Use color variance to reiterate the form. In John Singer Sargent’s Siesta, warm colors are used for the light planes, whilst cool colors are used for the dark planes. This helps add a sense of form to the otherwise fleeting and relaxed painting.
Tips for Learning Form
Here are some tips for learning how to effectively use form in your paintings:
- Practice drawing the “perfect” sphere, cube, cylinder, and cone. A simple but highly effective exercise.
- Draw basic forms as a warm-up exercise (refer to an extract from my sketchbook below).
- See if you can simplify reference photos or master paintings down to basic shapes and forms.
- Incorporate figure drawing into your practice. The human figure is one of the best demonstrations of form in action.

Thanks for Reading!
I appreciate you taking the time to read this post and I hope you found it helpful. Feel free to share it with friends. If you ever want to learn more, check out my Painting Academy course.
Happy painting!
Dan Scott
Draw Paint Academy


Lovely very useful
Thank you for sharing this. It is a wonderful reference tool. Have to publish a book teaching these techniques?
Thankyou
Many thanks I like your choice of Artists. I have been studying their work especially Albrecht Durer.and singer Sargent.
Exceptional and simple !!!
Thank you
Wonderful address on form! Light and shade are all!
I figured that my flat face was lacking but now I think I can fix it. Thank you!
Really helpful thank you…off to practice !!
Great article Dan! This is very helpful. Thank you.
Excellent! Very helpful!
That was very useful!
Enjoying the details you offer. A good reminder to build our paintings
Great info, thank you! I’m going to practice these tips today.
Thank you for explaining so well something I was having a problem with! I think I’ve got it!!
Thank you, very useful.
Very useful, well demonstrated.
Thanks. If all these info are learned and practiced consistently, who knows, we can all be painters.
Thank you for this. It is so helpful
Very Interesting !
These reminders of what is important are truly invaluable. It helps me see what I have been able to incorporate into my work and what still needs to be done. Great for setting goals. Thanks so much!
Very informative. Thank you
Thank you so much. Buy a painting (mixed media). +2347030346271. Thank you
Thank you for caring enough to take the valuable time to share.
Thank you all this is very helpful, looking forward to practice these very good points
Dan, I have taken drawing classes in school and in other workshops, but
your explanations, were spot on. I know my paintings will be better because I will
follow your tips!
Thank you,
Judee
Very helpful article, especially interesting to me was Constable’s use of thick paint on highlights and thinner paint for the shadows – I will try this along with warm light and cool shade.
Your emails are very welcome an well thought out. Much appreciated.
I will do one of your courses at some point.
Well done,good explanation.
Thank you very helpful post
This is an excellent short summary on the basics of drawing. Thank you.
Thank you for your helpful emails and I especially appreciate the illustrations using ‘Old Masters’ and well-known more recent ‘Masters’ such as the Impressionists and Sargent. I hope that you and yours are well with all the fires I have heard about in Australia. I’m sending positive thoughts and prayers out to the universe for your whole country.
Thank you.
These lessons are so good you could gather them together and publish them as a book. A serious suggestion. Thanks for these.
Huge help, thank-you!
This article for someone like me (just got started oil painting last week (not that I have done any other art before)), Priceless!, Thanks for sharing.
Thank you Dan, it’s very helpful
This level of teaching is supreme
Thanks so much
Thank you..
Thank you!
First of all, thank you very much for your hard effort to teach everyone about art. its really helpful for me.
Fabulous!!
Brilliant information…well written. Thankyou Dan.
I agree with Amy…a book in the making!
Thank you! I especially appreciated the overdrawn 3D shapes on the artwork. Ive noticed in my own work that I have to actively choose to show 3 surfaces–I default to 1 or 2 and get a flatter graphic look. For example, tilting a piece of fruit or a hand to show the top planes doesnt come naturally to me yet. I tend to use the side view with an iconic contour unless I sketch a few iterations first.
There are so many components to a good artwork….balance, foreground, background, a thousand color do’s and don’ts, perspective, that sometimes we forget principles we have already learned. I needed to see and consider form again, so thank you for a wonderful article I can employ in today’s painting efforts.
thank you, your articles are always so clear and informative , especially your use of examples.
great job.
Nice explanations for shape and form. Thanks so much for that. I would be interested in knowing how you depict your subject “living in the atmosphere of the painting.” I’m familiar with hard and soft and vanishing edges but actually making the painting appear “3 d” is what I struggle with most.
Any suggestions…?
Thank you!
This information is exactly what I needed. Thank you very much for putting it in simple terms with clarity.
Dan, thank you so much for all this information that you willingly share with us.Your method of explaining the complexities of understanding art, is without doubt the best that I have encountered so far.I look forward and appreciate any and all of your teachings.
Many thanks.
Len Conway
your work is commendable !
even the great Durer erred in ‘form’ in his rhinoceros sketch.
most western artists cannot draw an elephant accurately.
my point is why not approach ‘form’ from common mistakes made…. it will be lesson that will resound in the….
Thank you!
Thanks for sharing these article. this are Awesome article as always. I am glad to gain this remarkable information from you. these is best blog, I like it.
Off to deconstruct some paintings. Lots of new ideas now. Thank you.
I think of shape and form as you do. I also think of geometric form as two shapes that come together ie two rectangles combine to make a cube, a rectangle and circle shape combine to make a cyclical form. This can be used for Triangles, rectangles, pentagons, circles and more. If one starts starts to combine the forms together you have compound shapes like plastic oil containers, lamps, jars, coffee filters and on and on. These forms have straight or curved shapes so the intersections or edges (lines) are straight or curved. If we add an S-curve to the equation cool things happen: a cylindrical form becomes a hose or snake form, a cone becomes soft serve ice cream, a cube becomes a melting ice cube and a ball becomes a bean bag. The S-curve is the tool to transition from geometric to organic. I mentioned earlier about combining forms well we can take these geometric forms and start to slice them up. Take a slice through a corner of a cube and you add a plane in the shape of a triangle. Slice through a cone and add a plane maybe of an eclipse, if sliced from the side to the base a cord. So shapes combined to make a form are often planes of the new form. Just wanted to expand on the versatility of shapes, forms, planes and types of edges (straight, curved and S-curved) Maybe you might make an article to illustrate these.
Great content, Thank you for sharing! one article I think i complements your is this one about the color wheel. Hope it helps your readers.
http://linesandcolors.com/2020/01/07/colour-wheels-charts-and-tables-through-history-on-public-domain-review
After a long time, I read such a useful article.I will follow all the tips.Thanks
You have an amazing God gift. I appreciate your teaching talents as well.
Thanks, for root line information ,basic theory ,concept of shape & form
Great info even for beginners like me. Thanks so much.
Great information! Very much appreciate your knowledge and expertise. You do have a great gift of explaining and presenting the important facts that are practical and so useful for our projects. This was a perfect explanation of how both form and shapes are truly needed to make one’s picture come alive/real. Thank you Dan.
Thank you so much for these two last lessons. You opened my eyes and mind on how to critique my own works. I would like to be a better painter and even though I am 88 there still is so much to learn and how much time I have left is a question mark but I will put it to good use as much as I can.
Thank you Scott.
I want to learn please help me get better
As a beginner, I found this VERY helpful.
This was VERY helpful. Thank you for posting 😊
This was very helpful thank you
You ,My friend are a Godsend!! I was trying to paint flowers on a door and they looked horrible. When i get frustratedI grab my phone and go to pintrest to relax. Tonight I found your post!! Very helpful.
Very informative ,and easy to understand what you are teaching.
Thankyou so much!