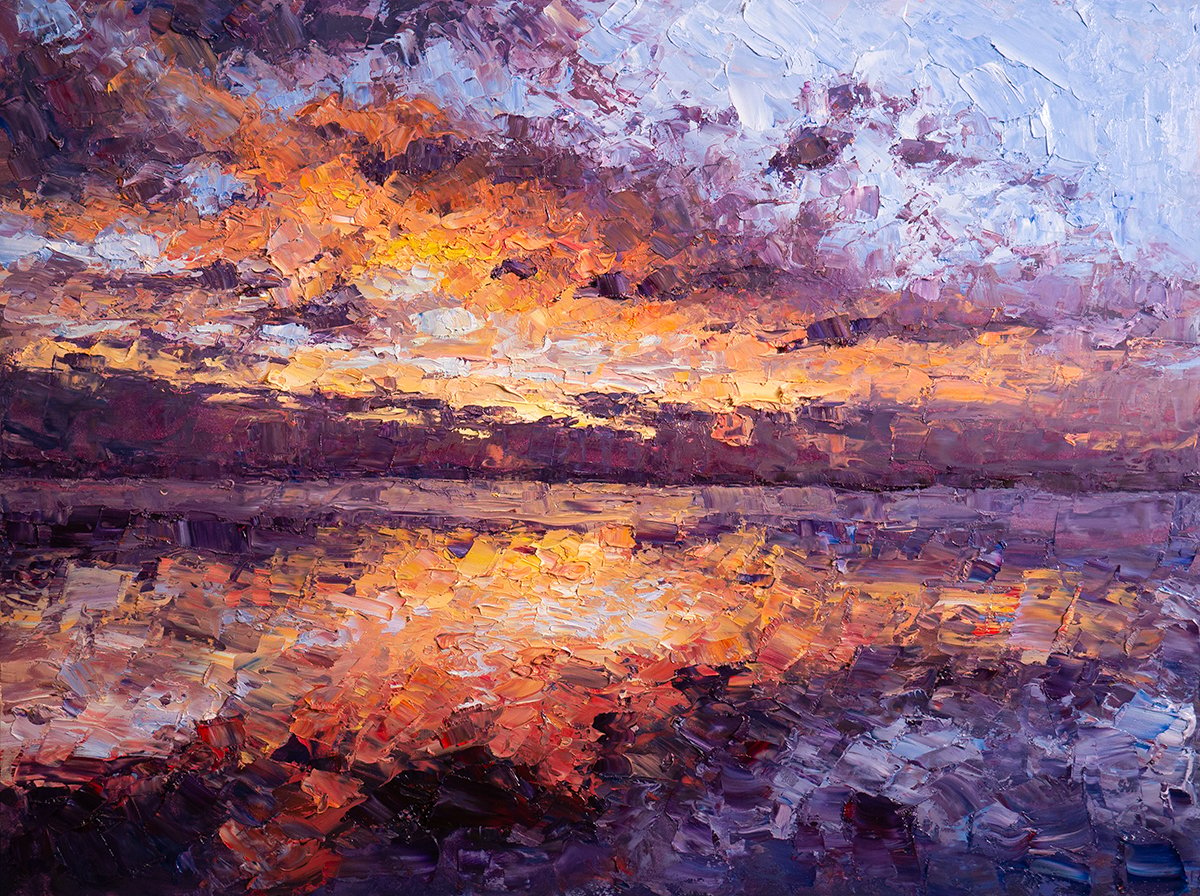
Below is one of my more dramatic paintings, Dramatic Sunrise, Caloundra. Let’s take a look at how I painted it.
Reference Photo
Below is the reference photo I painted from. I had just hit the water in my kayak and was about to do some fishing. The glassy water reflected the fiery sky. A magnificent sight.
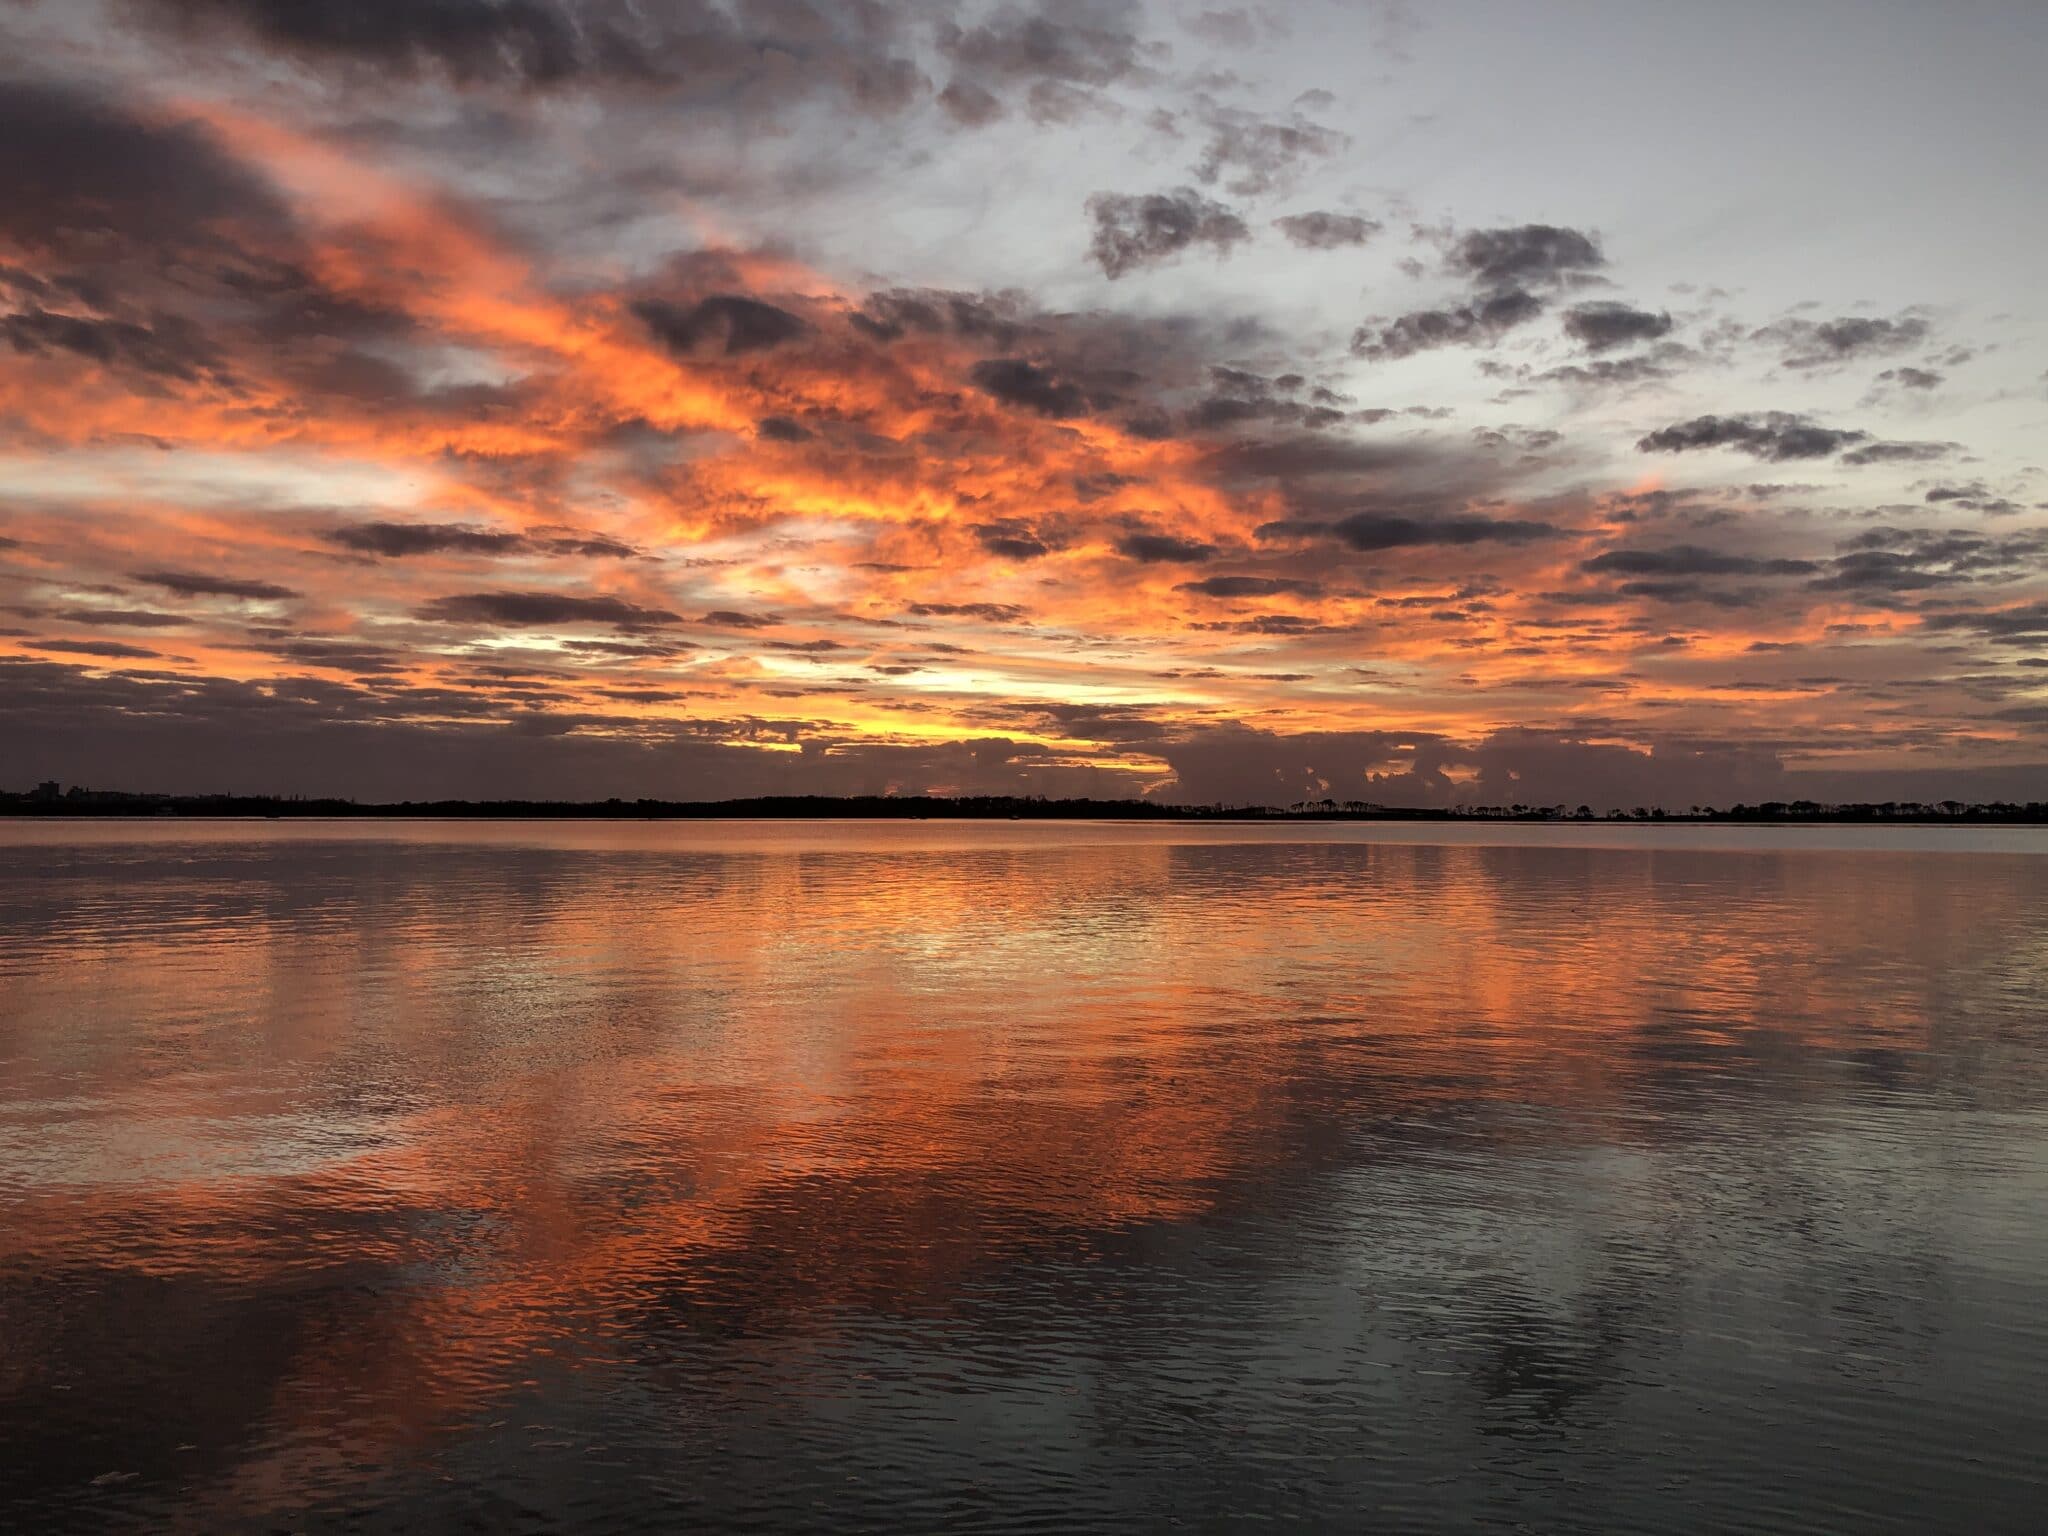
This photo was taken on a significant day for me. I had spent six months chasing a monster flathead. Thousands of casts, hundreds of hours on the water, and many days without a bite. This was the day my luck changed. I finally landed the big one later in the morning. 31.4 inches (80 cm). My best catch in many years, and my best ever on a kayak. I released her to fight another day and hopefully give birth to more fish. It’s nice when two interests, fishing and painting, align like this.

Details
- Oil on Ampersand Gessoboard. 18 x 24 inches.
- Main colors: Ultramarine blue, cobalt blue, cadmium red, alizarin crimson, cadmium orange, cadmium yellow, cadmium yellow deep, and titanium white.
Refer to my supplies list for more details on what I use.
Notes
- Drama is the big idea of this painting. There’s no single focal point; the painting as a whole is the focus. I drew inspiration from Joseph Turner’s work, who was a master of ambiance and drama.
- I painted almost entirely with a palette knife, only using brushes for the start. The palette knife was perfect for making dramatic strokes of broken color. It was also much easier to clean up.
- The reference photo was taken back in June 2020. The lockdowns have restricted travel, so I looked back through my old photos for inspiration. There’s always inspiration hidden there.
- The palette knife works well with the hard gessoboard surface. I was able to scrape, scratch, and apply paint without having to worry about damaging the surface.
Progress Shots
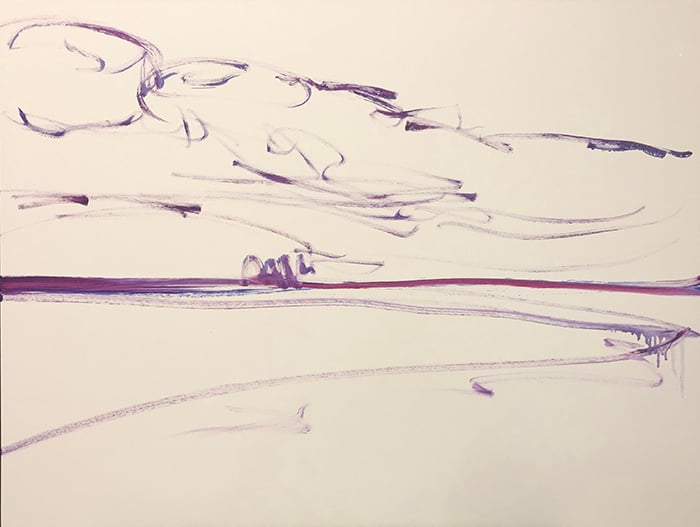
Step 1: A simple sketch, focusing on key shapes and movement.
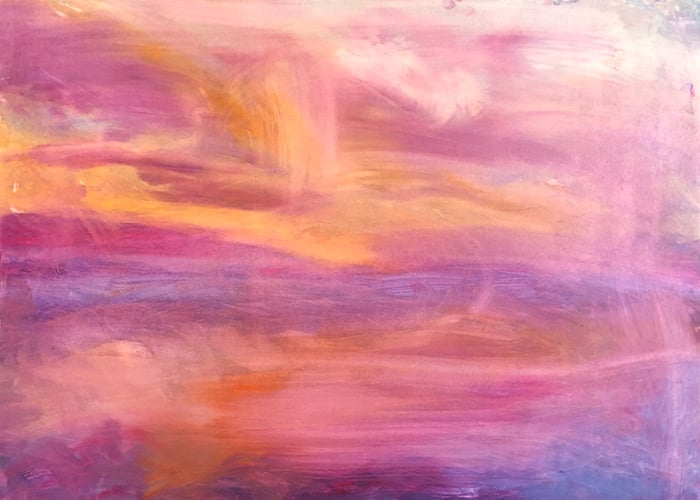
Step 2: Thin washes of bright color. Then wipe down with paper towel to remove excess paint.
Step 3: Use the palette knife to apply thick strokes of color. Start with the sky, then move to the water.
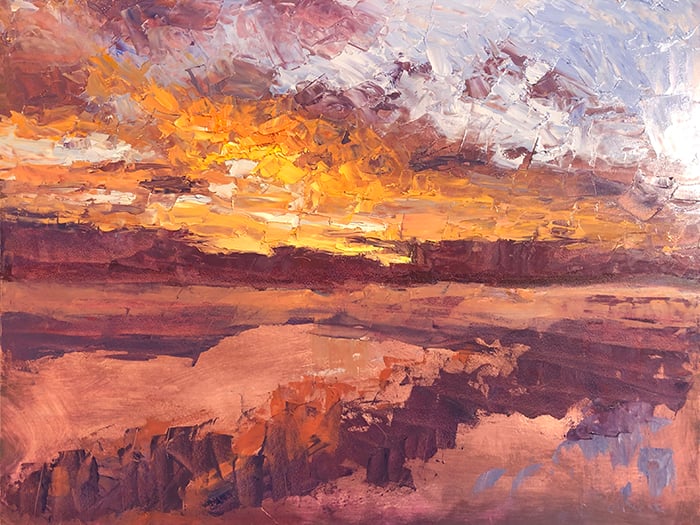
Step 4: Finish the water and start refining.
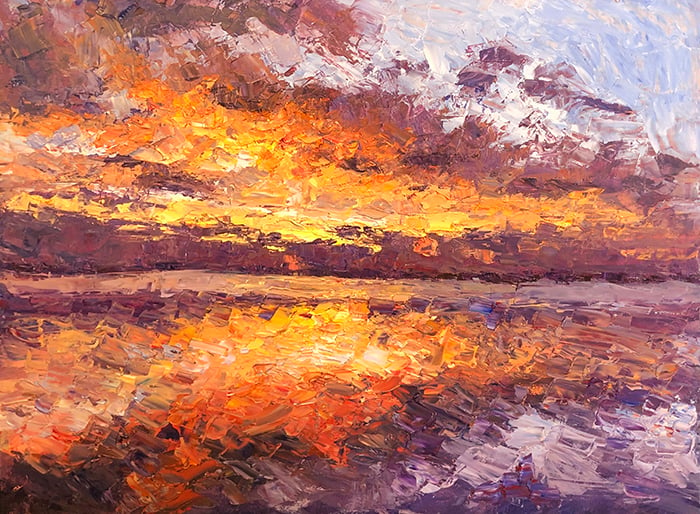
Step 5. Photograph the finished painting (I still need to sign it). Keep in mind, I use a better camera to photograph my finished paintings. Hense why it looks different from the progress shots.

Additional Resources
Thanks for Reading!
Thanks for taking the time to read this post. I appreciate it! Feel free to share with friends. Want to learn more about landscape painting? My Landscape Painting Masterclass opens for enrollment in a few days. Join the waitlist here if interested.
Happy painting!
Dan Scott

