
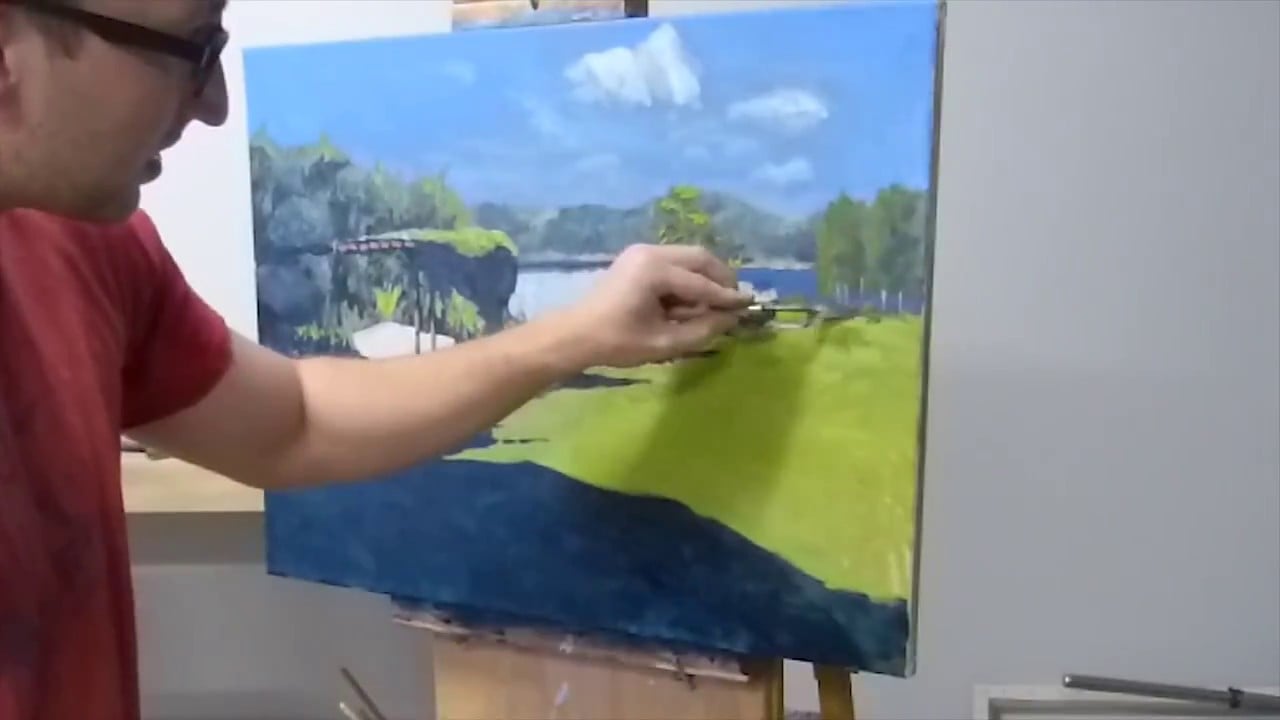
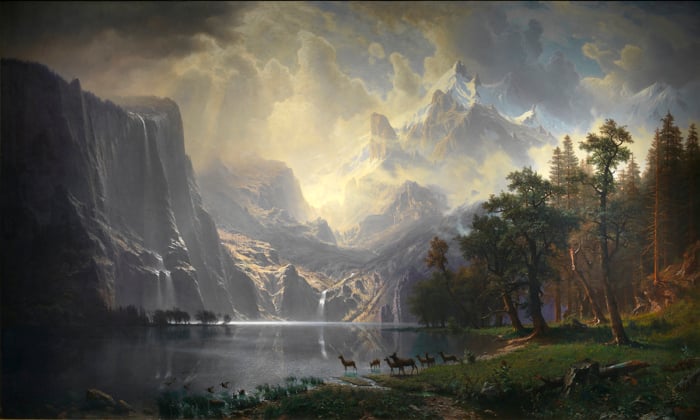
Here is an oil painting tutorial based on the stunning Secrets On The Lake, which is a small get-away in Montville, Queensland. I went there with my partner some time ago and took some beautiful photos which I can now use for painting inspiration.
Feel free to try and paint along. But just a warning, this is a slightly more complex scene to paint than some of the other landscapes in my tutorials. There are lots of small and delicate elements in this scene that are tricky to paint.
Painting these bright, sunny days are always a challenge, especially when painting from a photo. The sharp contrast in values can be difficult to render. In addition, photos taken at this time of day tend to be overexposed and the darks disappear into black.
I have also put together a quick time-lapse video of the painting which you can find below.
Anyway, let’s get into it!
- Part 1 – Materials
- Part 2 – Reference Photo And Planning
- Part 3 – Prepare The Canvas
- Part 4 – Sketch The Composition
- Part 5 – Paint The Sky & Clouds
- Part 6 – Paint The Rest Of The Background
- Part 7 – Work Into The Bright Greens
- Part 8 – Clean Up My Messy Palette…
- Part 9 – Work Into The Darks
- Part 10 – Paint The Lightest Light
- Part 11 – Add Some Highlights To Indicate Form
- Part 12 – Cover The Rest Of The Canvas
- Part 13 – Start Adding Small Points Of Interest
- Part 14 – Use The Palette Knife To Build Up Texture And Create Interest
- Part 15 – Make The Finishing Touches And Sign!
- Thanks for Reading!
I’ll walk you through the entire process using one of my recent paintings. You’ll see how I go from idea all the way through to reflecting on the finished painting.

Part 1 – Materials
The art supplies used for this painting were:
- A Large Filbert Brush
- A Few Medium Sized Filbert Brushes
- A Few Medium Sized Round Brushes
- A Medium Sized Flat Brush
- A Medium Palette Knife With A Straight Edge
- Toned Disposable Palette
- Linseed Oil
- Odorless Solvent
- Raw Umber Oil Paint
- French Ultramarine Blue Oil Paint
- Cobalt Blue Oil Paint
- Spectrum Violet Oil Paint
- Viridian Green Oil Paint
- Alizarin Crimson Oil Paint
- Cadmium Red Oil Paint
- Cadmium Orange Oil Paint
- Yellow Ochre Oil Paint
- Cadmium Yellow Oil Paint
- Titanium White Oil Paint
- 20×28 Inches Winsor & Newton Gallery Stretched Canvas (Thin Edge)
What Brands Do I Use?
I have had great experiences with all the top brands and I do not have any real preference. I have used and recommend the artist-quality supplies by Winsor & Newton, Gamblin, Mont Marte, Art Spectrum and Neef.
Where Do I Purchase Art Supplies
I generally purchase all my supplies at my local art store. If you want to support Draw Paint Academy, you can purchase your art supplies at either Dick Blick or Amazon using my affiliate links.
Part 2 – Reference Photo And Planning
Here is the reference photo (you can get access to reference photos like this one in full resolution in the Reference Photo Library).

As I am painting on a large canvas, I place a grid down to help me with the initial sketch.
This grid also helps me assess the design of the composition. Notice how the important elements of the composition seem to be arranged around the intersecting lines of the grid. This is generally an aesthetically pleasing way to design a composition.
I decide not to paint the bush which is on our right in the photo as I do not think it adds anything of value to the composition.

Part 3 – Prepare The Canvas
I use raw umber to stain the canvas. I place some paint straight from the tube onto the canvas and then wipe it around using a cloth soaked in solvent.

Part 4 – Sketch The Composition
After placing down a grid, I briefly sketch of the composition. Whilst the sketch is fairly simple and lacking much detail, I am careful to ensure all the major objects in the composition are accurately positioned. Mistakes at this stage can cause havoc later in the painting.

Part 5 – Paint The Sky & Clouds
I paint the sky & clouds using a combination of cobalt blue, titanium white and a touch of cadmium orange to tone it down.

Part 6 – Paint The Rest Of The Background
I start painting in the rest of the background. For the water, I basically use a darker version of the sky color.
I do not use much detail here as it is in the distance and is not a focal point in the painting. The background is really just to create depth and atmosphere.

Part 7 – Work Into The Bright Greens
Mixing the correct green for this painting is very important, but challenging. I use a mix of viridian green, cadmium yellow, yellow ochre, cobalt blue, alizarin crimson and titanium white. After playing around with the colors for a while, I am able to mix than nice bright green.

Part 8 – Clean Up My Messy Palette…
By this stage of the painting, my palette is a complete mess! So I take some time to just clean things up a bit in the middle with a palette knife. I just scrape away some of the excess paint and wipe it down with a cloth and solvent.

Part 9 – Work Into The Darks
I then start painting in the darkest darks of the painting. I keep all the brushwork very loose at this stage, with the intention I would tighten things up later in the painting.


Part 10 – Paint The Lightest Light
The lightest light in the painting is where the light is hitting the boardwalk on our left. Whilst it may look like a pure white, it is actually much darker than that. It is essentially a warm gray with lots of white.

Part 11 – Add Some Highlights To Indicate Form
I start to emphasize form by painting some highlights here and there. This gives me a better grasp of where everything is in the painting.

Part 12 – Cover The Rest Of The Canvas
I then cover the rest of the canvas with color. I use a medium-sized filbert brush to paint the cluster of trees on the left of the painting. I make sure there is enough variance in these greens to create depth in the trees.

Part 13 – Start Adding Small Points Of Interest
With the foundation of the painting in place, I start painting in small points of interest, such as the colorful flowers on our left and small highlights in the greens to indicate light hitting strands of grass and leaves.
These small points of interest are not obvious, but can really add an element of depth and complexity to your painting.

Part 14 – Use The Palette Knife To Build Up Texture And Create Interest
I use the palette knife here to build up some areas of thick texture, mostly for the highlights.

Part 15 – Make The Finishing Touches And Sign!
To finish the painting, I add some more small points of interest and some more blue to the sky and water.
After I sign the painting in a dirty red color, I call it finished!

To judge how I went, a useful trick is to view the painting as a thumbnail and compare it to the reference photo. Can you easily tell which is the painting and which is the reference?

Thanks for Reading!
Feel free to share with friends. If you want more painting tips, check out my fundamentals course.
Happy painting!
Dan Scott
Draw Paint Academy


Really enjoyed watching this and picked up some tips re procedure and colour blending
Thank for your tutories ! step by step really details ! It is help me avoice some comon mistake , I hope you keep sharing aknowlege to every one who adictic drawing !
I really enjoyed the painting. Instructions were great. Thanks
Bonnie
Thanks Bonnie!
Such a lovely painting. I was especially interested in your directions re: the manner in which you painted the oils.
Thanks Barbara glad you enjoyed it!
Dan
Dan, So many thanks for sharing this. Painting is lovely and your instructions so explicit. I plan to try this following your direction!
Dianne
Thanks for the kind word Dianne – I really appreciate it!
Let me know how you go 🙂
Dan