Welcome to lesson 1 of the Painting the Landscape workshop.
Before I get into it, I’ll recap what to expect from this workshop.
There will be 4 lessons covering the landscape painting process. I’ll walk you through the creation of my most recent painting, from idea all the way through to reflecting on the finished work.
Lesson 1 (Today) will cover the idea.
Lesson 2 will cover planning and strategy.
Lesson 3 will cover painting and technique.
Lesson 4 will cover self-reflection.
The idea of this workshop is to give you practical insight into what goes into the creation of a painting. I’ll be using my work as an example, but keep in mind there are many ways to go about painting. What works for me might not work for you, so don’t feel you need to copy what I do.
If you want to follow along and paint with me, that’s fine. You are free to paint from my reference photo (shown later in this lesson). But if you just want to sit back and enjoy the lessons, that’s fine too. Depending on how this workshop goes, I might do a more community-focused one in the future. We will see.
Ok, here’s lesson 1.
When I want to start a new painting, the first thing I do is look through the photos on my phone. This is my inspiration hub.
I’ll start with my favorites folder, which contains photos I have shortlisted or “starred”. If nothing catches my attention, I’ll take a look through the general photo folder.
I look for photos in which I can see a finished painting. If I don’t see a finished painting at the end of the line, I don’t paint it. Simple as that.
I don’t care if the photo is “good” by photography standards. I’m not going to be judged on the photo, only on the painting.
The reference photo’s purpose is to provide me with a rough guide of the subject and, more importantly, to remind me of my first impressions. Those first impressions are gold and should form the foundation of an artwork.
This is why I prefer using recent photos, whilst my memory of the subject, place, or event is still fresh. As time passes, my memory fades and all I have is the photo to rely on. The outcome tends to be less inspired and creative and more of a reproduction of the photo.
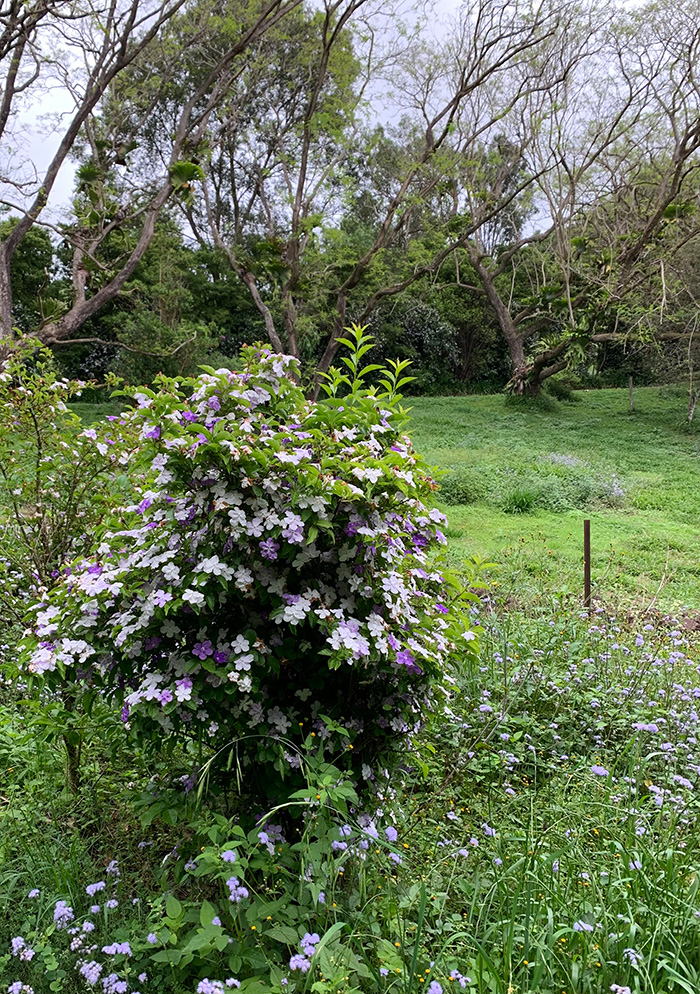
Having looked through my recent photos, I narrowed down on these two taken from the same location:


These were taken at Maleny, Queensland. Chontele, Elora, Kobe, and I were on a short family holiday there. It was an overcast day and we were exploring the surroundings (trying to get Elora to nap).
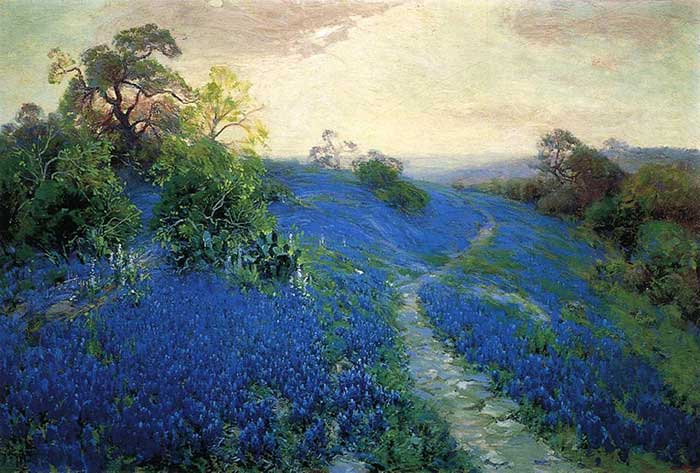
There were tiny blue flowers scattered across the landscape. The photos don’t do them justice. I remember them being richer and more brilliant in person. They reminded me of the bluebonnets in Julian Onderdonk’s paintings.

I decided to go with the latter photo. The composition seems stronger and more coherent.

(Click here to download the full-size image.)
Some other things I like about this photo are:
- There’s a strong focal point with the feature plant and its white and purple flowers.
- It takes my eyes on an interesting journey.
- There’s a good sense of depth and space, with a distinct foreground, middle-ground, and background.
- There’s an interesting play between positive space (the trees) and negative space (the sky).
- I like how the feature plant pushes up and overlaps the middle ground. This creates a sense of cohesion between the different areas in space.
- There are many opportunities for interesting displays of brushwork and color, particularly with the grass, flowers, and plants around the bottom.
But most importantly, I can see myself painting from this photo and I can envision what that painting might look like.
The photo isn’t perfect. I can see aspects that I’ll change in the painting. I don’t like how the flowers appear cropped at the bottom. And I’m unsure about the single fence post on the right-hand side. But these are minor things.
Now that I have a reference photo to paint from, it’s time to move on to the planning and strategy phase. That will be the topic for the next workshop lesson.
Until then!

Dan Scott
Draw Paint Academy
