
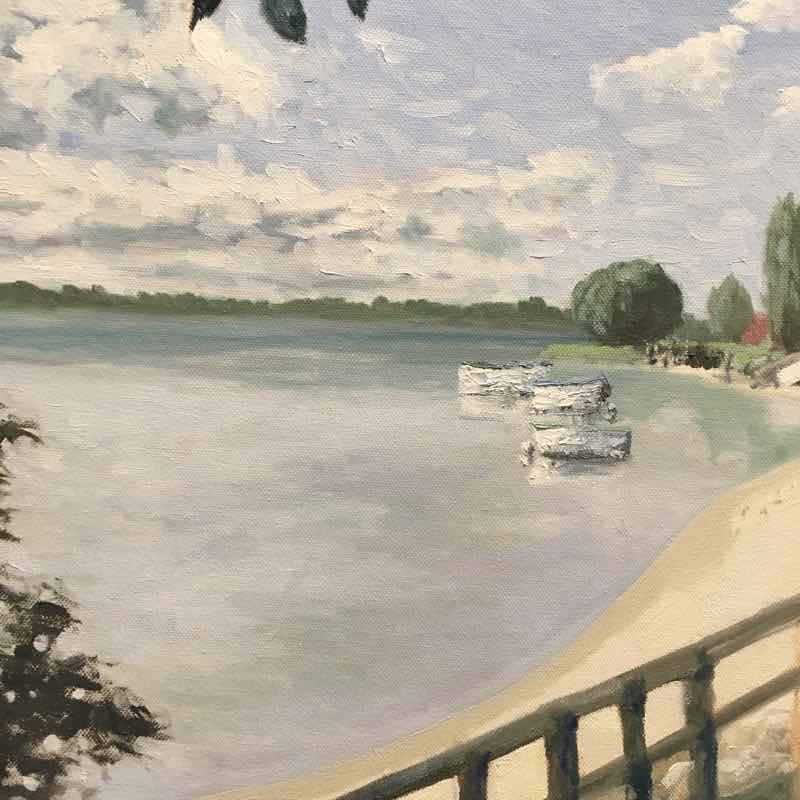
Here is a step-by-step guide through my painting, “Golden Beach, Caloundra”, 20×28 inches, oil on canvas.
My parents own a unit at Golden Beach, Caloundra and this is a scene from just down the road. The painting is based on a photograph I took of the scene.
Whilst this is painted using oils, the principles can be applied to acrylics. The key difference is the techniques used to apply and manipulate the paint.
- Step 1: Attack The White Canvas
- Step 2: Paint In The Sky
- Step 3: Block In The Major Tones And Shapes
- Step 4: More Blocking In And Starting To Add Detail
- Step 5: Those Finishing Touches To Bring It All Together
- Thanks For Reading!
(Before diving into this post, make sure to pick up a copy of my free Landscape Painting Starter Kit.)
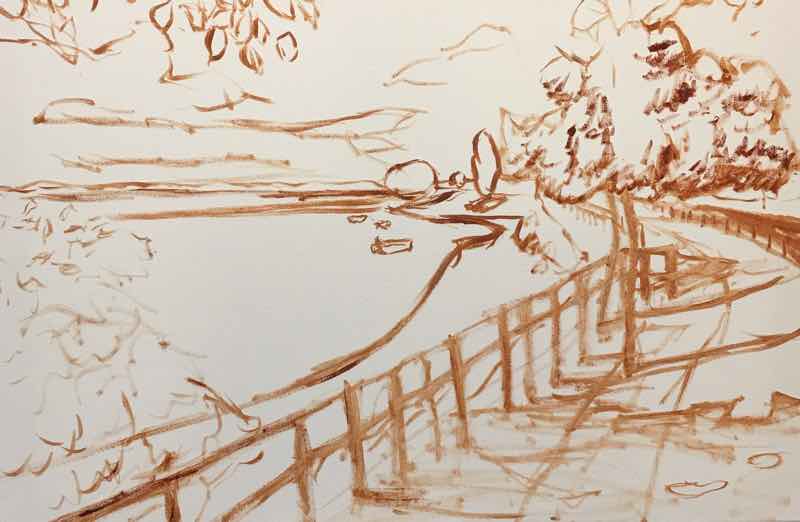
Step 1: Attack The White Canvas
The first step of this landscape oil painting lesson is to roughly sketch out the composition and any significant changes in value using burnt sienna. You can use whatever color you like but I prefer to use a more neutral color.
The sketch is great to set out your composition and really just get the ball moving. A blank white canvas can really hinder your creative spirit.
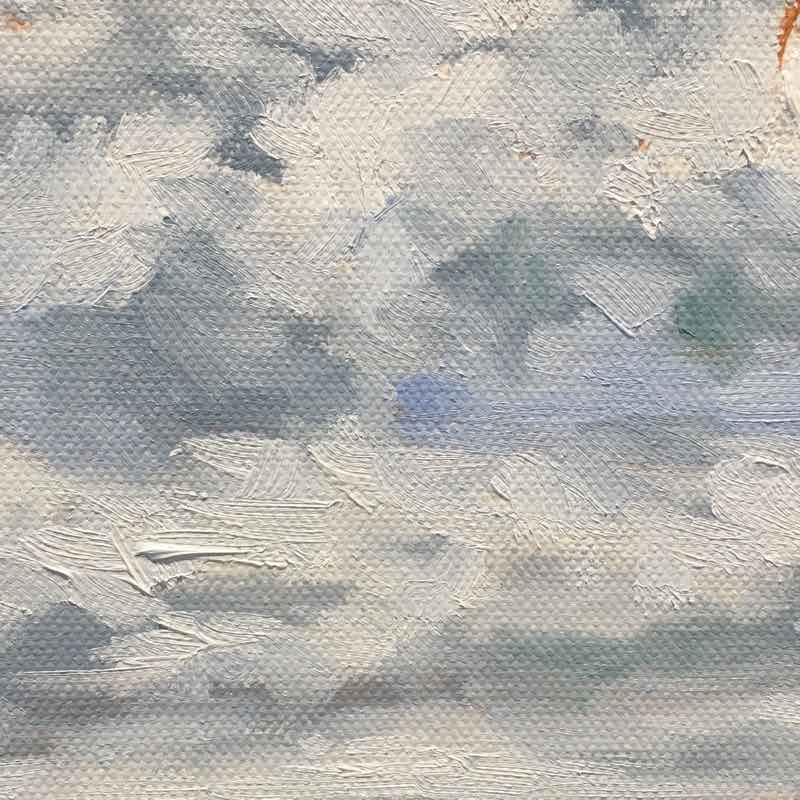
Step 2: Paint In The Sky
I generally paint the sky first just as I find it easy to do and get out of the way. I do notice how many other painters wait until the end before they paint the sky.
To paint the clouds, I mix a nice light blueish-gray (white plus all three primary colors with a blue dominance) and use this to plot out the shaded areas of the clouds. I then highlight using white and light grays.
One thing to note is I do not use much paint for the darker shaded parts of the clouds, but for the highlighting, I apply paint in a thick, impasto fashion. This was similar to many of Claude Monet’s paintings.

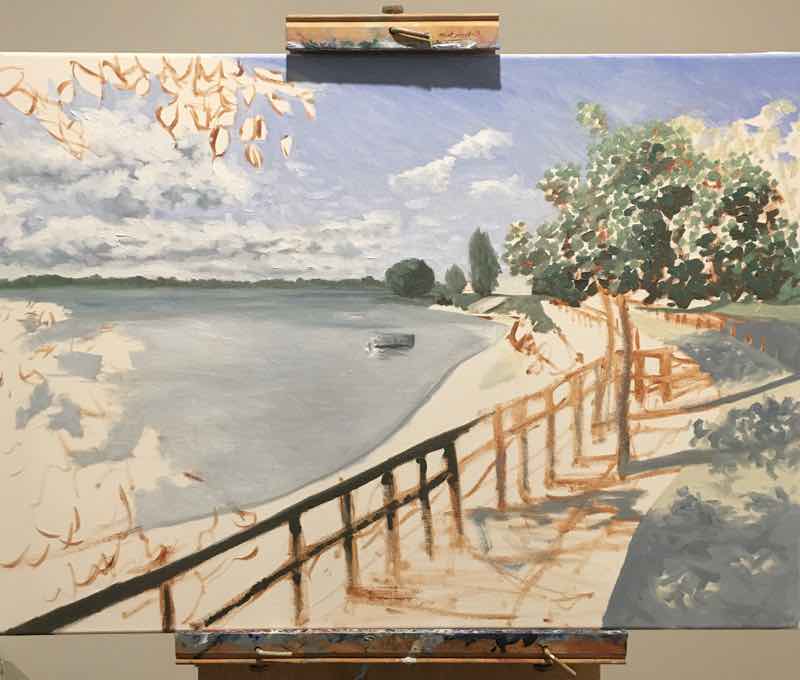
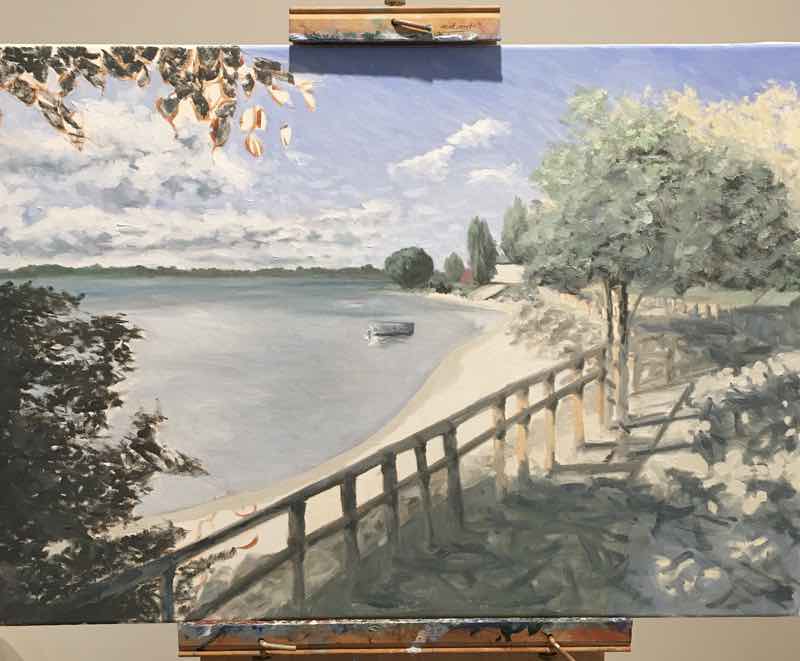
Step 3: Block In The Major Tones And Shapes
Here I am just blocking in the general areas of my painting, guided by my sketch. Your color selection is extremely important here so spend lots of time mixing on your palette. If you are not sure, you can try just put a little bit of the color on the canvas and see if it works. If not, just blend it in with a new color.
If you are not one hundred percent sure about a color or stroke, don’t make it.
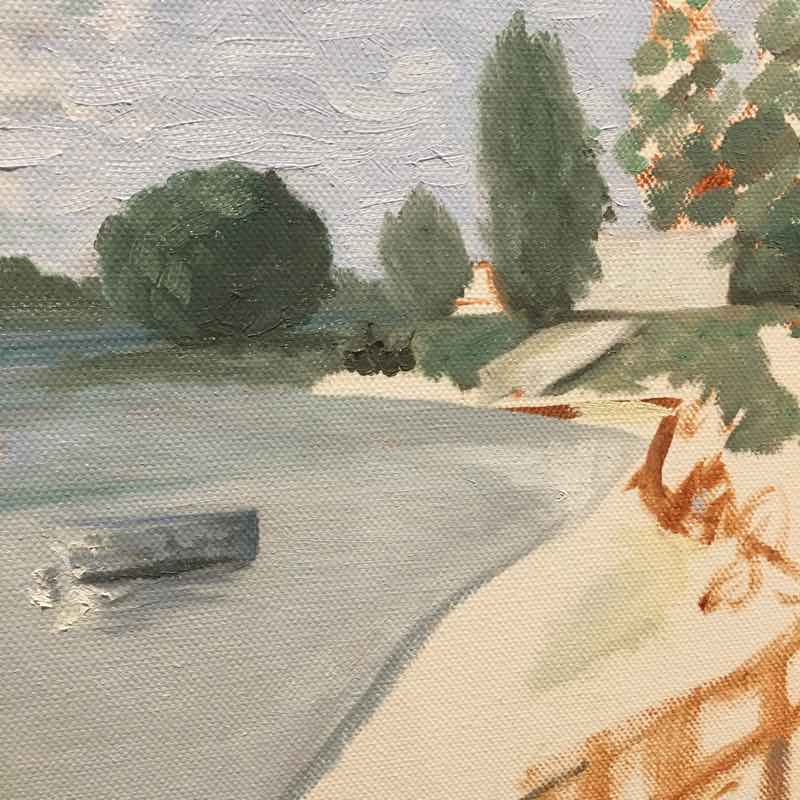
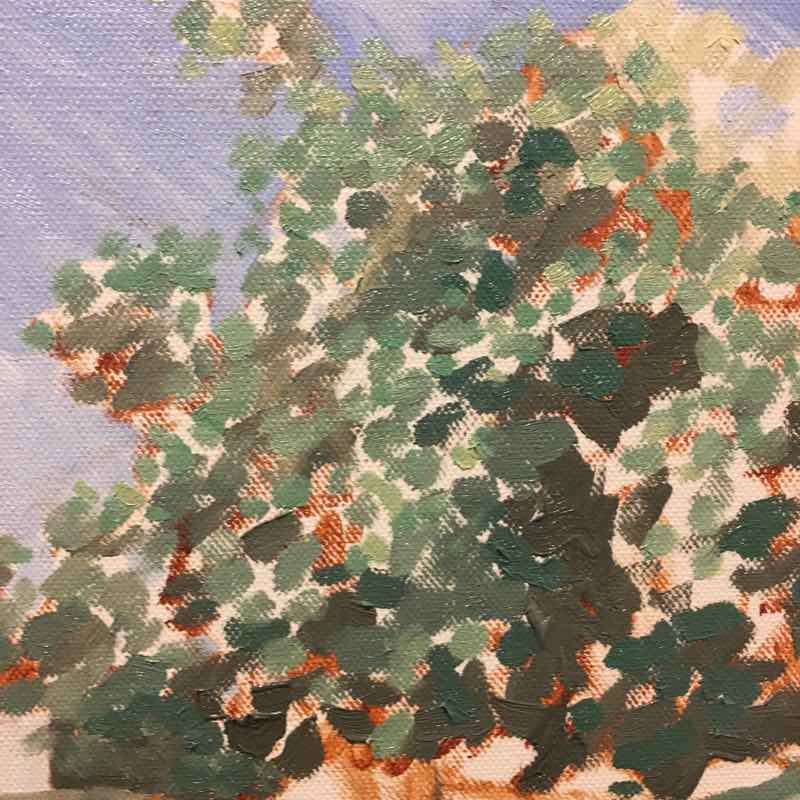
Step 4: More Blocking In And Starting To Add Detail
Here I am just blocking in the rest of the canvas and starting to add some layers of detail. I have been waiting a day between each painting session so each layer is basically dry and easy to paint over.
Remember, for oil and acrylic painting it is generally easier to paint dark to light. So my detailing is really just adding some lighter colors to objects.
The thing I like about progress shots is that at some points throughout the painting you may think, “…. not sure where this is going”. But then with a few detailed strokes, it all comes together.
Step 5: Those Finishing Touches To Bring It All Together
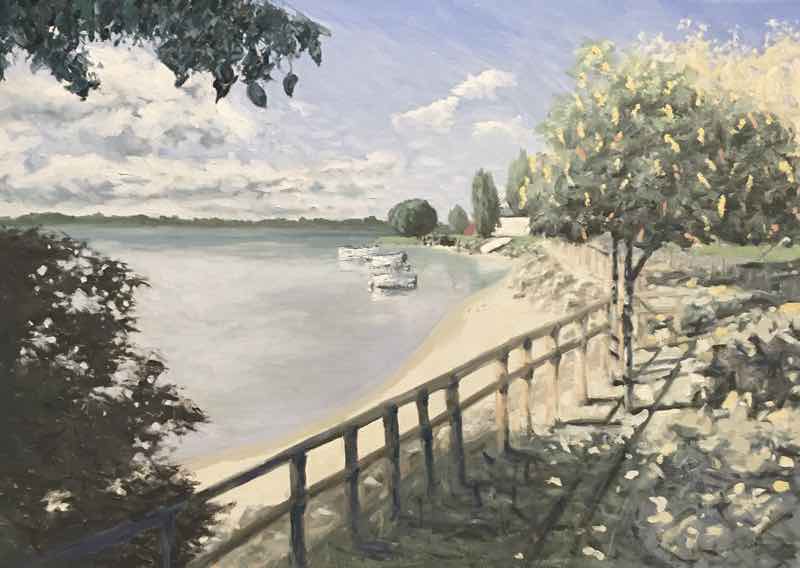
Now just for some finishing touches to bring it all together. The most important part at this stage of the painting is not to overdo it.
Even many of the great masters of art have commented on the difficulty of knowing when to put the paintbrush down and call the painting finished, such as John Singer Sargent.
Thanks For Reading!
Thanks for taking the time to read this post. I appreciate it! Feel free to share with friends. If you want more painting tips, check out my Painting Academy course.
Happy painting!
Dan Scott
Draw Paint Academy


Thank you Dan,this is very informative. I really appreciate this.
Glad I could help Kathy!
Dan
Love the painting. Look forward to seeing the next one.
Thanks Barbara 🙂
thank you scott i will try and your tips are really nice
No problem 🙂